
Removal and installation
Sedan
1. Remove the passenger side lower instrument panel trim, front side trim and glove box.
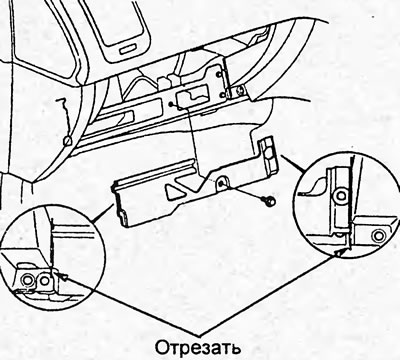
2. Unscrew the bolt, cut off the plastic spacer as shown in the figure.
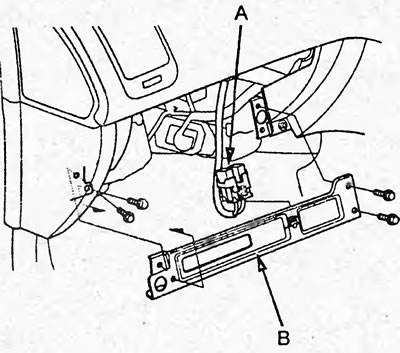
3. Remove the relay (A), unscrew the bolts and remove the bracket (B).
4. Remove the powertrain control unit.
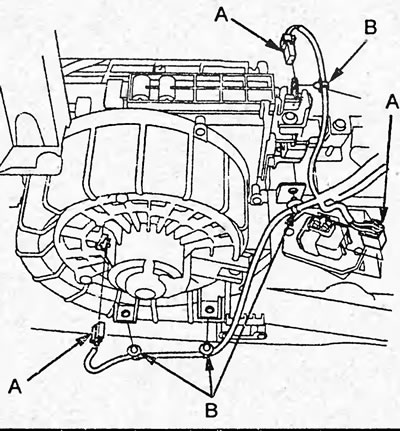
5. Disconnect the connectors (A) from the heater blower motor, power transistor and air intake switch actuator. Disconnect the wiring harness clamps (B).
6. Fold back the floor trim, unscrew the bolts and remove the heater fan assembly (A).
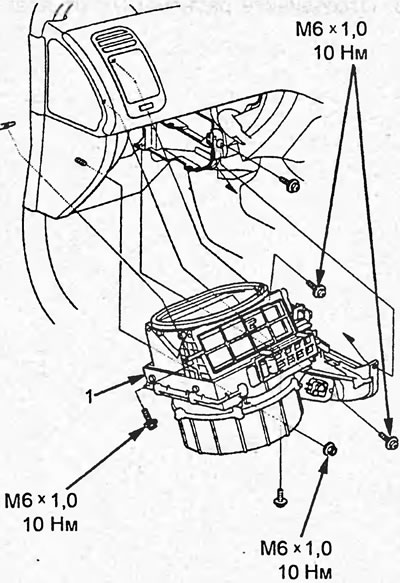
7. Install in the reverse order of removal.
Hatchback
1. Remove the passenger side lower instrument panel trim, front side trim and glove box.
2. Cut the plastic spacer as shown in the picture.
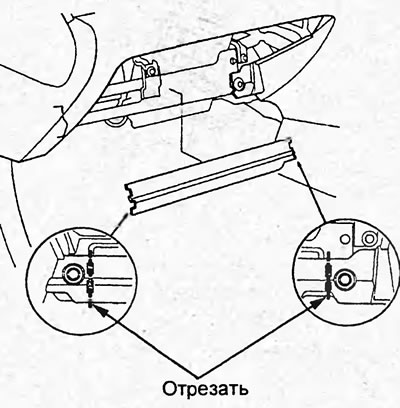
3. Loosen the bolts and remove the bracket (A).
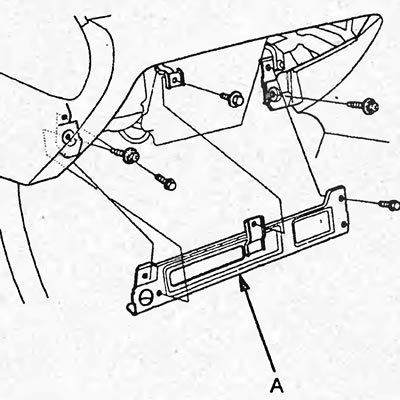
4. Remove the powertrain control unit.
5. Disconnect the connectors (A) from the heater fan motor, power transistor (or heater fan resistor). Disconnect the harness clips (B) and connectors (C). Loosen the screws and remove the bracket (D).
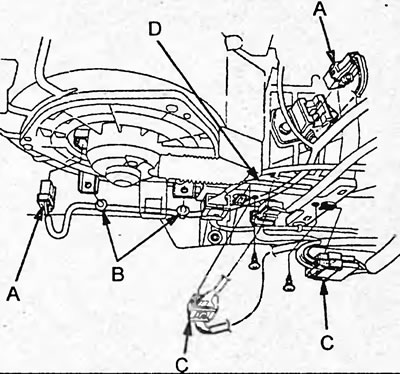
6. Disconnect the connector (A) from the air intake switch actuator and the wiring harness clamps (B). Loosen the bolts and nuts and remove the heater fan unit (C).
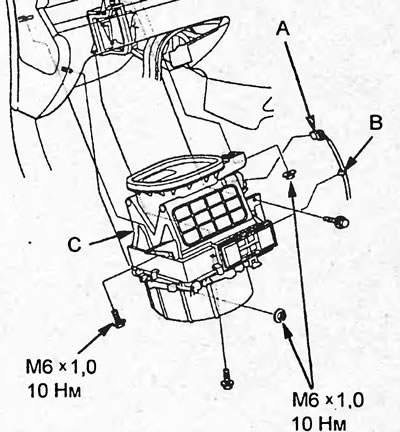
7. Install in the reverse order of removal.
Disassembly and assembly
Disassemble and assemble using the assembly drawing "Disassembling and assembling the heater fan unit".
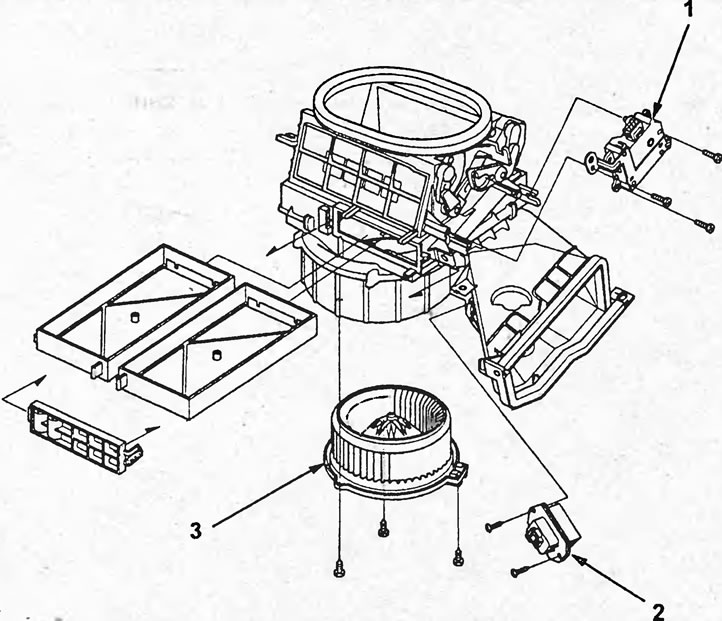
Disassembly and assembly of the heater fan unit (sedan). 1 - air intake switching drive, 2 - power transistor, 3 - heater fan.
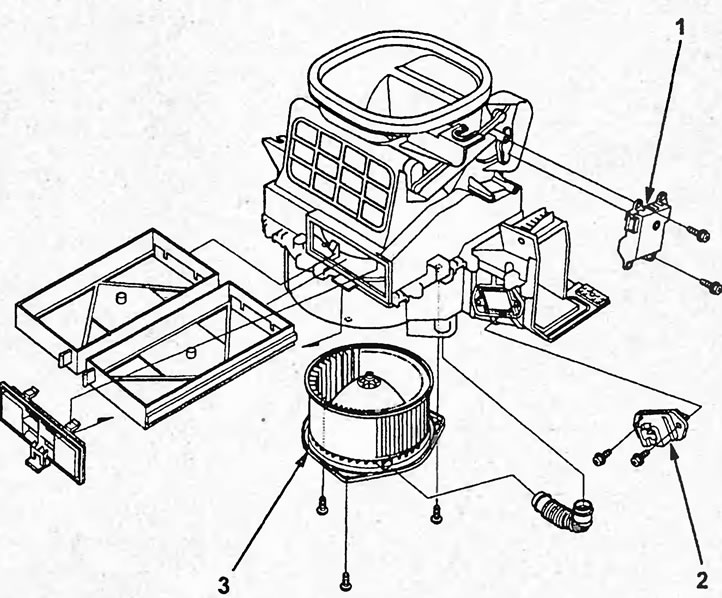
Disassembly and assembly of the heater fan unit (hatchback). 1 - air intake switch drive, 2 - power transistor (or heater fan resistor), 3 - heater fan.
Material obtained from the website hondabook