
Contents: Removal and installation ⇊ Disassembly and assembly ⇊ Adjusting the air flow mixing drive…⇊ Examination ⇊ Checking the heater fan speed switch ⇊
Removal and installation
Sedan
1. Remove the center panel.
2. Remove the controls (A), unscrew the screws and remove the air conditioning and heating control panel (B) from the center panel (C).
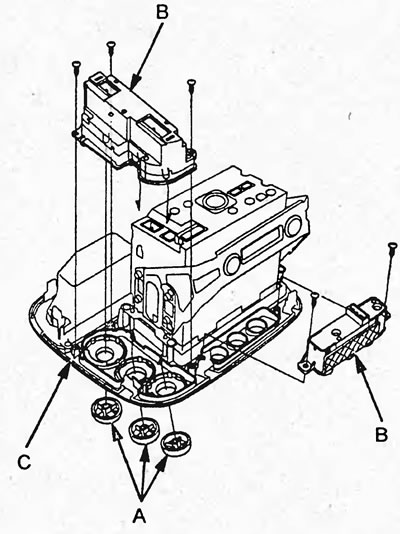
3. Install in the reverse order of removal.
4. Conduct diagnostics of the air conditioning system.
Hatchback
1. Remove the center panel.
2. Loosen the screws and remove the air conditioning and heating control panel (A) from the center panel (B).
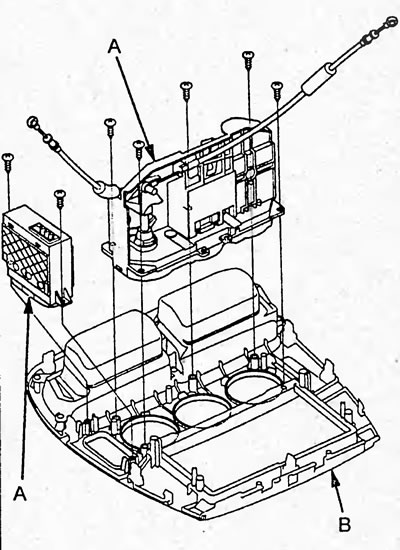
3. Install in the reverse order of removal.
Disassembly and assembly
Hatchback
Disassemble and assemble the air conditioner and heater control panel using the diagram as a guide.
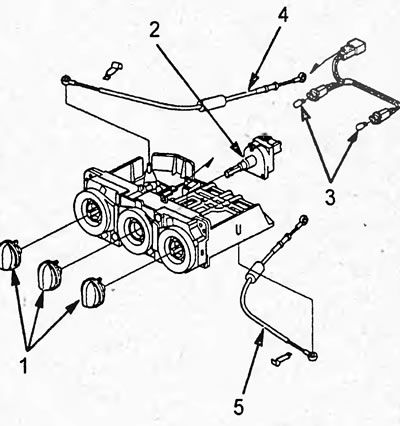
1 - regulators, 2 - heater fan speed regulator, 3 - lamps, 4 - air flow mixing drive cable, 5 - air flow direction change drive cable.
Adjusting the air flow mixing drive cable and the air flow direction change drive cable
Hatchback
1. Set the "MAX COOL" or "VENT" mode.
2. Fasten the cable (A) to the lever (B) as shown in the figure.
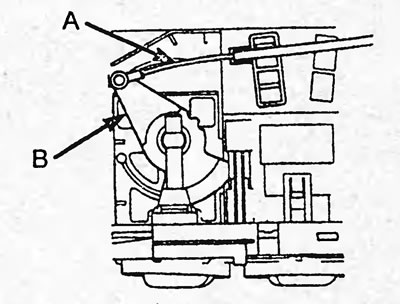
3. Set the length between the cable head (A) and the cable sheath (B) as shown in the figure.
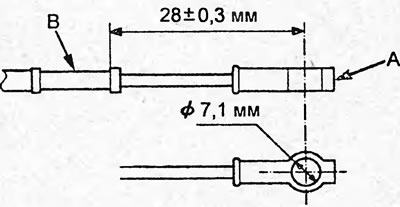
4. Secure the cable with the clamp.
Examination
Hatchback
Check the conductivity between the connector terminals according to the table.
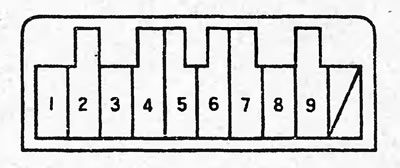
| Switch/Breaker Position | Conclusions | |
 | REC | 2 - 5, 8 - 9 (lamp) |
| FRESH | 2 - 6, 8 - 9 (lamp) | |
 | ON | 3 - 4, 8 - 9 (lamp) |
| OFF | 8-9 (lamp) | |
 | ON | 2 - 8, 8 - 9 (lamp) |
| OFF | 8-9 (lamp) | |
Checking the heater fan speed switch
Hatchback
1. Remove the heater control panel.
2. Check the conductivity between the connector terminals according to the table.
| Switch position | Conclusions |
| 0 | - |
| 1 | 1-2-3 |
| 2 | 2-3-5 |
| 3 | 2-3-6 |
| 4 | 2-3-7 |