
Removal and installation
1. Fully lower the window, then disconnect the negative cable from the battery.
2. Open the door all the way and support it with a jack or wooden blocks.
3. Remove the interior upholstery panel and waterproof screen (see Removal and installation of an internal upholstery of doors).
4. Tag and disconnect all electrical connectors, then release the electrical wiring from the latches on the door assembly.
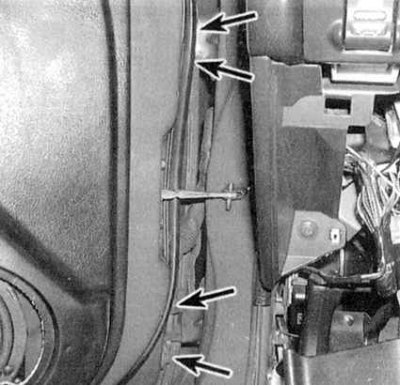
5. From the side of the door, separate the rubber guide tube laid between it and the body. Remove the wiring harness threaded through the guide tube and remove it from the door.
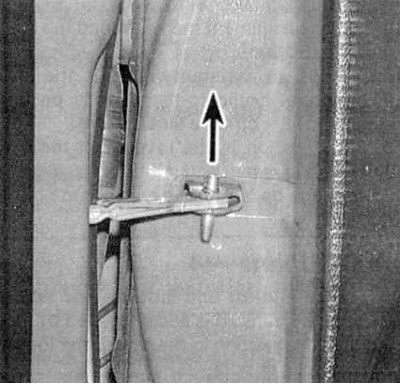
6. Knock out the center pin of the door stop (see accompanying illustration).
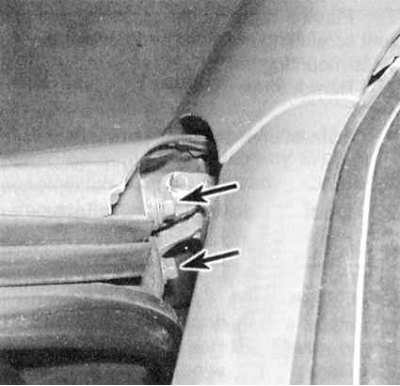
7. Circle the hinge strips with a marker, marking their position on the door.
8. Ask an assistant to hold the door and give the bolts securing the hinge bars (see accompanying illustration). Together remove the door from the car.
9. Installation is carried out in the reverse order.
Adjustment
1. The correct location of the door in the body opening is critical in terms of the proper functioning of the door assembly. First of all, evaluate the amount of play of the axial fingers of the door hinges. Fully open the door and pull it up and down. If the door play exceeds 1.6 mm, the hinges must be replaced.
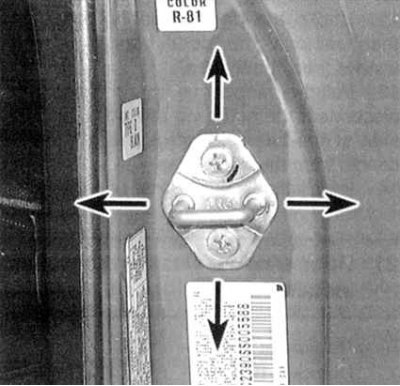
2. To adjust the door in the opening, loosen the hinge bolts on the car body (see accompanying illustration). The door can be considered installed correctly when, in the closed position, its upper edge is parallel to the cut of the car roof; Front edge (rear at the back door) in this case, the door should be flush with the surface of the wing, and the lower one should be flush with the threshold plane. If it is not possible to achieve the task by simply moving the door, adjusting washers of the required thickness should be selected. Washers are placed under the hinge strips (both on the body and on the door) and can be purchased from automotive accessory stores.
3. Proper operation of the locking mechanism can be achieved by adjusting the position of the striker of the lock in the vertical direction (see illustration below). To estimate the amount of displacement, circle the base plate of the striker with a marker. Loosen the fasteners and make the necessary adjustment - the latch should engage with the central part of the striker.
4. Finally, adjust the position of the striker in a horizontal direction - the closed door should be flush with the surface of the pillar / rear fender panel and lock properly (see accompanying illustration).