
Lock latch assembly
1. Raise the window pane and remove the door trim panel (see Removal and installation of an internal upholstery of doors).
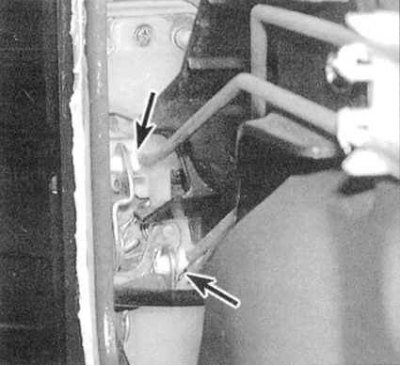
2. Remove the stem connecting the outside handle to the latch through the large hole in the door frame. Do the same with the stem of the inner handle, as well as with the stems of the outer and inner locks and the electromagnetic actuator (with appropriate equipment) (see accompanying illustration).
3. All stems are secured with plastic clips. Release the part of the retainer that engages with the stem, then pull the stem to release it from the mounting hole.
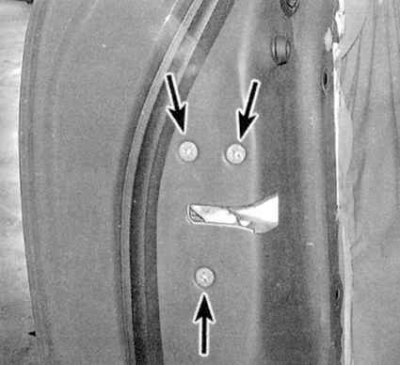
4. Remove the screws securing the latch to the door (see accompanying illustration). Remove the latch assembly through the hole provided in the door frame.
5. Installation is carried out in the reverse order.
Outside handle and door lock cylinder
1. Close the window and remove the door trim panel and water shield (see Removal and installation of an internal upholstery of doors).
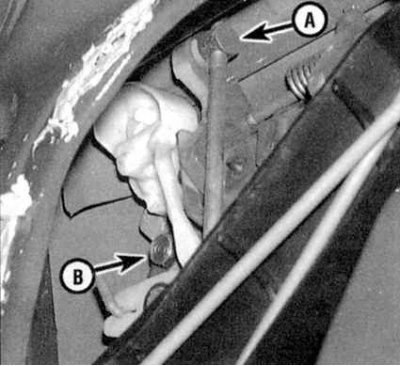
2. Through the hole in the door frame, release the plastic fasteners securing to the latch of the actuating rods of the outer handle and door lock (see accompanying illustration).
3. Turn out bolts of fastening of the external handle (see illustration above).
4. Remove the handle and lock cylinder assembly from the vehicle.
5. Installation is carried out in the reverse order.
Internal handle
1. Remove the interior upholstery panel and separate the waterproof screen (see Removal and installation of an internal upholstery of doors).
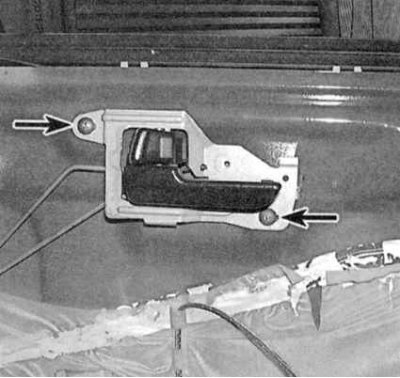
2. Release the actuator rod guide, then remove the screws that secure the handle (see accompanying illustration).
3. Release the handle from a door and disconnect an executive rod from its back party. Remove the handle.
4. Installation is carried out in the reverse order.