
Removal and installation
1. Remove the front console.
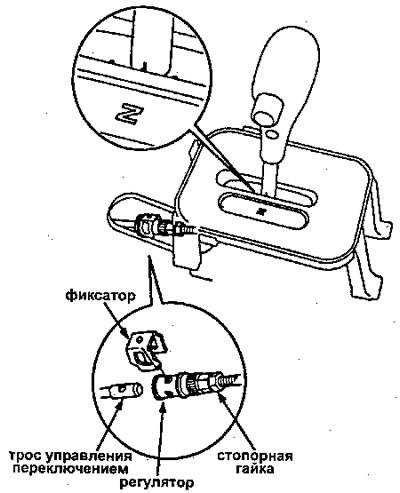
2. Set the shift lever to position "N" (neutral), then remove the retainer from the shift control cable adjuster.
Note: LHD model shown. RHD is similar.
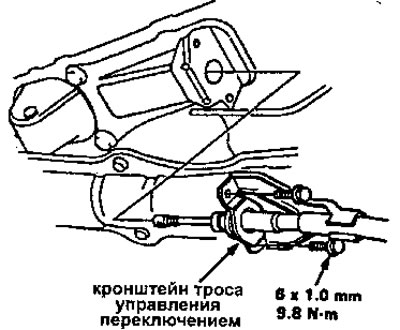
3. Remove the shift control cable bracket.
S4NA
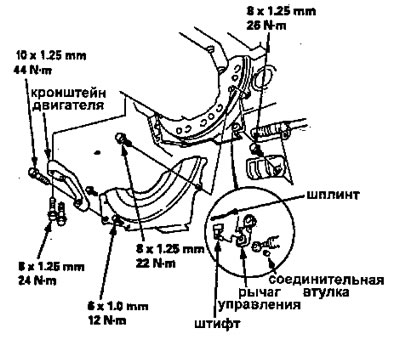
4. Remove the engine bracket.
5. Remove the torque converter lower cover and shift cable cover.
6. Remove the cotter pin, then remove the pin and coupling sleeve.
7. Separate the shift control cable from the lever. Do not bend the cable during removal and installation.
S4PA, S4XA
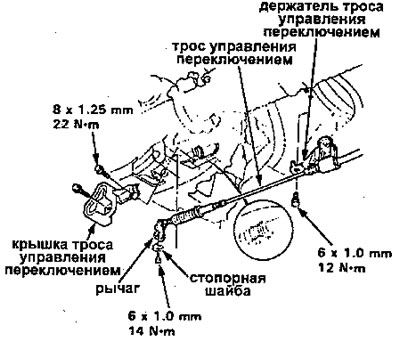
4. Remove the shift control cable holder.
5. Remove the shift control cable cover.
6. Separate the shift control cable from the lever. Do not bend the cable during removal and installation.
S4NA, S4PA, S4XA
8. Install the shift control cable in the reverse order of removal.
9. Check the cable adjustment.
Adjustment
Warning. Make sure the mounting points are positioned correctly.
1. Remove the front console.
2. Switch to the [N] position, then remove the locking bracket from the latch.
Note: The illustration shows a left-hand drive vehicle; The right one is similar.
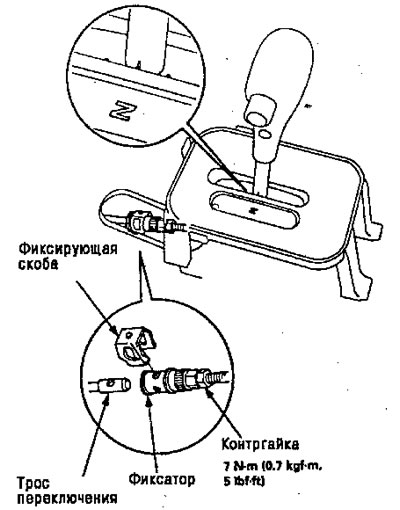
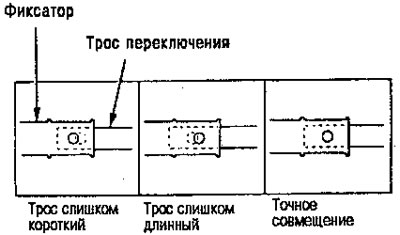
3. Check that the hole in the clamp is completely aligned with the hole in the shift cable. The latch has two holes. They are positioned 90°apart to provide adjustment accuracy of up to 1/4 turn.
4. If they are not completely aligned, loosen the locknut on the retainer and adjust as required.
5. Tighten the locknut to 7 Nm (0.7 kgf'm).
6. Install the retaining bracket onto the retainer. If you feel the locking bracket catching after you have installed it, the cable is still out of adjustment and should be readjusted.
7. Make sure the retaining bracket is securely seated in the retainer.
8. Shift the lever into each gear and check that the shift position indicator corresponds to each gear.
9. Start the engine and check the shift lever in all gears. If any of the gears do not work correctly, refer to the section "malfunctions".