
Warning: Make sure lifts, jacks and safety stands are properly installed (see chapter 1).
1. Remove the front console (see chap. "Body").
2. Shift to any position, then remove the locking pin from the regulator.
Note: The picture shows a left-hand drive model; the layout on the right-hand drive model is similar.
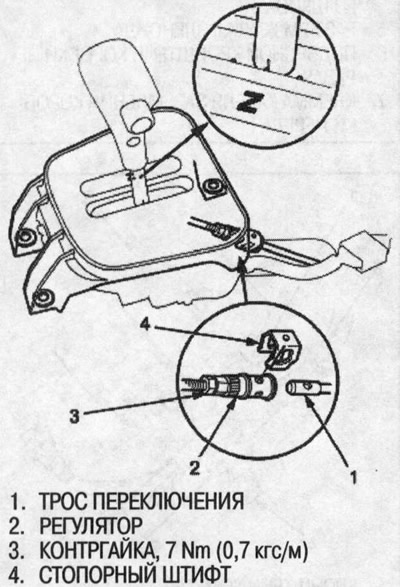
3. Make sure the hole in the adjuster is aligned exactly with the hole in the shift cable. There are two holes in the adjuster. They are spaced 90° apart and allow the cable to be adjusted in 1/4 turn increments.
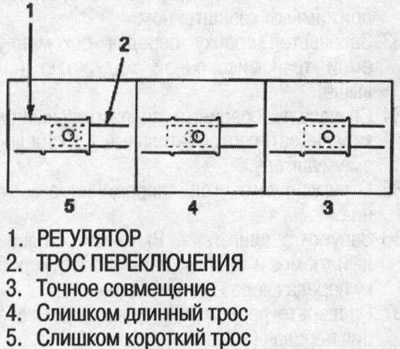
4. If the hole is not aligned accurately, loosen the lock nut on the adjuster and make the adjustment as required.
5. Tighten the lock nut to 7 Nm (0.7 kgf/m).
6. Insert the locking pin into the adjuster. If you feel the locking pin sticking when you install it, the cable is still out of adjustment and needs to be adjusted.
7. Make sure the locking pin is securely seated in the regulator.
8. Move the selector lever through all ranges and make sure that the gear range indicator follows the automatic transmission selector switch.
9. Start the engine and check the operation of the selector lever in all positions.
10. On KQ and KU models, insert the ignition key into the cylinder on the automatic transmission range indicator panel and ensure that the shift lock lever is unlocked.
Full version on the source website: HondaBook.ru