
Note: Leaks through the seals are usually a prerequisite for repairing the wheel cylinder. We recommend simply replacing the cylinder.
Removal
1. Raise the rear of the vehicle and place it on stands. Block the front wheels from rolling
2. Remove the brake pads (see Section 5).
3. Clean the area around the brake cylinder.
4. Disconnect the brake pipe, do not remove the pipe from the cylinder.
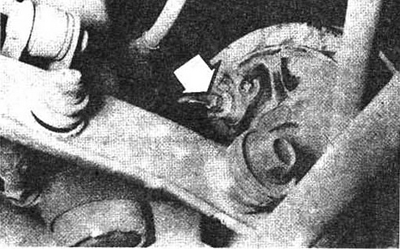
Fig. 6.4 Disconnect the brake pipe (arrow) and the two mounting bolts
5. Unscrew the brake cylinder mount.
6. Remove the brake cylinder. Plug the brake pipe to avoid loss of brake fluid.
Note: Do not allow brake fluid to come into contact with the pads. If this happens, wash them with brake cleaner.
Repair
7. Remove the bleeder nipple, dust boot, pistons, piston caps and springs.
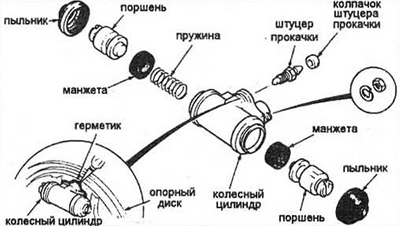
Fig. 6.7 Assembly of a typical brake cylinder
8. Wash the parts with clean brake fluid or denatured alcohol.
Caution: Do not flush with gasoline or other hydrocarbon solvents.
9. Blow out the channels with compressed air and dry the parts.
10. Check the cylinder walls for scoring and corrosion. A cylinder with scoring cannot be restored.
11. Lubricate the piston seals with brake fluid.
12. Assemble the brake cylinder. Install the sealing lips of the cuffs outward.
Installation
13. Apply sealant to the mounting surface of the brake cylinder. Install it on the support disc and connect, but do not tighten the brake pipe.
14. Install and secure the mounting bolts. Tighten the brake pipe nut. Install the brake pads.
15. Bleed the brakes (see Section 10).
16. Check the operation of the brakes on a closed area.
(Full text available on the portal «hondabook.ru»)