
HondaBook.ru
Auto companies Volkswagen Auto companies Ford Auto companies Lada Auto companies Skoda Auto companies BMW Auto companies Mazda Auto companies Peugeot
English Русский
Български
Беларускі
Український
Српски
Hrvatski
Română
Polski
Slovenský
Magyar
Bookmark Contacts Sitemap   


Accord Civic Fit / Jazz CR-V HR-V Others Articles
Civic 3 and 4 (1983-1991) Civic 5 and 6 (1991-2000) Civic 6 (1995-2000) Civic 7 (2000-2005) Civic 8 (2005-2011)

Brake disc — inspection, removal and installation (Honda Civic 3)

  • Main
  • Honda Civic
  • 3 (1983-1991)
  • Chassis and running gear
  • Brake system
  • Brake disc — inspection, removal and installation
0
Contents: Inspection ⇊ Removal ⇊ Installation ⇊

Inspection


1. Loosen the wheel nuts and raise the vehicle on stands. Remove the wheels and install two lug nuts with 3mm washers to hold the disc in place. Release the parking brake when inspecting the rear brake.

2. Remove the caliper (see Section 3). There is no need to disconnect the brake hoses. Secure the calipers away from the work area. Remove the two bolts securing the guide to the steering knuckle (see fig. 4.2a) or, on rear brakes, to the trunnion bracket (see fig. 4.26). remove that bracket.
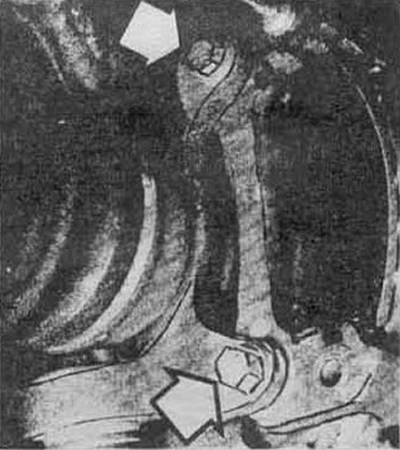
Fig. 4.2a Bolts for fastening the bracket to the…

Fig. 4.2a Bolts for fastening the bracket to the steering knuckle
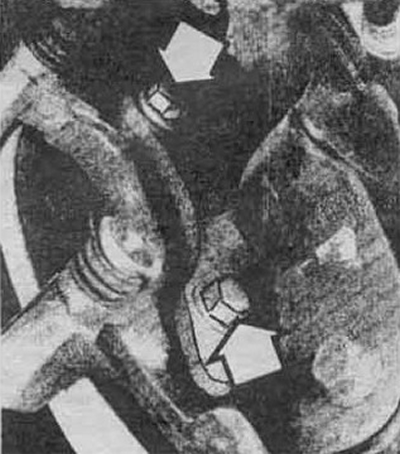

Fig. 4.2b Bolts for fastening the bracket to the…

Fig. 4.2b Bolts for fastening the bracket to the rear wheel axle


3. Inspect the disc for nicks and damage. Light scratches and shallow grooves are not a cause for concern. If grooves or scratches are deeper than 0.4 mm, the disc surface needs to be restored. Inspect both sides of the disc.


4. If pulsations in the brake force occur during braking, check the disc runout by placing the indicator leg approximately 13 mm from the outer edge of the disc (see fig. 4.4a) Set the indicator to zero and spin the disc. The runout should not exceed the values given in the specification.
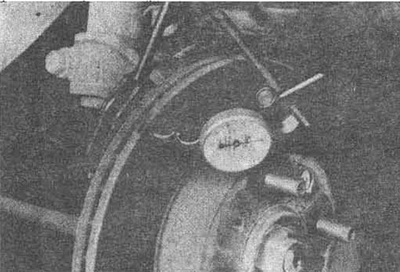
Fig. 4.4a Measuring the disc runout with an…

Fig. 4.4a Measuring the disc runout with an indicator
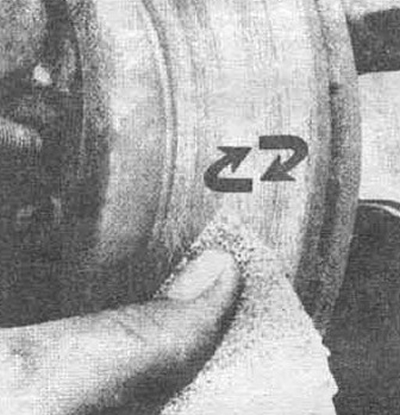

Fig. 4.4b Preparing the disk surface for…

Fig. 4.4b Preparing the disk surface for measurement


Note: To eliminate the influence of disk unevenness when measuring runout, smooth out the marks with sandpaper, making circular movements (see fig. 4.4b).


5. The surface of the disc can be turned only up to certain limits: the minimum thickness of the disc is punched on its rim.
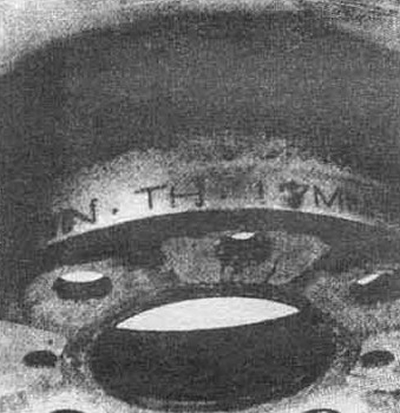
Fig. 4.5 Indication of the minimum disc thickness

Fig. 4.5 Indication of the minimum disc thickness


Removal


6. Unscrew the retaining nuts (or retaining screws, see design) and remove the disk from the hub. If the disk does not come off, screw two bolts into the special threaded holes and remove the disk.
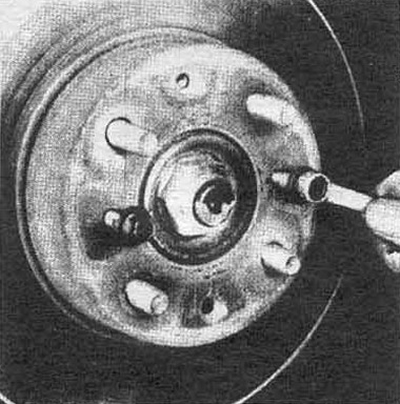
Fig. 4.6 Removing the disc using threaded holes

Fig. 4.6 Removing the disc using threaded holes


Installation


7. Place the disc on the studs.

8. Install the pad guide and caliper. Tighten the guide to the torque specified in the specification.

9. Lower the car, installing the wheels first. Press the brake pedal several times to install the pads in place. Bleed the brake system, if necessary.
This article is available at: russian, bulgarian, belarusian, ukrainian, serbian, croatian, romanian, polish, slovak, hungarian
This information has been verified: Yaroslav Shiryaev
Share with friends:
◀ Previous
Civic 3 and 4: Brake system
Next ▶

Disc Brake Caliper — Removal, Repair and Installation
Brake pads — replacement
Brake system specifications
Drum brake shoes — replacement
Wheel Brake Cylinder — Removal, Repair and Installation
Master Brake Cylinder — Removal, Repair and Installation
Brake force distributor — general information
Brake pipes and hoses — inspection and replacement
See also other articles from Honda manuals:
Rear Disc Brake Caliper — Removal and Installation Honda Accord 3 (1985-1989)
Emergency Brake Assistance (EBA) Honda Fit 1 (2001-2008)
Front disc brake pads Honda CR-V 1 (1995-2001, petrol)
Front Brake Disc — Checking Runout Honda HR-V 1 (1998-2006, petrol)
Front Brake Discs — Brake Disc Grinding Honda Avancier 1 (1999-2003, petrol)
Link in different formats to this article
Comments and feedback from visitors
No comments yet


How much will 23 + 39 ?


Civic 8 (2005-2011) 
  • General information
  • Technical data
  • Governing bodies
  • Driving and maintenance
  • Power unit
  • Gasoline engines (L13A)
  • Gasoline engines (R18A)
  • Diesel engines (N22A)
  • Cooling and lubrication (L13A)
  • Cooling and lubrication (R18A)
  • Cooling and lubrication (N22A)
  • Injection system (gasoline)
  • Injection system (diesel)
  • Toxicity reduction system
  • Troubleshooting
  • Transmission
  • Clutch and drive shafts
  • Mechanical gearbox
  • Chassis and running gear
  • Suspension and wheels
  • Steering
  • Brake system
  • Body and interior
  • Exterior (external elements)
  • Doors, locks and windows
  • Electrical equipment
  • Equipment and devices
  • Headlights and lighting
  • Power devices
  • Electrical circuits
Civic 7 (2000-2005) 
  • General information
  • User manual
  • Maintenance
  • Power unit
  • Engines D15B and D17A
  • K20A Engines
  • Overhaul engine
  • Cooling system
  • Lubrication system
  • Fuel injection system
  • Toxicity reduction system
  • Engine electrical equipment
  • Transmission
  • Clutch
  • Manual gearbox
  • Automatic gearbox
  • Variator (CVT)
  • Drive shafts
  • Chassis and running gear
  • Car suspension
  • Steering
  • Brake system
  • Body and interior
  • Exterior (external elements)
  • Interior (internal elements)
  • Doors, locks and windows
  • Heater and air conditioner
  • Manual air conditioner
  • Automatic air conditioner
  • Security system
  • Electrical equipment
  • Equipment and devices
  • Headlights and lighting
  • Windscreen wipers
  • Audio system
  • Electrical diagrams
Civic 6 (1995-2000) 
  • General information
  • Introduction to guide
  • User manual
  • Maintenance
  • Power unit
  • Engine in car (Civic)
  • Engine in car (Integra)
  • Engine overhaul
  • Cooling and heating
  • Power and exhaust systems
  • Engine electrical equipment
  • Engine management systems
  • Transmission
  • Manual gearbox
  • Automatic transmission (AT/CVT)
  • Clutch and drive shafts
  • Chassis and running gear
  • Brake system
  • Car suspension
  • Steering
  • Body and interior
  • Exterior (external elements)
  • Interior (internal elements)
  • Doors, locks and windows
  • Electrical equipment
  • Equipment and devices
  • Electrical circuits
Civic 5 and 6 (1991-2000) 
  • Power unit
  • SOHC engines
  • DOHC engines
  • Engine overhaul
  • Cooling and lubrication system
  • Intake and exhaust system
  • Fuel injection system (SOHC)
  • Fuel injection system (DOHC)
  • Carburetor
  • Transmission
  • Clutch
  • Manual gearbox S4C
  • Manual gearbox S40
  • Automatic gearbox
  • Drive shafts
  • Chassis and running gear
  • Car suspension
  • Steering
  • Brake system
  • Body and interior
  • Body elements
  • Heater and air conditioner
  • Electrical equipment
  • Power devices
  • Equipment and instruments
  • Electrical circuits
Civic 3 and 4 (1983-1991) 
  • General information
  • Maintenance
  • Power unit
  • Engine in a car
  • Engine overhaul
  • Cooling system
  • Power and exhaust system
  • Engine electrical equipment
  • Emission control system
  • Transmission
  • Mechanical gearbox
  • Automatic gearbox
  • Clutch and drive shafts
  • Four-wheel drive
  • Chassis and running gear
  • Brake system
  • Car suspension
  • Steering
  • Body and interior
  • Body elements
  • Electrical equipment
  • Equipment and devices
  • Electrical circuits
HondaBook.ru © 2018–2026 • Mobile version • Sitemap: EN BG BY UA RS HR RO PL SK HU • Feedback • Driver Information • Search system • Bookmark
Accord 3 (1985-1989) • Accord 6 (1997-2002) • Civic 3 and 4 (1983-1991) • Civic 5 and 6 (1991-2000) • Civic 6 (1995-2000) • Civic 7 (2000-2005) • Civic 8 (2005-2011) • Fit 1 (2001-2008) • CR-V 1 (1995-2001) • CR-V 2 (2002-2006) • HR-V 1 (1998-2006) • Avancier 1 (1999-2003) •
 
This website uses cookies to ensure proper functioning. By clicking "OK," you agree.