
Note: To view the electrical diagram of the fuel level sensor, see the electrical diagram of the measuring instruments.
1. Check the integrity of the #10 (7.5 A) METER electrical fuse in the under-dash electrical relay/fuse box before starting testing.
2. Check for body electrical DTCs.
- If no faults are found, proceed to step 3.
- If DTC B1175 or B1176 is detected, proceed to troubleshooting for that DTC.
3. Turn the ignition key to the "OFF" position.
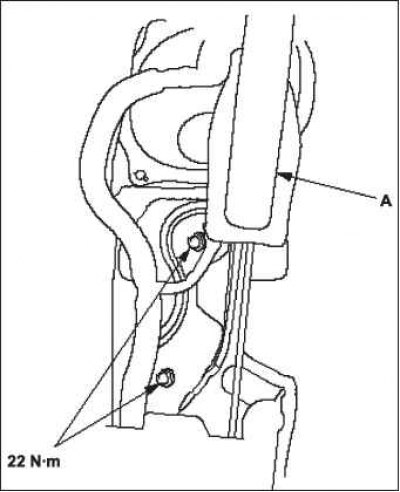
4. Remove the center console and remove the parking brake lever A.
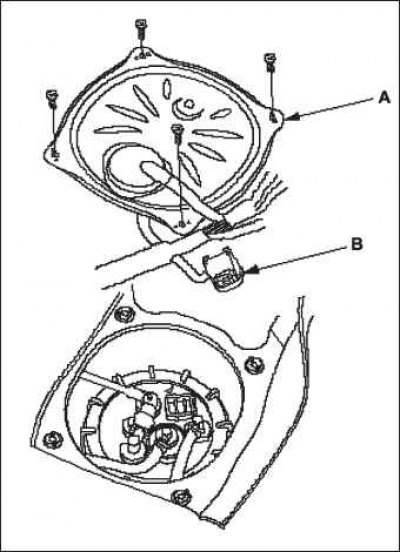
5. Remove access panel A from the floor.
6. Disconnect 4P connector B from the fuel tank.
 |
 |
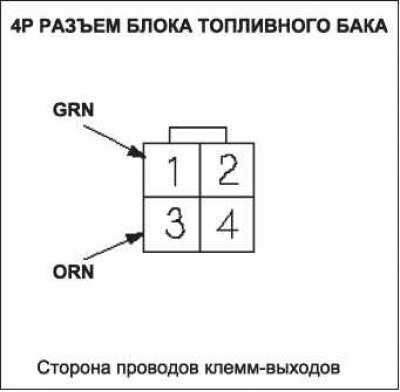
7. With the ignition switch in the "ON" (II) position, measure the voltage between terminals No.1 and 3 of the 4P connector of the fuel tank block. There should be battery voltage.
- If the voltage is OK, proceed to step 8.
- If the voltage is not as specified, check for: a short to ground in the GRN wire. or an open in the GRN or ORN wires.
8. Turn the ignition key to the OFF position.
9. Remove the fuel tank assembly from the tank.
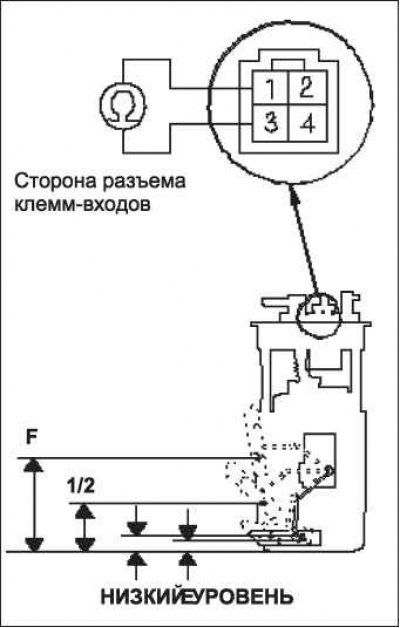
10. Measure the resistance between terminals No.1 and No.3 of the 4P connector of the fuel tank unit when the float is in the E (empty), "LOW" positions (low fuel indicator), 1/2 (half full) and F (full).
If you do not obtain the specified values, replace the fuel level meter sending unit.
11. Connect the 4P fuel tank connector.
12. Remove fuse #16 BACK UP (15A) from the underhood fuse/relay box for at least 10 seconds, then reinstall it.
13. Turn on the ignition by turning the key to the "ON" (II) position.
14. Make sure the fuel gauge pointer shows "F" and the float is in the F position.
- If the fuel gauge does not indicate "F", replace the gauge control module (tachometer).
- If the sensor is OK, the test is complete.
Note: Regardless of the fuel level, the fuel level gauge pointer returns down along the indicator needle when the ignition switch is in the OFF position.

Remove the #16 BACK UP (15A) fuse from the underhood fuse/relay box for at least 10 seconds after completing the troubleshooting procedure, otherwise you will have to wait up to 20 minutes before the fuel gauge will show the correct level.