
Checking the play
1. Set the selector to the "N" position.
2. Apply marks (C) to the flanges of the transfer case (A) and the propeller shaft (B).
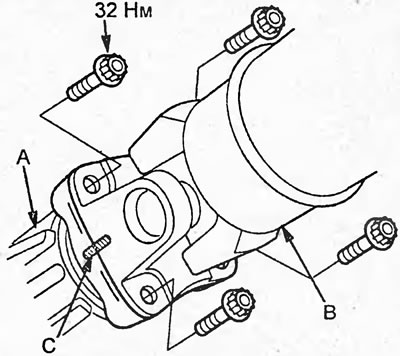
3. Loosen the bolts and disconnect the propeller shaft from the transfer case.
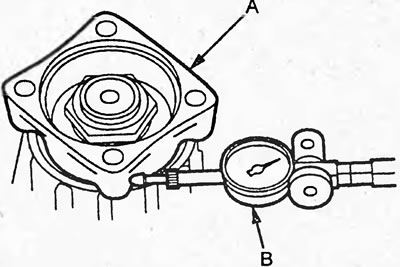
4. Install the dial indicator as shown in the figure and measure the play.
Backlash - 0.06 - 0.16 mm
Removal
1. Jack up the car and place it on stands.
2. Unscrew the drain plug (A) and drain the working fluid.
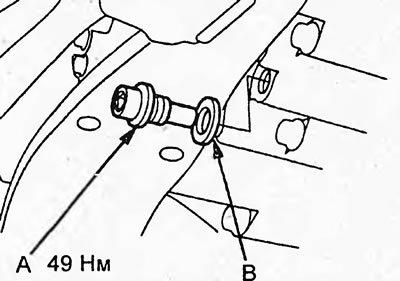
3. Remove the gasket (B) from the drain plug.
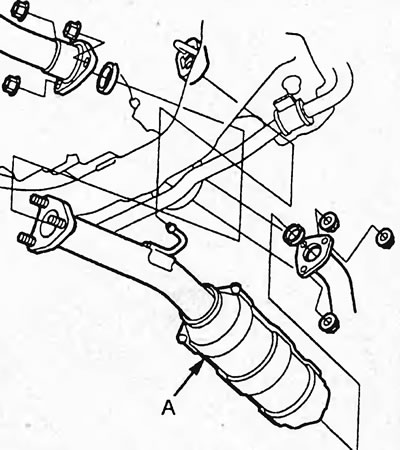
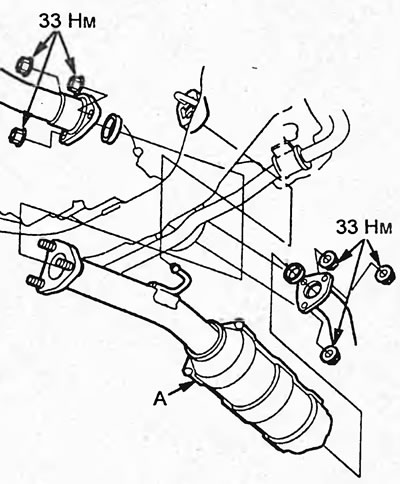
4. Remove the catalytic converter (A).
5. Remove the protective cover (A) of the gearbox control cable and unscrew the cable bracket mounting bolts (B).
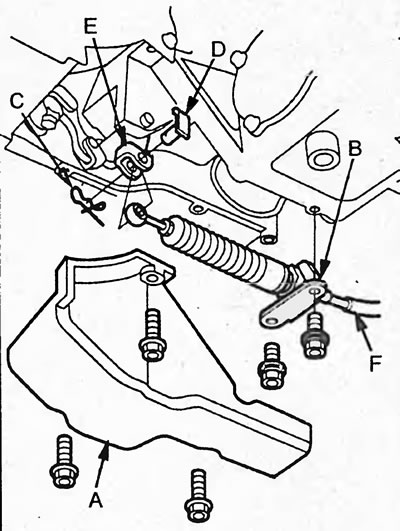
6. Remove the cotter pin (C) and pull out the pin (D). Disconnect the cable (F) from the gearshift lever (E) and remove the cable.
7. Apply marks (C) to the flanges of the transfer case (B) and the propeller shaft (A).
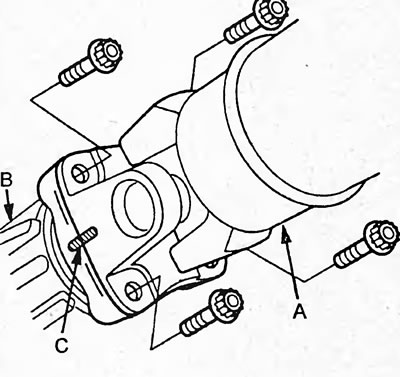
8. Loosen the bolts and disconnect the propeller shaft from the transfer case.
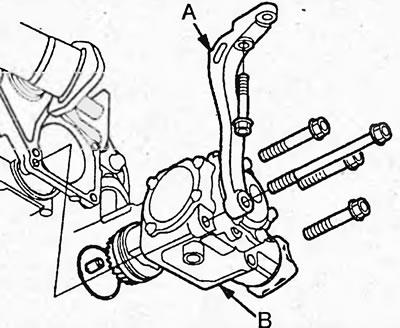
9. Loosen the bolts and remove the stand (A). Then loosen the bolts securing the transfer case and remove it.
Installation
1. Install the pin (C) and new O-ring (B) onto the transfer case (A).
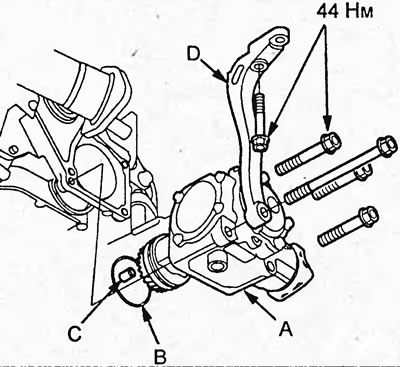
2. Apply grease to the O-ring and install the transfer case. Tighten the transfer case mounting bolts.
3. Install the stand (D) and tighten the bolts.
4. Align the marks (A) on the flanges of the transfer case (C) and the propeller shaft (B) and tighten the bolts.
Tightening torque - 32 Nm
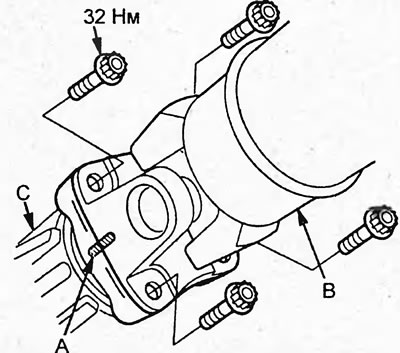
5. Connect the transmission control cable (B) to the transmission control lever (A). Install the pin (C) and cotter pin (D).
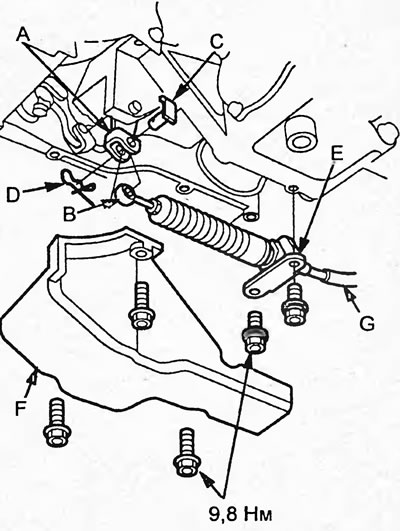
6. Install the cable bracket (G) and protective cover (F).
7. Install the catalytic converter.
8. Fill the gearbox with working fluid (see chapter "Maintenance and general check and adjustment procedures").
9. Warm up the engine and check the level of working fluid in the gearbox.
(Based on materials from the website: Hondabook.ru)