
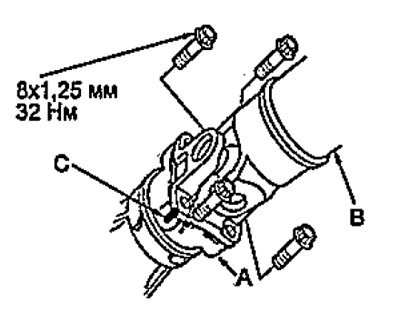
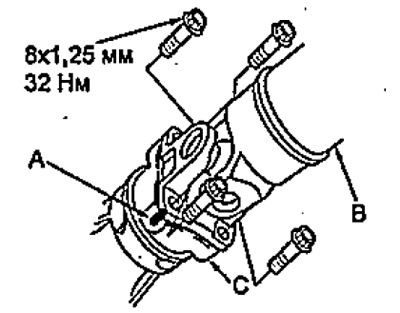
2. Mark (WITH) on the flange of the transfer case (A) and propshaft flange (IN).
3. Turn away bolts and remove cardan shaft.
4. Install a dial indicator as shown in the figure and measure the backlash in the transfer case gears.
- Backlash - 0.06 - 0.16 mm
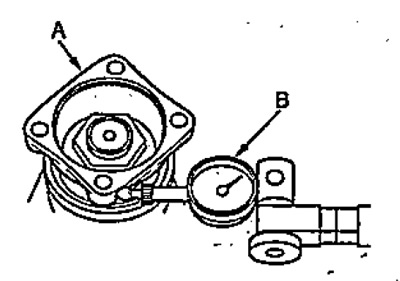
If the play is not correct, remove the transfer case and adjust.
Withdrawal
1. Jack up the front of the vehicle and place it on stands.
2. Remove the drain plug (A) and drain the working fluid.
3. Remove the gasket (IN) from the drain plug.
4. Mark (WITH) on the flange of the transfer case (A) and propshaft flange (IN).

5. Turn away bolts and remove cardan shaft.
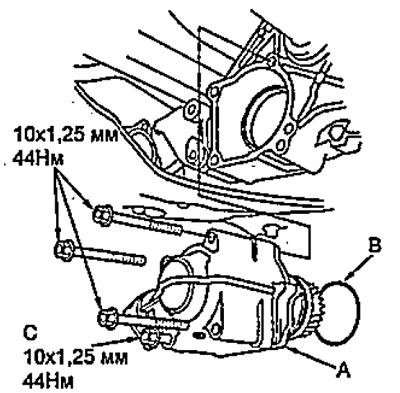
6. Loosen and remove the bolts (A), completely unscrew the bolt (IN) and remove the transfer case.
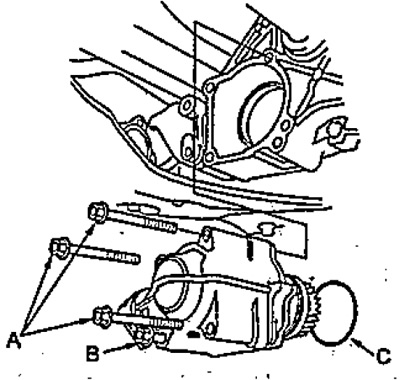
7. Remove the O-ring (WITH).
Installation
1. Install a new O-ring (IN) to the distribution box (A).
2. Apply fluid to the transfer case drive gear.
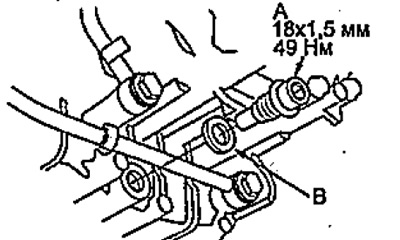
3. Install the transfer box and tighten the bolt (WITH).
- Tightening torque - 44 Nm
4. Wrap bolts of fastening of a distributing box.
- Tightening torque - 44 Nm
5. Align marks (A) on the flange of the transfer case (WITH) and cardan shaft flange (IN). Wrap bolts.
- Tightening torque - 32 Nm
6. Fill in the working fluid (see chapter "Maintenance and general inspection and adjustment procedures").
7. Start and warm up the engine. Shut off the engine and check the fluid level.