
Contents: Checking the wheel turning angles ⇊ Checking the wheel alignment and…⇊ Wheel alignment ⇊ Checking and adjusting the alignment ⇊
The values of the wheel alignment angles are given in the table "Wheel alignment angles".
Checking the wheel turning angles
Place the vehicle on a wheel alignment stand and check the maximum wheel turning angles.
Note: If a portable alignment stand is used for adjustment, the rear wheels are placed on a stand so that the car is level.
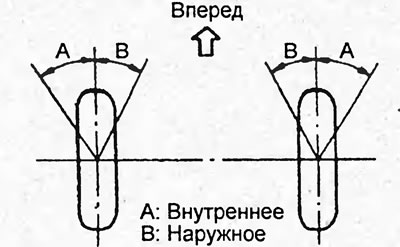
Checking the wheel alignment and longitudinal tilt of the steering axis
1. Place the vehicle on the stand.
2. Unscrew the wheel hub mounting nut.
3. Install the special device.
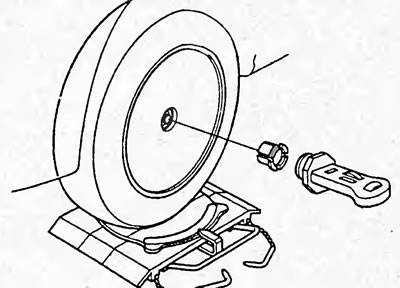
4. Measure the wheel alignment and caster angle.
5. Remove the special device.
6. Tighten the new wheel hub nut.
If the longitudinal angle of the steering axis does not correspond to the established norm, check the suspension elements for damage and bending. If necessary, replace the faulty element.
If the camber does not correspond to the established norm, make adjustments.
Wheel alignment
1. Jack up the front of the car and remove the wheels.
2. Remove the front wheels.
3. Loosen the 2 nuts at the bottom of the front suspension strut.
4. Adjust the camber by moving the lower part of the strut.
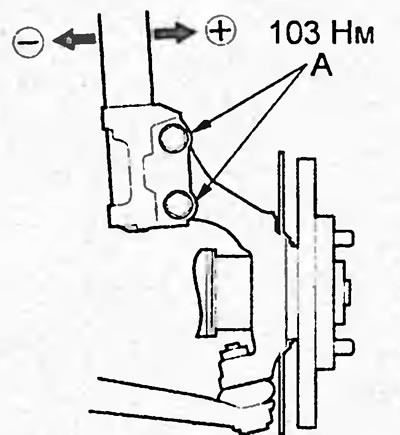
5. Tighten the 2 nuts.
Tightening torque - 103 Nm
6. Install the front wheels and lower the vehicle.
7. Check the front wheel alignment. If the wheel alignment is not within the established standards, select the adjusting bolt (A) and adjust the camber value.
Note: After adjusting the front wheel camber, check the toe-in.
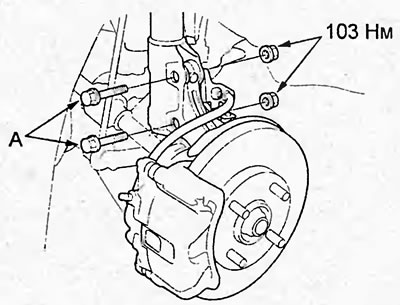
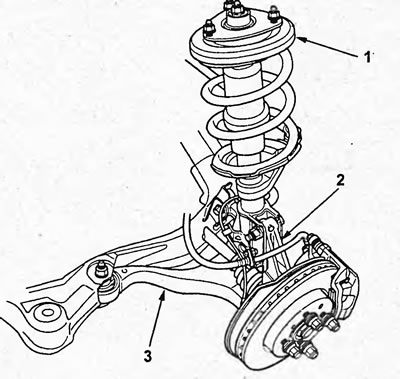
Front suspension component locations. 1 - front suspension strut, 2 - steering knuckle, 3 - lower arm.
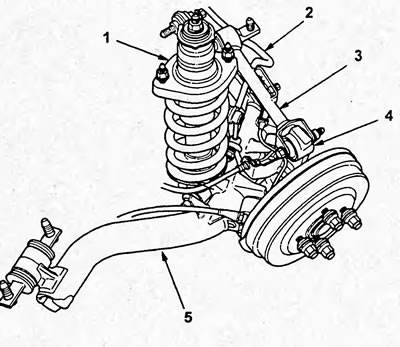
Rear suspension component locations. 1 - rear suspension strut, 2 - anti-roll bar, 3 - upper wishbone, 5 - trunnion.
Checking and adjusting the alignment
1. Set the wheels to the straight ahead position.
2. Measure the toe-in value.
Adjust the front wheel alignment if necessary.
3. Adjusting the front wheel alignment.
a) Remove the cover clamps.
b) Loosen the tie rod end locknuts.
c) Rotate the left and right rods (A) by the same number of turns to adjust the toe-in.
Note: Make sure the right and left rods are the same length.
d) Tighten the tie rod end locknuts.
Tightening torque - 44 Nm
d) Install the covers in place and tighten them with clamps.
(Original published on this resource: «www.hondabook.ru»)