
Withdrawal
1. Disconnect the negative cable from the battery.
Attention! If the stereo system installed in the car is equipped with a security code, before disconnecting the battery, make sure that you have the correct combination to activate the audio system!
2. Remove the resonator, air intake sleeve and air cleaner cover (see chapter Power and exhaust systems).
3. Disconnect the starter wiring and unscrew the top mounting bolt of the last (see chapter Engine electrical equipment).
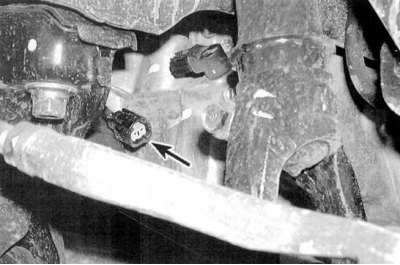
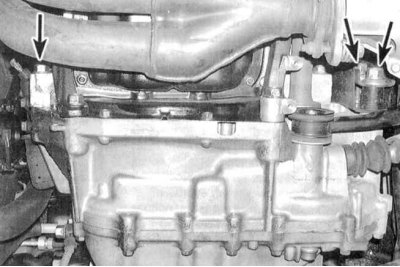
4. Disconnect the ground bus of the manual transmission, the electrical wiring of the sensor-switch of the reversing lights (see Check and replacement of the gauge-switch of reversing lights) and speed sensor (see accompanying illustration).
5. Loosen the hub nuts of the drive shafts (see chapter Clutch and drive shafts). Loosen the front wheel nuts. Jack up the car and place it on jack stands. Remove the front wheels.
6. If equipped, remove the crankcase protection.
7. Remove the cranked section of the exhaust system passing under the gearbox (see chapter Power and exhaust systems).
8. Drain gear oil (see chapter Current service).
9. Disconnect from a transmission draught of a drive of switching and a jet bar of the lever of a gear change (see Removal and installation of draft of a drive of a gear change).
10. Remove the nipple assembly connecting the clutch hydraulic hose to the pressure hydraulic line. Remove pressure line and clutch slave cylinder with push rod (see chapter Clutch and drive shafts).
Attention! Take care not to bend or twist the pressure line. Do not depress the clutch pedal with the slave cylinder removed.
11. Remove drive shafts (see chapter Clutch and drive shafts).
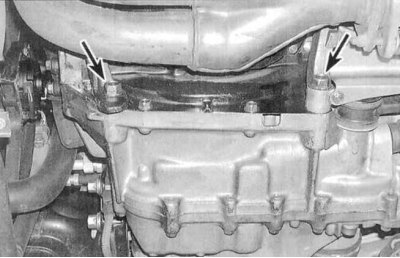
12. If equipped, remove the stiffener of the power unit (see accompanying illustration).
13. Remove the mounting bolts and remove the access cover from the clutch dome.
14. Give a bolt of fastening of the distributor of ignition. Attach lifting straps to the cylinder head and hoist the engine onto the winches, relieving the load on the gearbox mounts.
15. If equipped, remove the splash screen.
16. Support the transmission with a jack (as special as possible), fixing it on the head of the latter with a safety chain.
Note. Special transmission attachments are available for the head of the floor jack. Raise the gearbox, finally unloading its supports.
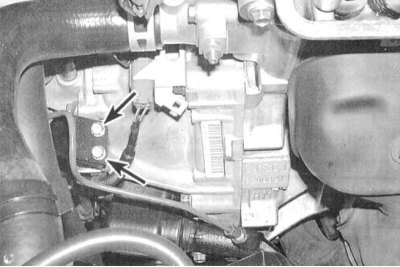
17. Give nuts and bolts of fastening of the right support of manual transmission (see accompanying illustration).

18. Turn out four top bolts of fastening of a transmission to the engine (see accompanying illustration).
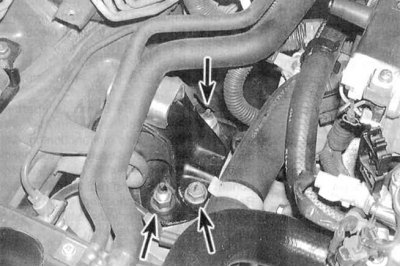
19. Give bolts of arms of fastening of lines of a hydraulic path of a drive of coupling (see accompanying illustration).
20. Turn out the lower back bolt of fastening of transmission to the engine, located directly over the right power shaft.
21. Turn out the bottom bolt of fastening of transmission to the engine, and also bolts of an arm of a support (see accompanying illustration).
22. Finally make sure that all lines and electrical wiring are disconnected, then, moving the jack, carefully separate the manual transmission from the engine.
23. Having completely released the input shaft of the manual transmission from the clutch assembly, remove the box from under the car.
24. After removing the box, access to the clutch components opens up, the condition of which, taking the opportunity, should be checked immediately. Usually, when removing a manual transmission, it is customary to replace the clutch (see chapter Clutch and drive shafts).
Installation
1. If removed, reinstall clutch components (see chapter Clutch and drive shafts).
2. Make sure the two drive pins are in place. Jack up the transmission as you did during the removal process and carefully slide it under the car, lifting it to its original position. Carefully insert the input shaft into the splines of the hub of the clutch disc. Never use force - if the input shaft does not fit into the hub, adjust the angle of the gearbox and rotate the shaft slightly to achieve proper alignment of the splines.
3. Screw in the bolts of the manual transmission to the engine, as well as the bolts of the rear bracket. Tighten fasteners to the required torque.
4. Screw in the three upper bolts of the box to the engine, as well as the lower bolt of the starter. Tighten fasteners to the required torque.
5. Slightly raise the gearbox on the jack, install the bolt and nuts of the bracket of the right assembly support. Tighten fasteners to the required torque.
6. Establish a forward stop arm and tighten bolts of its fastening with the demanded effort.
7. If equipped, install the splash screen. Tighten fasteners to the required torque.
8. Disconnect the lifting rigging and screw the distributor mounting bolt into place.
9. Install the clutch dome inspection cover. If equipped, install the stiffeners of the power unit. Tighten fasteners to the required torque.
10. Further installation is carried out in the reverse order of dismantling.
11. Fill the gearbox with the required amount of gear oil of the required grade (see chapter Current service).
12. Bleed the clutch hydraulic system
13. Carry out road tests of the car, checking the correct operation of the manual transmission. Inspect the power unit for signs of fluid leaks.