
Contents: Removal ⇊ Installation ⇊
Warning! Remember that gasoline is a highly flammable liquid – when working with fuel system components, observe all accepted fire safety measures. Do not smoke or approach the work area with an open flame or unprotected portable lamp. Do not service the system in a room equipped with heating devices operating on natural gas and equipped with a pilot flame (such as water heaters and clothes dryers). Remember that gasoline is a carcinogen that can cause cancer - try to avoid fuel coming into contact with exposed areas of the body - use protective rubber gloves, and in case of accidental contact, wash your hands thoroughly with warm water and soap. Collect spilled fuel immediately and do not store fuel-soaked rags near open flames. Remember that the fuel system of models equipped with fuel injection is constantly under pressure. Before disconnecting the fuel lines, release any residual pressure in the system (for more details, see Chapter Power and exhaust systems). Wear safety glasses when servicing fuel system components. Always keep a class B fire extinguisher on hand!
Removal
1. Disconnect the negative cable from the battery.
Warning! If the car stereo system is equipped with a security code, make sure you have the correct combination to activate the audio system before disconnecting the battery!
2. Drain the cooling system (see Chapter Routine maintenance).
3. Remove the air cleaner with the air intake (see Chapter Power and exhaust systems).
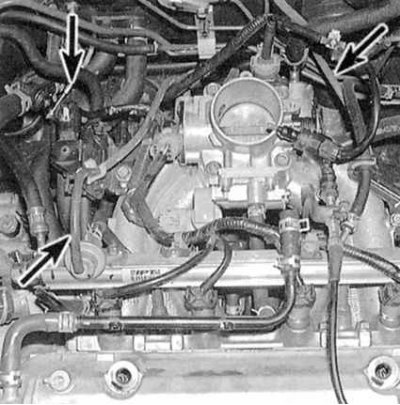
4. Clearly mark and disconnect all electrical wiring and vacuum lines that interfere with removal of the intake manifold (see accompanying illustration). 5. Disconnect the accelerator cable from the throttle lever (see Chapter Power and exhaust systems).
6. Remove the cooling system hoses from the throttle body.
7. Relieve the pressure in the fuel system and disconnect the fuel supply and return lines from the fuel line (see Chapter Power and exhaust systems).
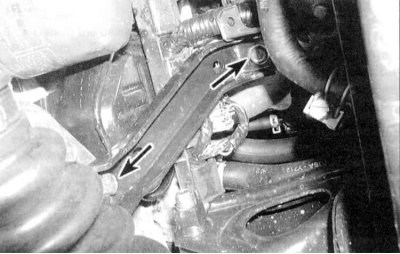
8. Working from underneath the engine compartment, remove the intake manifold support bracket (see accompanying illustration).
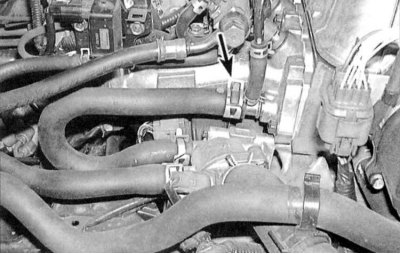
9. Disconnect the cooling system bypass hose from the intake manifold (see accompanying illustration).
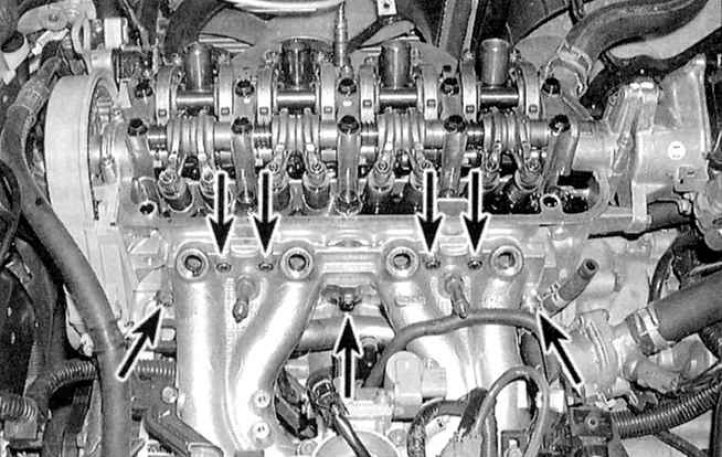
10. Remove the mounting bolts (see accompanying illustration) and remove the intake manifold from the engine.
Installation
1. Wipe the intake manifold mounting nuts with solvent, then dry them thoroughly (if possible, using compressed air).
2. Assess the flatness of the mating surface of the pipeline using a special measuring device (steel ruler placed on edge) and a blade-type feeler gauge.
3. Inspect the pipeline for cracks and signs of deformation. A defective pipeline must be either turned or replaced.
4. Check the condition of the fasteners (bolts/studs) pipeline. Replace defective elements.
5. Scrape off any traces of old gasket material from the mating surfaces of the head and intake manifold, then wipe the surfaces with a rag soaked in acetone.
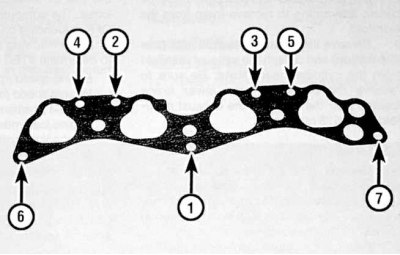
6. Having selected a new sealing gasket, install the pipeline in its regular place and secure it by tightening all the nuts by hand. Proceed in the order specified (see accompanying illustration), tighten the fasteners to the required torque (see Specifications).
7. Further installation is carried out in the reverse order of dismantling. Finally, do not forget to fill the cooling system (see Chapter Routine maintenance).