
Models with carburetor
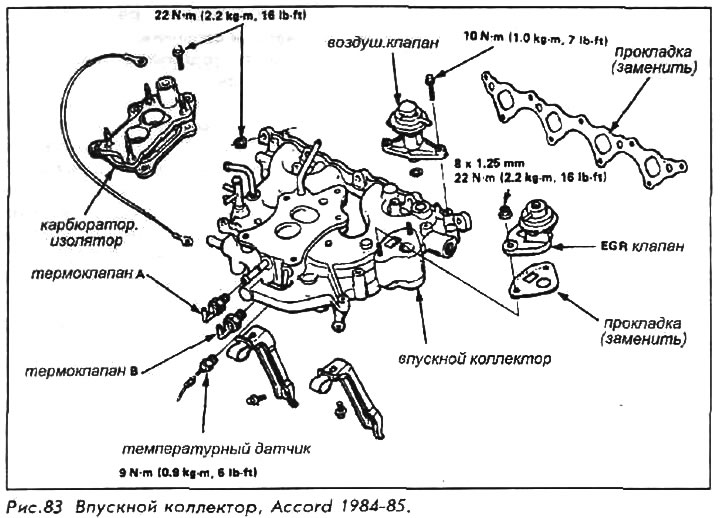
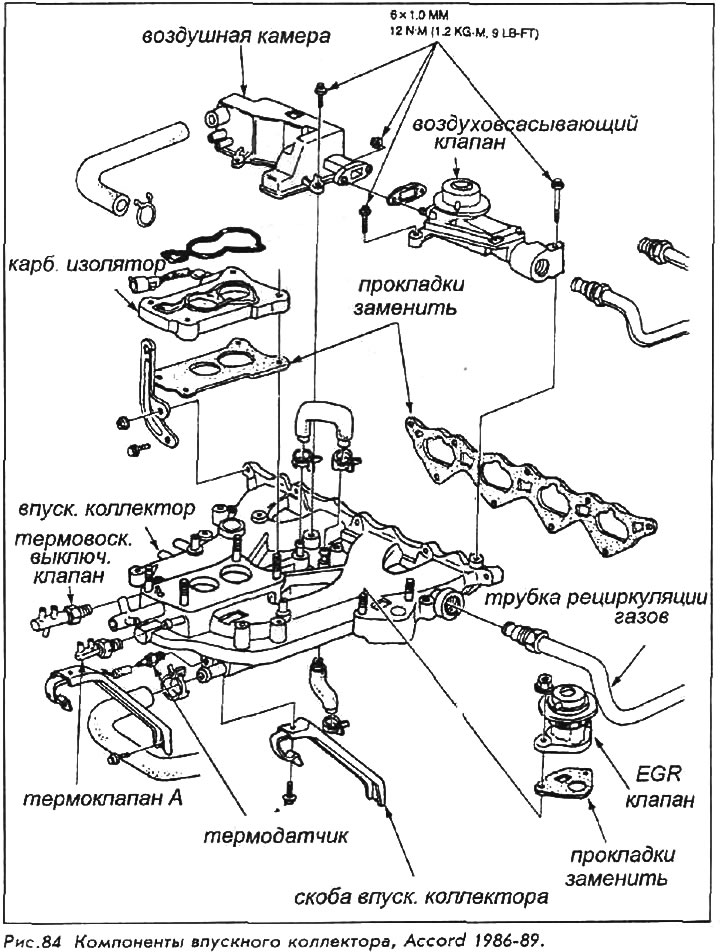
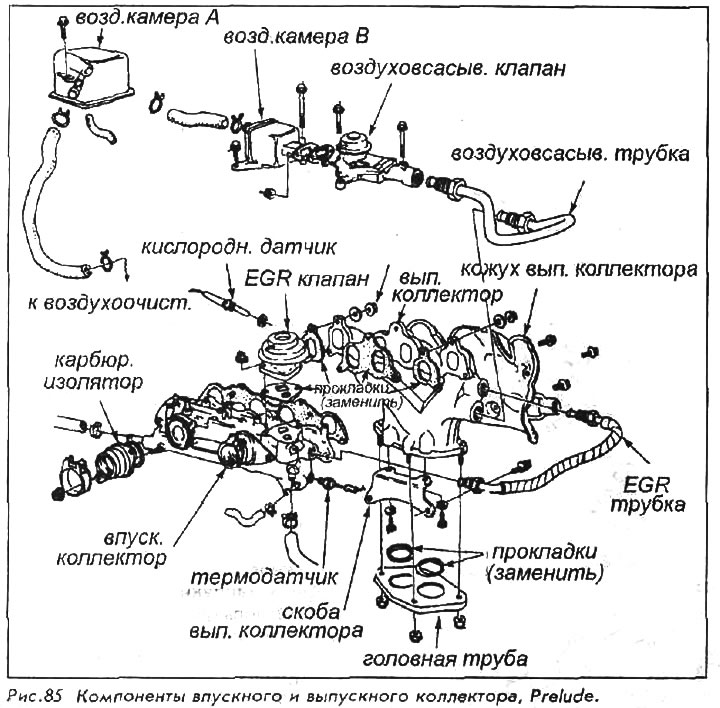
1. Place a clean, dry container under the radiator, remove the plug and drain the coolant from the radiator.
2. Remove the air filter and its housing from the carburetor.
3. Remove the air valve, EGR valve, air intake valve and air chamber (if vehicle is equipped).
4. Mark and disconnect all wires from the carburetor and intake manifold.
5. Disconnect the fuel line from the carburetor and disconnect the throttle control cable from the carburetor.
6. Remove the carburetors from the intake manifold.
7. Remove the nuts securing the intake manifold to the cylinder head using a criss-cross method (starting from the middle and working crosswise in both directions), then remove the manifold.
8. Using a putty knife or a piece of hard plastic, clean the cylinder head surfaces that were adjacent to the gasket. Do not use razors or scrapers, as they can damage the surfaces, causing a leak.
9. If you are going to replace the manifold, remount all necessary components onto the new manifold.
To install:
10. Using new gaskets, place them and the manifold on the cylinder head. Tighten the nuts by hand, starting from the center, then tighten them in a crisscross pattern. The nuts must be tightened with the same torque across the entire surface of the manifold to prevent leaks. The correct torques for cars are:
- ACCORD 1984-85: 22 Nm.
- ACCORD 1986-89: 22 Nm.
- PRELUDE 1984-87: 32 Nm.
- PRELUDE 1988-90: 24 Nm.
11. Install the carburetor(s), ensuring that the insulator or main gasket is not damaged and is properly seated.
12. Connect the fuel lines and throttle control cable. Adjust it if necessary.
13. Connect all electrical or vacuum connections to the carburetor and manifold.
14. Install the emission and air instruments, removed for access. Always use new gaskets for the EGR valve. Handle and install the air valve, air chamber and hoses with care.
15. Install the air filter with the housing.
16. Fill the radiator with coolant.
17. Start the engine, carefully checking for fuel, coolant, or vacuum leaks. Check for a possible vacuum leak at the manifold gasket location.
For fuel injection models
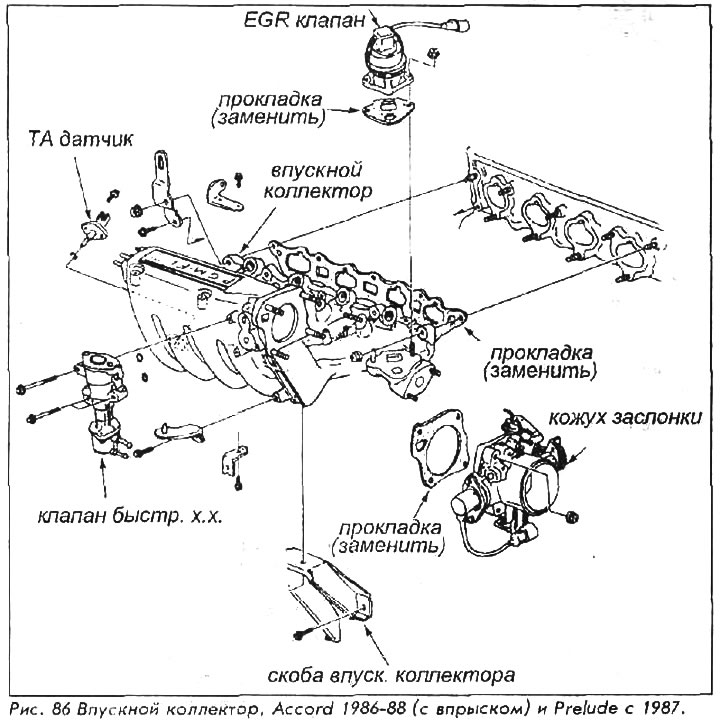
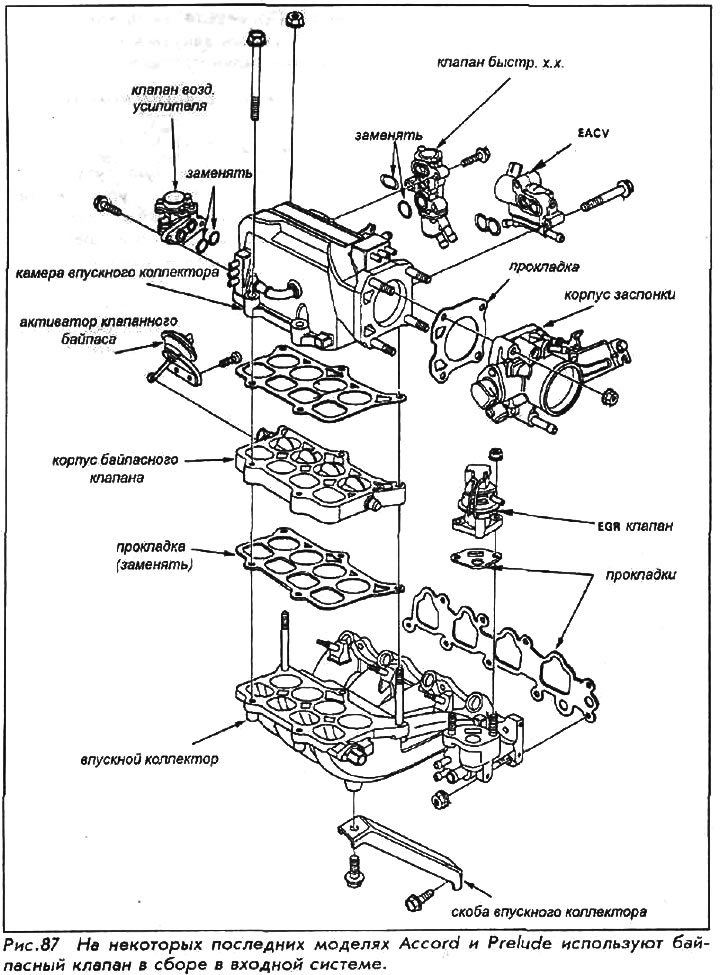
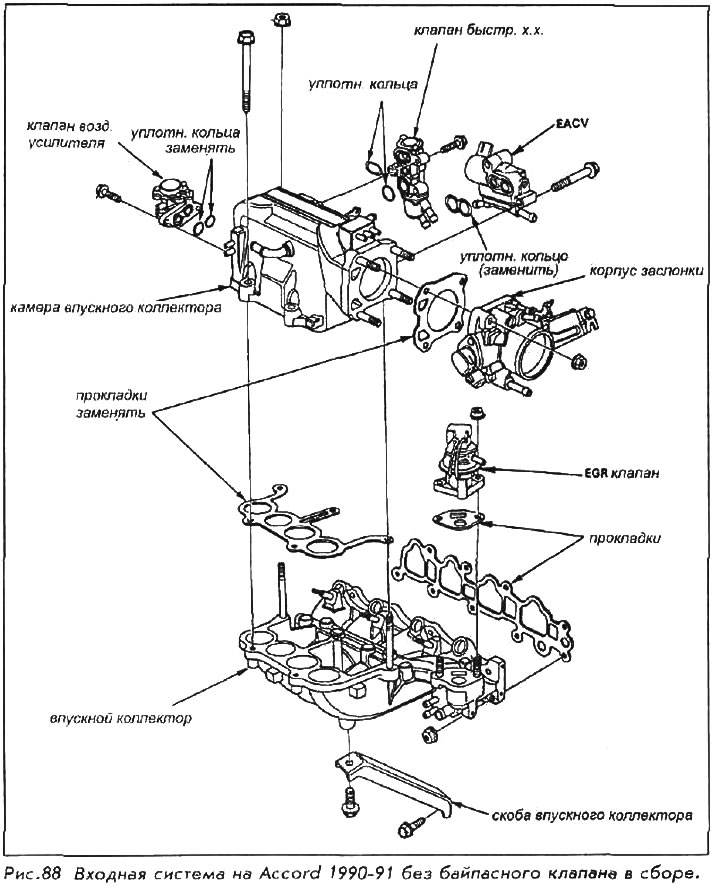
1. Place a clean, dry container under the radiator, remove the plug and drain the coolant to a level below the intake manifold. Disconnect the coolant hoses from the intake manifold.
2. Tag and disconnect all vacuum hoses and electrical wires from the manifold. Disconnect the wires from the terminals on the EGR valve.
3. Reduce the fuel pressure in the correct way.
4. Carefully remove the throttle body, metal fuel lines and injectors. On 1988-91 PrElUDE and 1991 ACCORD vehicles, carefully remove the bypass valve housing from the intake manifold.
5. Remove the fast idle valve, air bleed valve, EGR valve and the struts that hold them in place.
6. Remove the mounting bolts from the intake manifold struts and the struts themselves. Supporting the intake manifold, remove the nuts securing it to the cylinder head, remove the manifold and gasket from the cylinder head.
7. Use a putty spatula or other suitable tool to clean the surfaces adjacent to the gasket. Use a ruler to check the surfaces for distortion. Replace any deformed parts.
If the surface of the intake manifold that contacts the cylinder head is warped, it should be machined or replaced.
To install:
8. Using a new gasket, place the manifold in place and, while supporting it, tighten the nuts onto the rods.
9. Install the support brackets below the manifold. Tighten the bolt securing the bracket to the manifold to 22 Nm.
10. Starting with the inner or center nut, tighten in a crisscross pattern as this will distribute the tension evenly across the cap and prevent leakage. The correct tightening torque for all fuel injected vehicles is 22 Nm.
11. Install the bleeder valve, EGR valve and all other removed parts, making sure all gaskets are replaced with new ones.
12. If the bypass valve assembly was removed, then, after replacing the gasket, install it on the manifold.
13. Install the new gasket and the air receiver or manifold chamber if it was removed as a separate unit. The nuts and bolts holding it in place are tightened to 22 Nm.
14. Install the throttle and connect the cable to it.
15. Connect the fuel lines. Always use new washers when assembling the housing.
16. Connect the electrical and vacuum connectors.
17. Double check the installation of all parts, paying special attention to possible loose hoses, dangling wires, loose nuts, check that wires and hoses are correctly secured (not too tight or too loose), and forgotten tools.
18. Fill the radiator with coolant.
19. Start the engine, checking that the fuel, vacuum and coolant hoses are properly connected and that the manifold gasket is tight for vacuum leaks.
(The original is located on the website: «Hondabook.ru»)