
Withdrawal
1. Disconnect the negative cable from the battery.
Attention! If the stereo system installed in the car is equipped with a security code, before disconnecting the battery, make sure that you have the correct combination to activate the audio system!
2. Chock the rear wheels and apply the parking brake firmly.
3. Loosen the front wheel nuts, then jack up the front of the car and place it on jack stands (see chapter Current service).
4. Remove the front wheels and engine crankcase protection.
5. Jack up the power unit (in order to distribute the load, lay a block of wood between the head of the jack and the engine sump).
6. Remove upper engine mount bracket (see Checking the condition and replacing the suspension bearings of the power unit).
7. Turn out the spark plugs and remove the drive belts (see Current service).
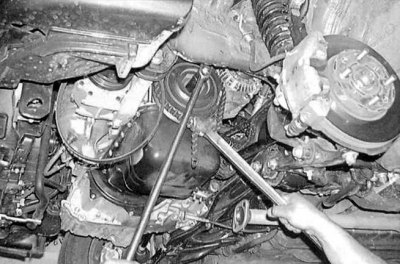
8. Loosen the steering pump and move it to the side without disconnecting the hydraulic lines (see chapter Suspension and steering).
9. Remove the engine oil dipstick.
10. Bring the piston of the first cylinder to the TDC position of the end of the compression stroke (see Bringing the piston of the first cylinder to the top dead center position (TDC)).
Attention! The crankshaft should only be turned in the normal direction (counterclock-wise) – Failure to comply with this requirement will lead to a violation of the timing belt adjustments.
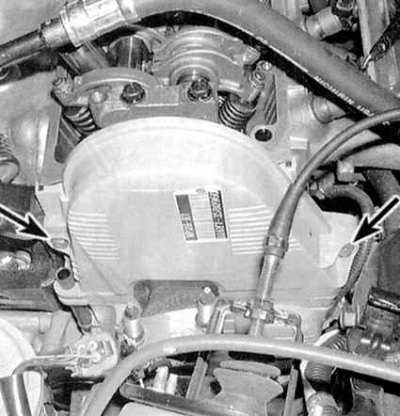
11. Remove the top timing belt cover (see accompanying illustration). 12. Remove the intermediate roller with bracket from the front of the engine.
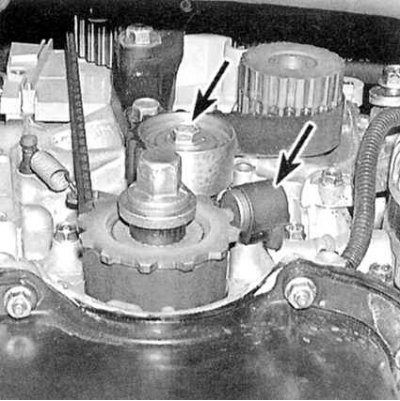
13. Using a chain or strap wrench, block the crankshaft pulley from turning, then loosen the pulley mounting bolt with a socket wrench (see accompanying illustration). 14. Remove the pulley from the crankshaft stub.
15. Remove the dipstick guide tube from the front of the engine.
16. Remove the lower timing belt cover.

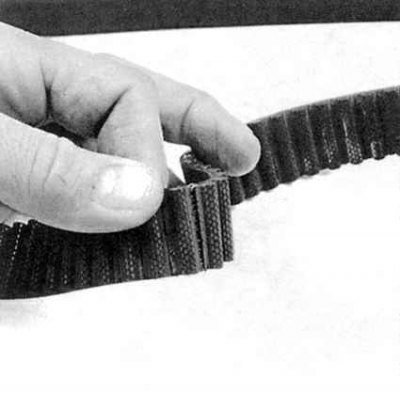
17. If the old belt is in good condition and will be installed in place, mark with chalk or white paint the direction of its rotation and position relative to the gears of the shafts (see accompanying illustration).
18. Loosen the timing belt tensioner mounting bolt (see accompanying illustration). After depressing the tensioner, loosen the belt, then re-tighten the bolt. Remove the crankshaft vibration sensor (see ibid), then remove the belt from the gears. If the belt is removed in order to replace the crankshaft oil seal, remove the gear wheel and the inner belt guide from the trunnion of the last (see Replacing the front crankshaft oil seal). 19. If there is a need to remove the camshaft or replace its oil seal, insert a large screwdriver through the hole in the shaft gear to block it from turning, then loosen the mounting bolt with a socket wrench and remove the wheel. Remove the key from the camshaft stub.
Examination
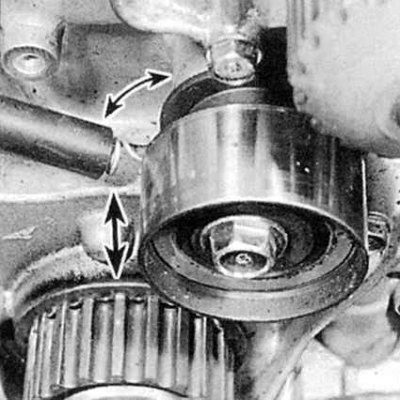
1. Manually check the free rotation of the tensioner pulley, then pull it from side to side, checking for play in the bearing (see accompanying illustration). A defective roller must be replaced.
2. Carefully inspect the timing belt on both sides, checking it for signs of wear (especially resistant tooth walls), cracks, cuts, abrasions and traces of oiling (see accompanying illustration). A defective belt must be replaced.
Note. Unless the engine mileage is very low, it is recommended to replace the belt, regardless of its condition. In no case do not install an old belt on the engine without being one hundred percent sure of its condition.
Installation
1. If removed, reinstall the gears of the shafts (don't forget the camshaft wheel key and inner belt guide on the crankshaft). Tighten the camshaft sprocket bolt to the required torque (see Specifications).
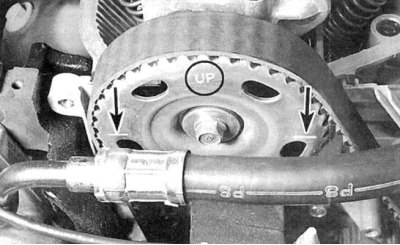
2. Before installing the belt, make sure that the camshaft gear is installed with a mark in the form of a dot, or letters "UP" up. The two alignment marks must be in the plane of the surface of the cylinder head (see accompanying illustration).
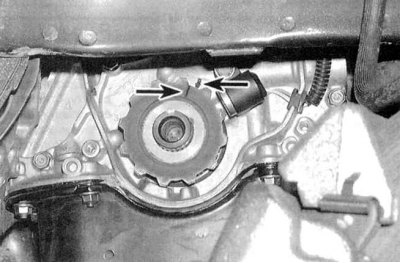
3. Temporarily install and bolt the crankshaft pulley, then turn the crankshaft (if he was hit) so that the alignment mark on its gear wheel is aligned with the counter pointer on the oil pump housing (see accompanying illustration).

4. Slide the belt firmly over the crankshaft gear, then route it under the tensioner pulley and around the water pump and camshaft gears (see accompanying illustration). 5. Loosen the tensioner bolt to tighten the belt, then temporarily tighten the bolt.
6. Gently rotate the crankshaft six times in a counterclockwise direction, then make sure that the alignment marks of the camshaft gear are correctly positioned. If the crankshaft jerks or jams, do not apply force, as this may damage the valves when they hit the piston bottoms (if the adjustment is off). Remove the belt and repeat the procedure, paying special attention to aligning the alignment marks.
7. To adjust the tension of the belt, loosen it half a turn (180°) tensioner bolt and turn the crankshaft counterclockwise three teeth past TDC. Now tighten the bolt to the required torque.
8. Reinstall all components that were removed during the dismantling process.
9. Adjust drive belt tension (see chapter Current service).
10. Start the engine and check for proper operation.