
Checking the fuel level indicator/sensor
Warning. Do not smoke while working on the fuel system. Keep open flames away from your work area.
1. Before starting the test, check fuse No. 25 (7.5A) in the under-panel fuse and relay box.
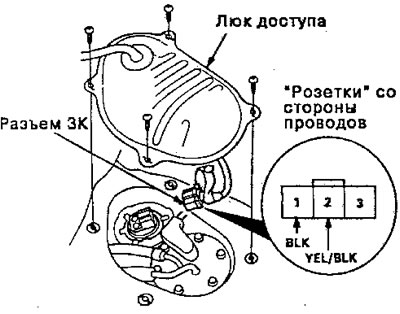
2. Remove the access hatch from the floor.
3. Disconnect the plug connector from the fuel level indicator.
4. Connect the positive voltmeter lead to pin #2 and the negative lead to pin #1, then turn the ignition switch ON (II). The voltage should be between 5 and 8 V.
- If the voltage is within specification, proceed to step 5.
- If the voltage is not within specification, check:
- Broken wire YEL7BLK or BLK.
- Poor grounding (G552).
5. Turn the ignition switch OFF.
6. Attach the connecting wire between pins No. 1 and No. 2, then turn the ignition switch ON (II).
7. Check that the fuel gauge needle has started to move towards the mark "F".
Attention: Turn the ignition switch OFF before the arrow reaches the "F" on the pointer scale. Otherwise, the pointer may be damaged.
Note: The fuel level gauge is an electromagnetic type, therefore the fuel level is continuously indicated even when the ignition switch is turned OFF and the needle moves slower than the bimetal type. (Except KY).
- If the fuel gauge needle does not move at all, replace the gauge.
- If the gauge is OK, inspect the fuel level sensor.
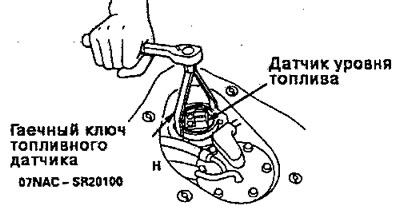
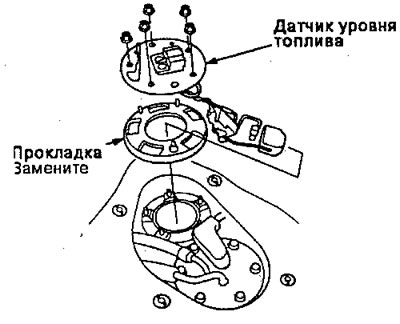
8. Remove the fuel level sensor as shown.
Made in Japan
Made in Canada (NSM), USA (US)
9. Measure the resistance between pins±1 and±2 in positions E (empty), 1/2 (half filled) and F (full), moving the float.

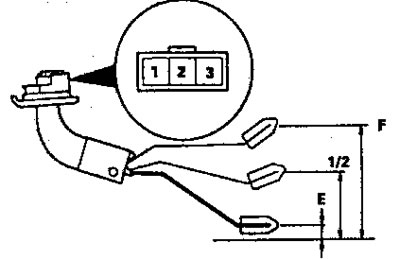
Desk surface (bottom of the fuel tank)
- Replace the fuel level sensor if it fails to provide the above readings.