
Contents: Checking the input signal of the…⇊ Checking the input signal of the…⇊ Driver's Window Engine Check ⇊
Checking the input signal of the main switch (combi).
Note: The control unit is built into the main window switch and controls the driver's door window only.
1. Remove the power window master switch and armrest pocket from the door panel.
2. Disconnect the 12K connector from the main window switch.
3. Inspect the connectors and socket contacts to ensure that they are in good contact. If the contacts are bent, loose or corroded, correct this and retest the system.
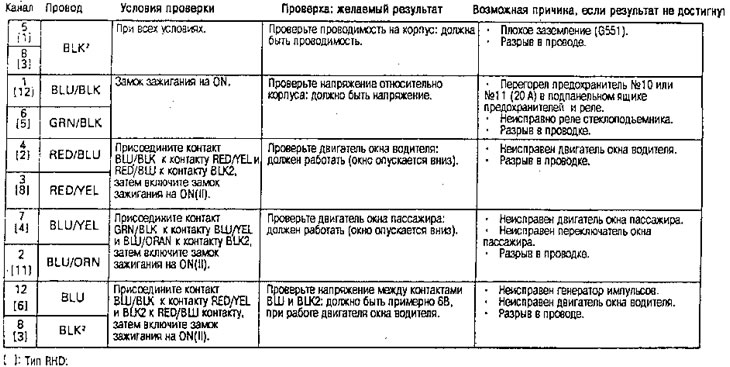
- If the contacts are OK, perform the following tests on the input signal at the connector.
- If any of the tests identify a problem, find and correct the cause, then test the system again.
- If all input tests are positive, the power window master switch is faulty, replace.
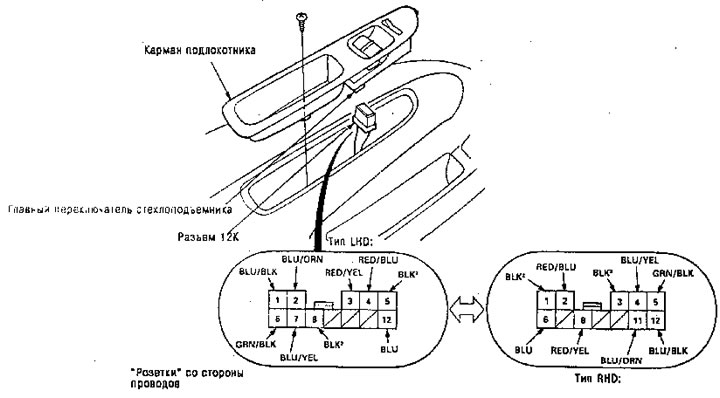
All systems:
Checking the input signal of the main switch (sedan)
Note: The control unit is built into the main window switch and controls the driver's door window only.
1. Remove the armrest and disconnect the 16K and 1K connector from the main switch.
2. Inspect the connectors and socket contacts to ensure that they are in good contact.
- If the contacts are bent, loose or corroded, correct them and retest the system.
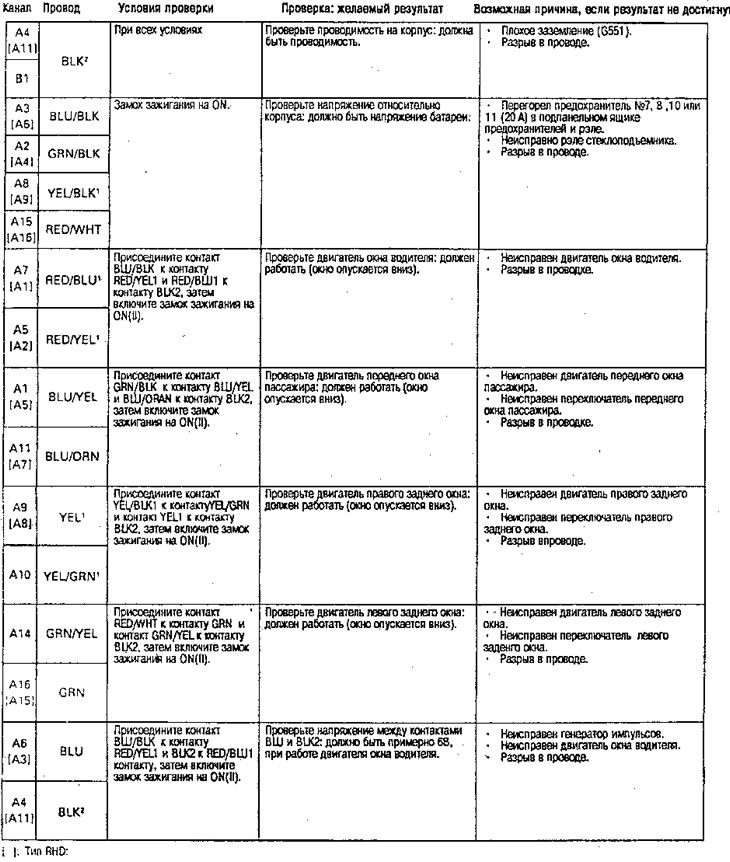
- If the contacts are OK, perform the following tests on the input signal at the connector.
- If any of the tests identify a problem, find and correct the cause, then test the system again.
- If all input tests are positive, the power window master switch is faulty, replace.
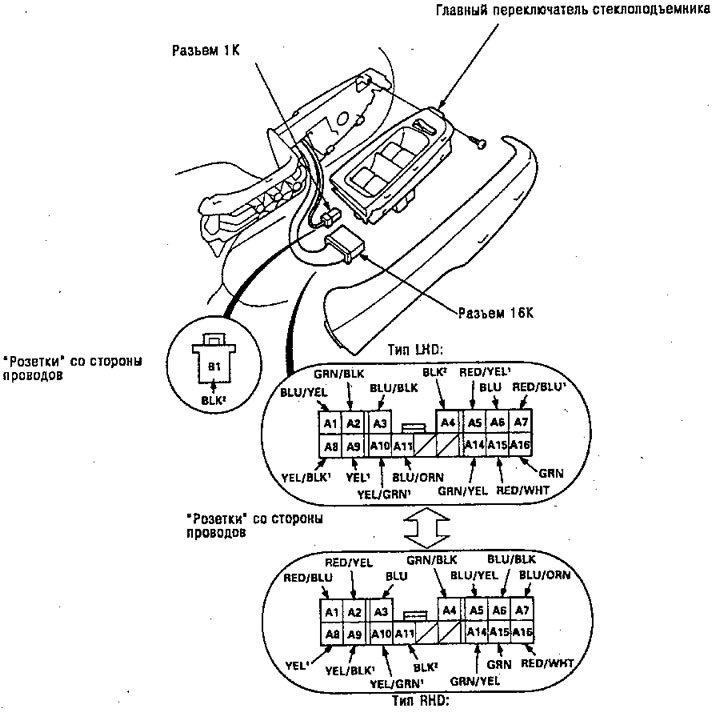
All systems:
Driver's Window Engine Check
Engine check:
1. Remove the driver's door panel and disconnect all connectors.
2. Disconnect the 4K connector from the window motor.
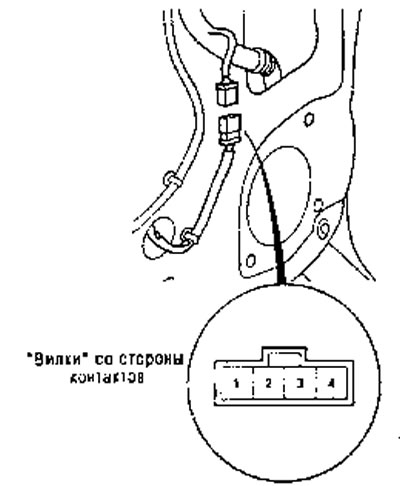
3. Check the motor in each direction by connecting the battery power and ground according to the table.
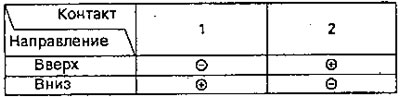
Caution: When the engine stops, disconnect one terminal immediately.
4. If the engine does not run or does not run smoothly, replace it.
Checking the pulse generator:
5. Connect the leads of the analog ohmmeter to contacts #3 and #4.
6. Turn on the engine by connecting power and ground to terminals #1 and #2. The ohmmeter needle should move back and forth alternately.