
Attention! See the warnings at the beginning Depressurizing the supply system.
Note. The procedure is greatly simplified if the gas tank is emptied in advance.
1. To relieve excess pressure, remove the fuel tank filler cap.
2. Relieve residual pressure in the supply system (see Depressurizing the supply system).
3. Disconnect the negative cable from the battery.
Attention! If the stereo system installed in the car is equipped with a security code, before disconnecting the battery, make sure that you have the correct combination to activate the audio system!

4. Unscrew the drain plug and drain the remaining fuel in the tank into a prepared container of a suitable volume (see accompanying illustration). If a drain plug is not provided, drain the fuel using a special kit available from almost any auto accessory store.
Attention! Never suck gasoline with your mouth!
5. Remove the back seat (see chapter Body) and disconnect the electrical wiring from the fuel flow sensor and the fuel pump (see Check of a condition and replacement of fuel lines and their union connections and Removal and installation of the fuel pump). Also disconnect the fuel hoses from the pump (see Check of a condition and replacement of fuel lines and their union connections).
6. Jack up the rear of the vehicle and place it on jack stands.

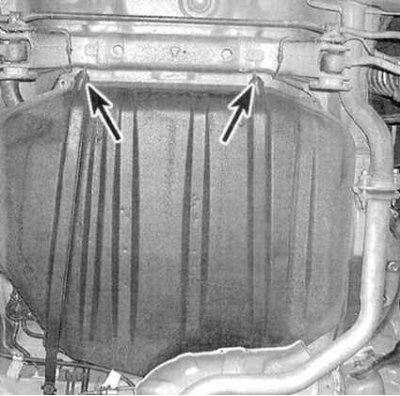
7a. Remove the gas tank and fuel line protection panels. Civic models use one large panel.
7b. On Integra models, two small (see accompanying illustrations).
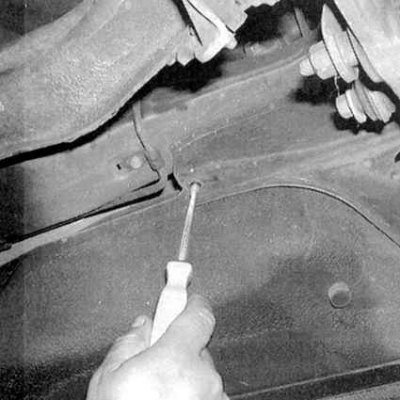
8. Mark and disconnect the fuel hoses and their mounting brackets on the tank (see accompanying illustration).
9. Support the fuel tank with a floor jack. To distribute the load, lay a solid wooden beam between the head of the jack and the bottom of the tank.
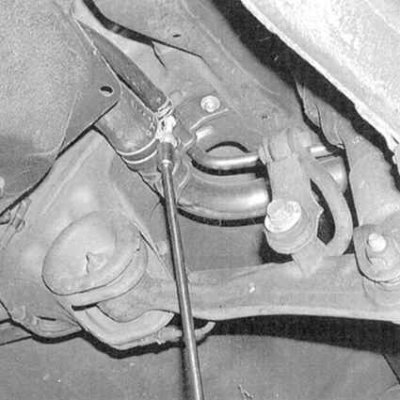
10. Give bolts of fastening of both mounting brackets of a fuel tank (see accompanying illustration).
11. Lower brackets and take a tank from under the car.
12. Installation is carried out in the reverse order.