
Warning: Fuel and its vapors are extremely explosive. Make sure that all possible sources of heat, fire or sparks must be turned off or removed in the work area before starting work. This also applies to all automotive energy consumers - electric motors, fans, etc. Have a dry powder fire extinguisher handy at all times (class B-C).

1. Block the front wheels. Raise the rear of the vehicle and secure it securely.
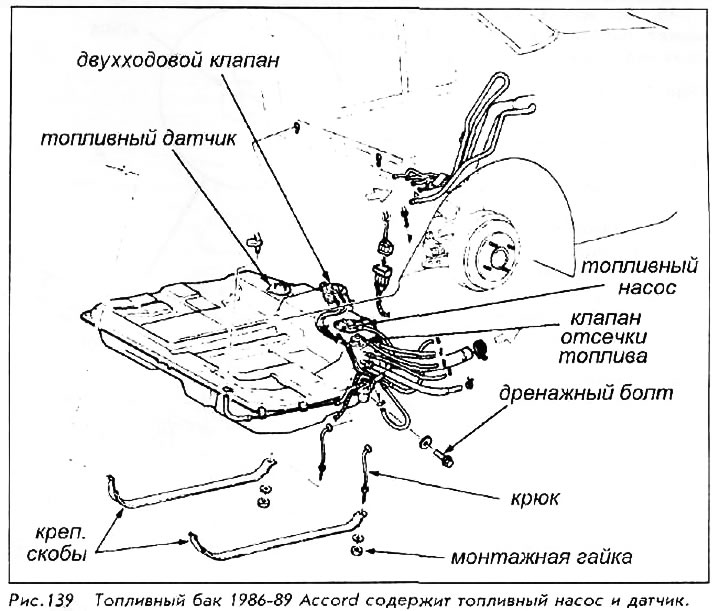
2. Remove the drain bolt from the tank and drain the remaining fuel.
3. Disconnect the sensor connector.
4. Mark and disconnect the hoses from the pipes installed above the suspension control arm. Release the clamps and, turning the hose, remove it from the fitting.
5. Use a jack and a wide plate under the tank. Adjust the position as needed to keep the tank evenly supported.
6. Remove the nuts holding the tank brackets. The staples will fall down.
7. Lower the jack and remove the tank from under the car.
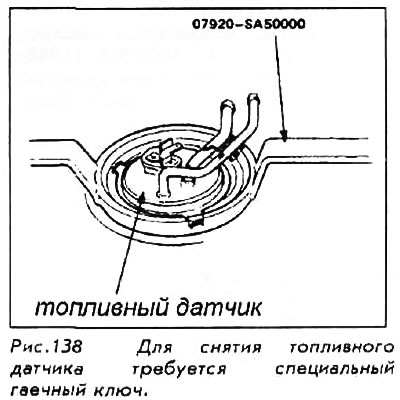
8. If the fuel sensor must be removed, use the Honda tool 07920-SA50000 or 07920-SA20000 to remove the thrust bushing. Then pull out the sensor.
For installation:
9. Install, if removed, the fuel gauge. Tighten the fastener.
10. Place the tank on a jack and position it under the vehicle. Put the tank back in place.
11. Fit the tank brackets and tighten the fixing nuts to 22 Nm. Make sure the opposite ends of the staples snap into place.
12. Connect the hoses and electrical wiring connectors.
13. Install the drain bolt on the tank and tighten it to 50 Nm.
14. Lower the vehicle to the ground. Using the funnel on the fuel filter and pouring fuel slowly, fill the fuel tank.
15. During cranking, the starter may run longer than usual due to lack of fuel in the lines.