
1984-1987 release models
2. Move the jack under the rear axle beam (see fig. 14.2) and lift the axle.
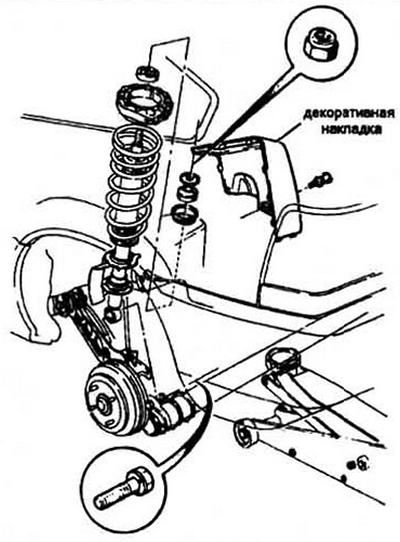
Pic. 14.2 Assembling the rear pillar (1984-1987 models)
3. Remove a decorative overlay and a protective cap from inside of the car.
4. Remove the top fixing nut. For. Use a hex wrench to prevent rotation of the shock absorber rod. Remove the washer and rubber pad.
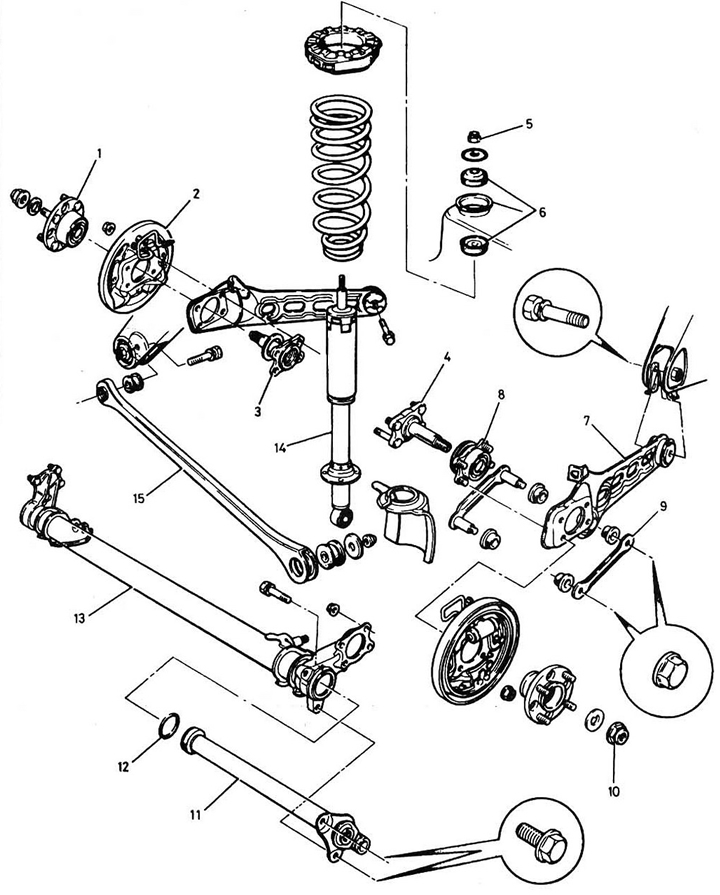
Pic. 14.4 Assembling the rear suspension (1984-1987 models) 1 - hub; 2 - support shield of brakes; 3 - trunnion; 4 - trunnion; 5 - upper shock absorber mounting nut; 6 - rubber cushion; 7 - guide lever; 8 - bearing assembly; 9 - lever; 10 - hub nut; 11 - stabilizer; 12 - stabilizer seal; 13 - rear axle beam; 14 - shock absorber; 15 - Panhard thrust.
5. Slowly lower the jack until the springs are unloaded.
6. Remove the lower strut mounting bolt, lower the jack completely and remove the shock absorber
7. Inspect shock absorber, see section 3. Remember the relative position of the parts
8. Installation is made in the return to removal order. Springs are installed with coils of smaller diameter down. Tighten fasteners to specification. Perform the final tightening with the vehicle on the ground.
Release models since 1988
9. From inside the car remove a decorative overlay for access to the top nut of fastening of the shock-absorber.
10. Remove the nut cap.
11. Loosen the nut.
12. From below the car turn away a bolt of fastening of a rack to the bottom lever.
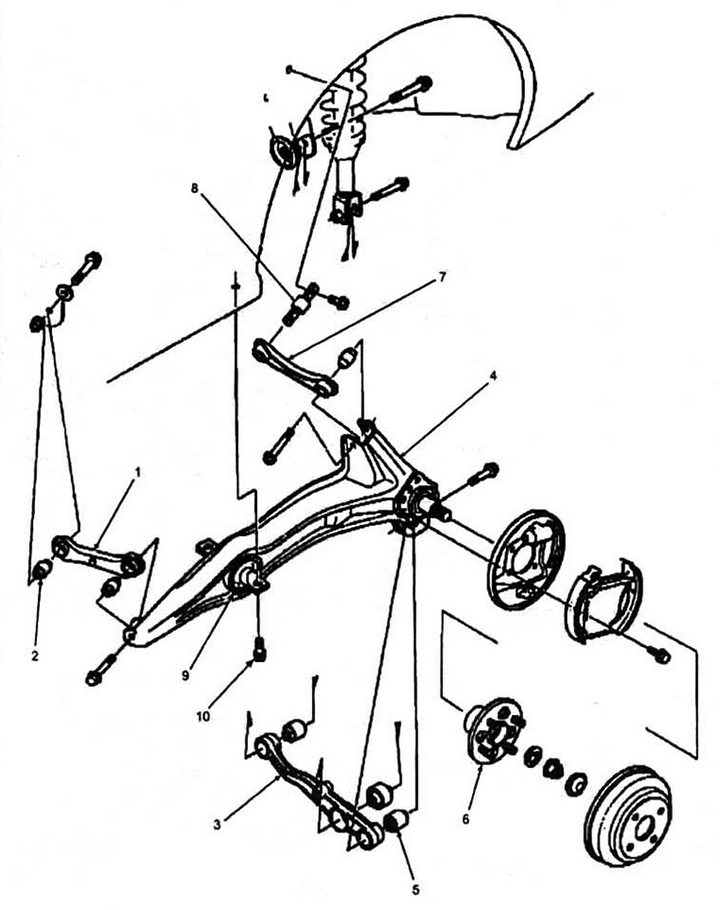
Pic. 14.12 Rear suspension (models since 1988) 1 - compensation lever; 2, 5 - silent block; 3 - lower arm; 4 - trailing arm suspension (guide); 6 - hub; 7 - upper lever; 8 - bushing of the upper arm; 9 - guide lever bushing; 10 - a bolt of fastening of the plug.
13. Pull back the lower arm and remove the shock absorber
14. Installation is in the reverse order of removal. Tighten the fasteners with the force specified in specifications.