
Note: Before bolting the holder with the new seal installed to the engine, install the crankshaft and main bearing caps.

1. Measure the standard seating depth of the old seal in the holder socket, then place the holder plate with its edges on a pair of wooden blocks of equal height and, using a suitable drift and hammer, knock the old seal out of its socket (see accompanying illustration). Try not to damage the walls of the nest.
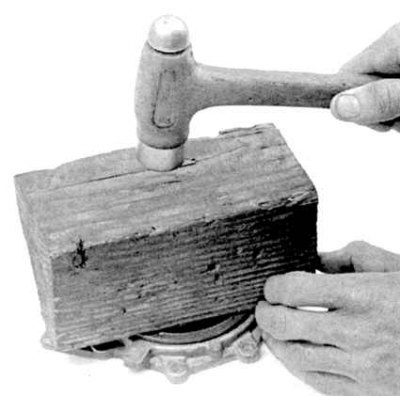
2. Wipe the holder thoroughly, then lubricate the outer edge of the new oil seal with clean engine oil. The oil seal must be seated in the socket strictly perpendicularly, so it is not recommended to hammer it into the holder. If there is no access to a press, the oil seal can be inserted into the socket using a large vice with soft jaws - in this case, the holder with the oil seal must be clamped between two flat wooden blocks, ensuring an even distribution of the load over the entire area of the end surface of the oil seal. In extreme cases, it is permissible to use a hammer, but tapping should be done through a flat wooden block (see accompanying illustration). Proceed slowly, making sure that there is no distortion.
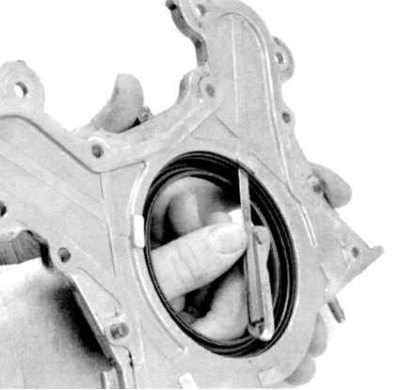
3. Using a blade-type feeler gauge, measure the gap between the seal and the holder. The gap should be equal around the entire perimeter of the holder and not exceed the range of 0.51÷0.76 mm.
4. Apply a thin layer of RTV sealant around the entire edge of the holder.
5. Before installing the holder assembly with the oil seal on the crankshaft journal, lubricate the lips of the oil seal with a universal grease. Do not forget to replace the holder sealing gasket.
Note: Both gasket surfaces should also be coated with RTV sealant prior to installation.
6. After placing the holder tightly against the block, tighten the mounting bolts by hand, make sure the holder is installed correctly, then tighten the bolts to the required torque (see Specifications to Parts Engine Repair Without Removing It From The Car - Civic Models and Engine Repair Without Removing It From the Vehicle - Integra Models of this Chapter). Trim the edge of the gasket flush with the mating surface of the oil pan (try not to scratch the last one).