
Attention! Remember to wear protective goggles when using compressed air!
2. Check the crankshaft main and connecting rod journals for scoring, cavities, cracks, and signs of uneven wear.
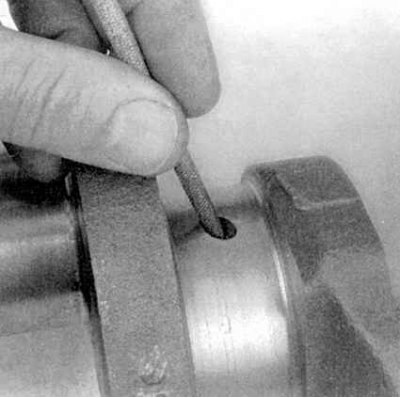
3. Use a whetstone, file or scraper to remove burrs from the edges of the oil holes (see accompanying illustration).
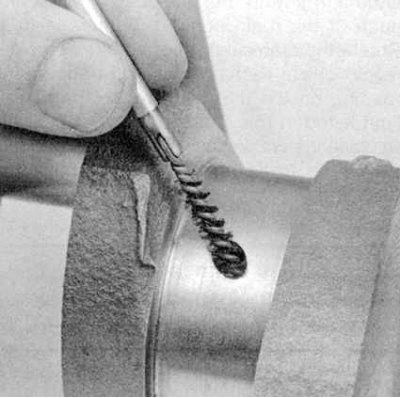
4. Don't forget to clean the oil holes with a stiff brush (see accompanying illustration). Then wash them with solvent.
5. Inspect the entire surface of the shaft for cracks or other damage. To identify hidden cracks, you should resort to magnetic particle flaw detection - give the shaft to a car service workshop.
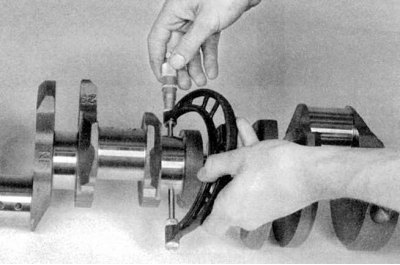
6. Using a micrometer, measure the diameters of the main and connecting rod journals of the shaft (see accompanying illustration). Measure the diameter of each neck at several points along the length and perimeter, which will allow you to evaluate the value of its taper and ovality, which should not go beyond the allowable range (see Specifications). You should also evaluate the amount of crankshaft runout - you will need a pair of V-shaped blocks and a DTI meter - in the absence of the necessary inventory, contact a car service specialist for help.
7. If the wear / taper / ovality of the necks exceeds the allowable value, or mechanical damage to the surfaces occurs, the crankshaft should be turned into a groove. After turning the shaft, it is necessary to select new liners for the main and / or connecting rod bearings of the appropriate repair size.
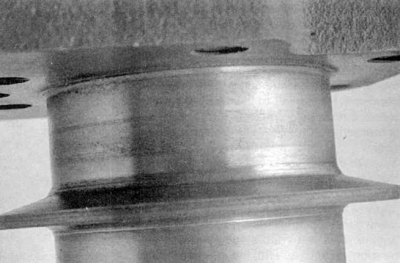
8. Check up a condition of omental necks on both pins of a cranked shaft (see accompanying illustration). The presence of grooves, burrs or scuffs made by the seals will lead to the failure of new seals in the very near future. In some cases, the trunnions can be restored by turning and pressing thin bushings onto them. If this kind of repair is not possible, replace the shaft.
9. Check the condition of the main and connecting rod bearing shells (see Checking the condition and selection of liners of main and connecting rod bearings of the crankshaft).