
Examination
1. Check the condition of the fuses and all terminal connections of the relevant electrical circuit. Make sure the battery is fully charged.
2. Move the transmission to "R", apply the parking brake and turn the ignition key to the ON position without starting the engine.
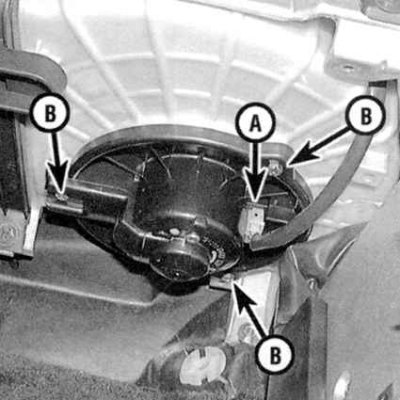
3. Without disconnecting the heater fan motor, connect the jumper wire to the blue-black wire terminal on the back of the motor connector (see accompanying illustration), ground the opposite end of the wire to ground. If the motor starts, then the cause of the failure lies in the malfunction of the switch, resistors or connecting wiring.
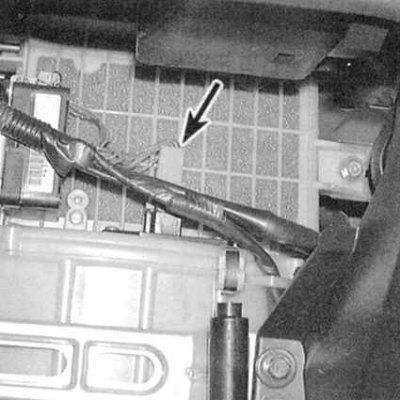
4. If the motor does not operate with the blue-black wire terminal grounded, remove the jumper wire, disconnect the connector and use a voltmeter to measure the voltage between the blue-black wire terminal and ground (see illustration above). On all models, if the voltmeter detects battery voltage and the motor does not operate in any of the speed modes, replace it (see Removal and installation of the electric motor of the heater fan drive). If there is no voltage, check the condition of the motor relay and connecting wiring (see chapter Onboard electrical equipment).
5. The resistor assembly is located on the casing of the fan drive motor (see accompanying illustration). There are several resistors installed on the assembly board, which provide the ability to select low and medium speed fan operation modes.
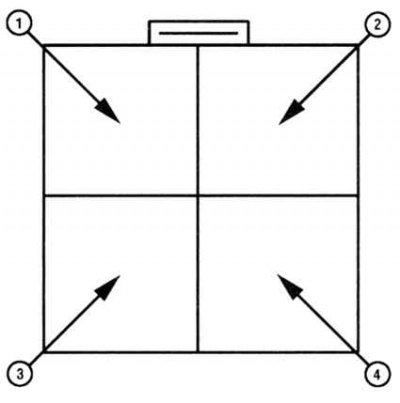
6. If the motor rotates, but it is not possible to select one of the speed modes, remove the resistor assembly from the heater casing and visually check it for damage. use an ohmmeter to check the resistance between terminals 2 and 4 (see accompanying illustration). If the resistance of any of the resistors is below normal, or equal to infinity, replace the assembly.
Replacement
1. Turn out two fixing screws and remove a payment of the resistor assembly from a heater casing.
2. Installation is carried out in the reverse order.