
Contents: Examination ⇊ Replacement ⇊
Examination
Note: Always check the fuse first.
1. Disconnect the electrical wiring from the horn.
2. To check the horn's proper functioning, apply battery voltage to one of its terminals. Ground the other terminal (use jumper wires). If the horn does not sound, replace it.
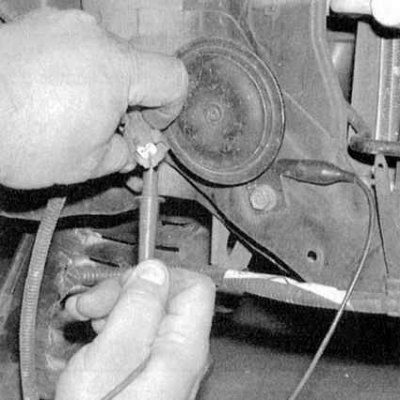
3. If the horn sounds properly, check for voltage at the horn connector with the control button pressed (see accompanying illustration). If voltage is present, check the grounding condition.
4. If there is no voltage, check the relay (see Relay - general information and checking the correct functioning).
5. If the relay is OK, check the power supply to the power relay. Also check the power supply to the control circuit. If the power supply to any of the circuits is interrupted, check the condition of the wiring in the section of the circuit between the relay and the fuse box.
6. If voltage is supplied correctly to the circuits of both relays, press the horn button and check the continuity of the switch to ground. If there is no continuity, check the circuit for an open circuit. If the circuit is OK, replace the horn switch.
7. If there is no conductivity in the switch, check the circuit between the relay and the switch for an open or short circuit.
Replacement
1. To gain access to the horn, remove the left front wheel liner (see Chapter Body).
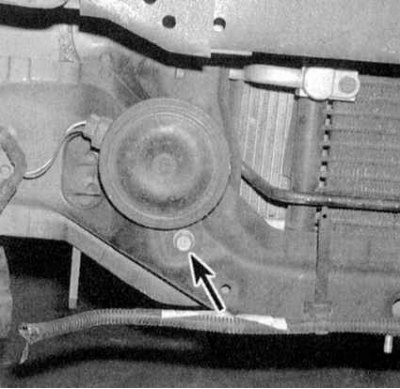
2. Disconnect the electrical connectors and remove the mounting bracket bolt (see accompanying illustration).
3. Installation is carried out in reverse order.