Attention. If the guides are worn, replace them before replacing the valve seats.
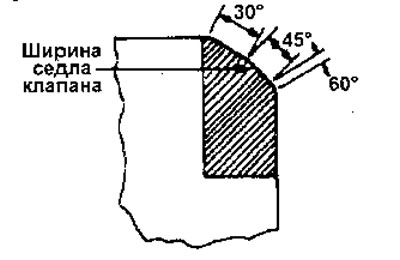
2. Carefully cut the seat at 45°, removing enough material to ensure a smooth and concentric surface of the seat.
3. Cut the top edge of the seat with a 30°cutter and the bottom edge of the seat with a 60°cutter. Check the width of the contact patch.
4. Make another very light pass with the router bit under the 45th. to remove any possible scoring caused by other cutters.
Valve seat width:
Standard value:
- Intake: 0.85 - 1.15 mm
- Release: 1.25 -1.55 mm
Limit value:
- Intake: 1.6mm
- Release: 2.0
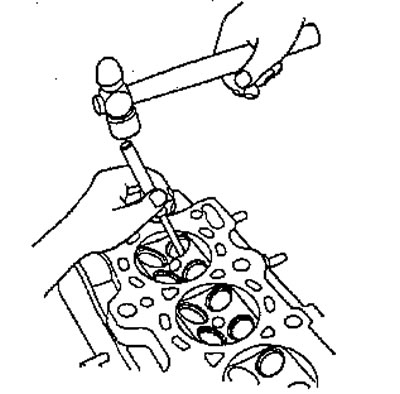
5. After rebuilding the seat, also check the valve:
Apply "Prussian glaze" on the valve chamfer, and insert the valve into its original position in the head, then press it against the seat and rotate it several turns around its axis.
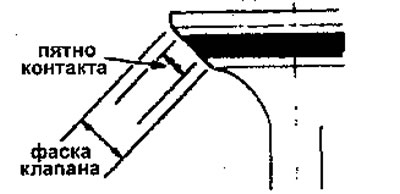
6. The contact patch between the valve and the valve seat should be in the middle part of the seat.
- If the contact patch is too high (closer to the valve stem), You should use a 60°cutter to "move" contact patch down and then another cutter at 45°to restore the width of the seat.
- If the contact patch is too low (closer to the edge of the valve). You should use a 30°cutter to "move" contact patch up, then another 45°cutter to restore the width of the seat.
Attention: finishing must always be done with a 45°cutter.
7. Insert the intake and exhaust valves into the head, and measure the valve stem installation height.
Installation height of valve stem of intake and exhaust valves:
- Nominal value: 53.17- 53.64 mm
- Limit value: 53.89 mm
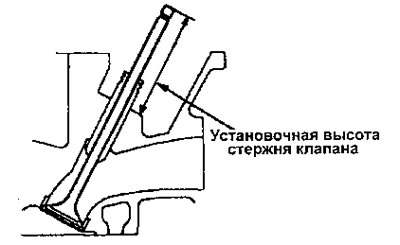
8. If the valve stem installation height is outside the specified value, replace the valve and recheck. If replacing the valve does not change the result, replace the cylinder head (The valve seat in the head is set too deep).
Replacing valve guides
Caution: Warm the cylinder head to 150°C before removing or installing guides.
Caution: Use gloves when handling hot cylinder heads.
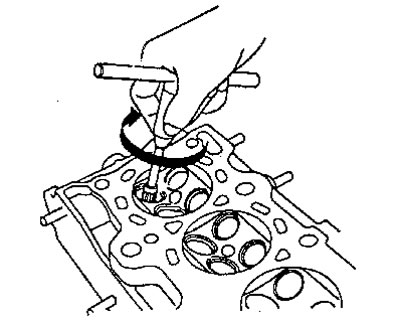
1. Knock out the valve guide from the cylinder block side.
2. Press in a new valve guide to the specified depth.
Valve guide installation height:
- Intake: 17.85 - 18.35 mm
- Release: 18.65-19.15 mm
Deployment
Attention. For new valve guides only.
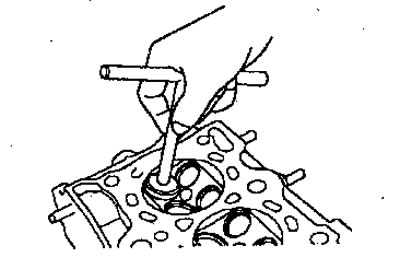
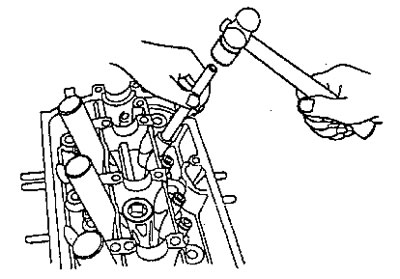
1. Coat both the reamer and valve guide with engine oil.
2. Rotate the reamer clockwise along the full length of the valve guide bore.
3. Continue rotating the reamer clockwise as you move it away from the hole.
4. Wash the guide completely in detergent and water to remove any remaining chips.
5. Check the valve clearance.