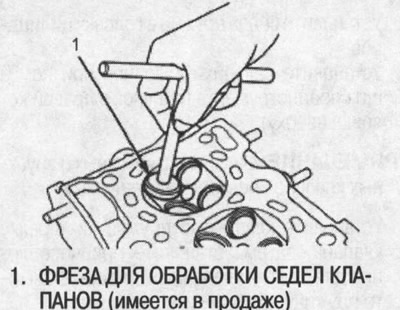
Note: If the guide bushings are worn (see above), replace them (see below) before machining valve seats.
2. Carefully machine the 45°seat, removing only as much metal as necessary to achieve a smooth, concentric seat surface.
3. Chamfer the top edge of the seat at 30°and the bottom edge at 60°. Check the valve seat collar width and adjust accordingly.
4. Make another light pass at a 45°angle and remove any burrs created by the other tool.
Valve seat collar width:
| Standard (new): | Inlet: | 0.85-1.15mm |
| Release: | 1.25-1.55 mm | |
| Limit: | Inlet: | 1.6 mm |
| Release: | 2.0 mm |

5. After regrinding the seat, check whether the valve is evenly attached to the seat: Apply a compound containing red lead to the valve face, insert the valve into its original place in the cylinder head, then lift and press it several times against the seat.

6. The actual seating surface, as indicated by the red lead compound, must be centered on the seat.
- If she is too high (closer to the valve stem), remachining with a sharpening angle of 60°and «lower» it, then go through another sharpening angle of 45°and restore the width of the valve seat belt.
- If it's too low (closer to the edge of the valve), remachining with a sharpening angle of 30°and «raise» it, then go through another sharpening angle of 45°and restore the width of the valve seat belt.
Note: The final cut should always be made with a 45°sharpening angle.
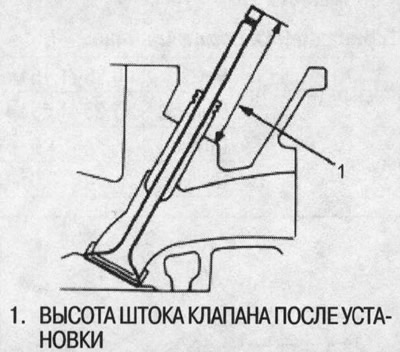
7. Insert the intake and exhaust valves into the cylinder head and measure the valve stem height after installation.
The height of the inlet, outlet valve stem after installation.
- Standard (new): 53.17-53.64mm
- Limit: 53.89mm
8. If the valve stem height after installation exceeds the specified limit, replace the valve and recheck. If it still exceeds the limit, replace the cylinder head; the valve seat in the head is too deep.