
Removal and installation
1. Remove the battery, protective cover and battery tray.
2. Remove the air intake duct (see chapter "Air intake and exhaust system").
3. Remove the air filter housing.
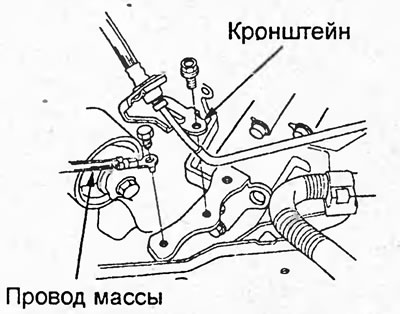
4. Loosen the bolt and disconnect the ground wire. Remove the clutch release hydraulic tube bracket.
Tightening torque - 10 Nm
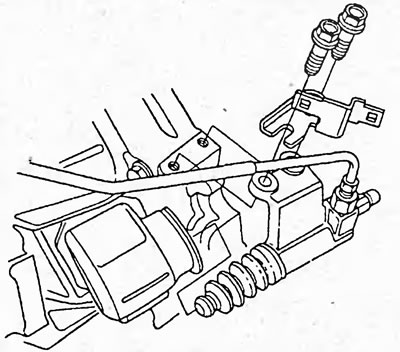
5. Loosen the bolts and remove the clutch release drive slave cylinder.
Attention:
- Do not damage the clutch hydraulic lines.
- After removing the slave cylinder, do not press the clutch pedal.
Tightening torque - 22 Nm
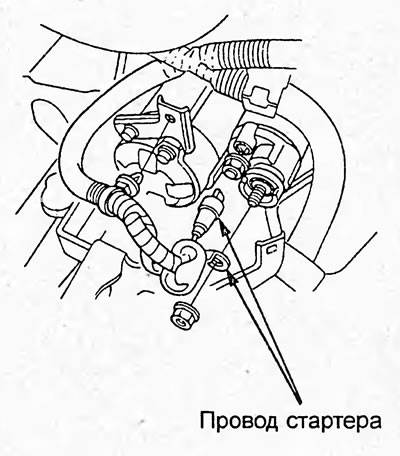
6. Disconnect the starter wire.
Tightening torque - 9 Nm
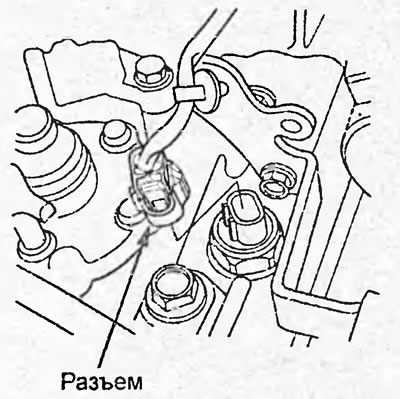
7. Disconnect the reversing light switch connector.
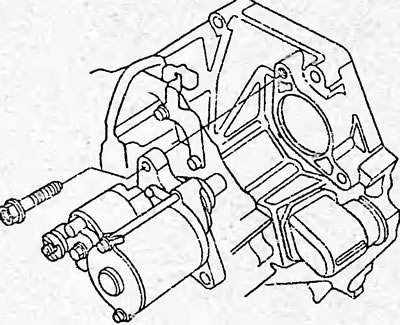
8. Loosen the bolts and remove the starter.
Tightening torque - 44 Nm
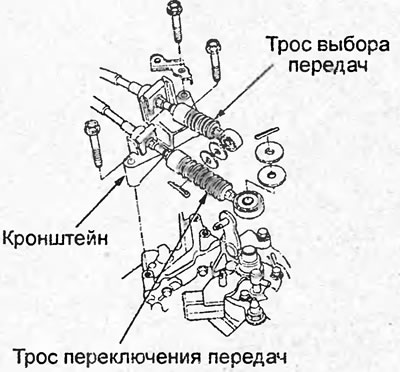
9. Loosen the bolts and remove the bracket. Then disconnect the transmission control cables.
Tightening torque: 27 Nm
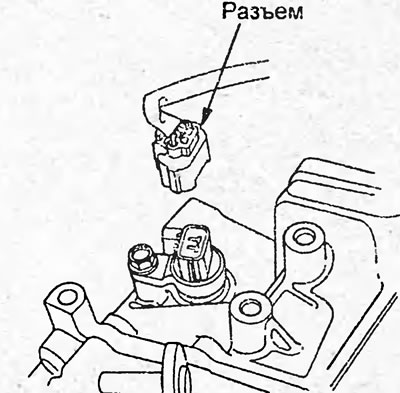
10. Disconnect the speed sensor connector.
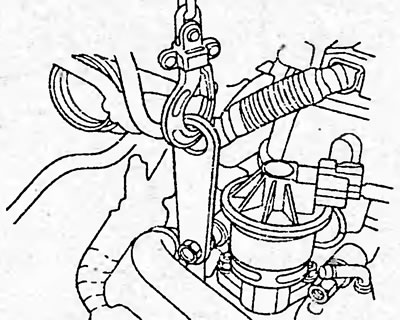
11. Install the hoist loop and tighten the bolt.
12. Remove the two upper gearbox mounting bolts.
Tightening torque - 64 Nm
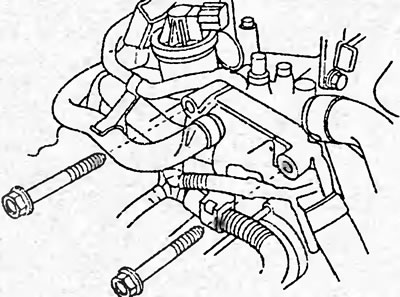
13. Loosen the bolts and nuts and remove the support bracket.
Tightening torque - 54 Nm
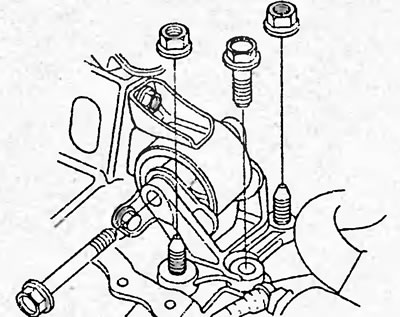
14. Remove the front engine mount bolt.
Tightening torque - 64 Nm
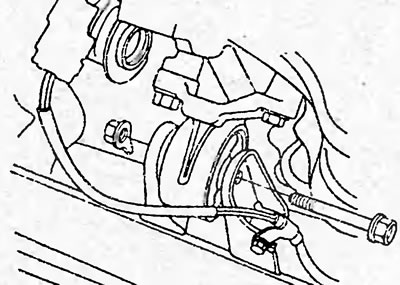
15. Loosen the bolts and remove the front engine mount.
Tightening torque - 54 Nm
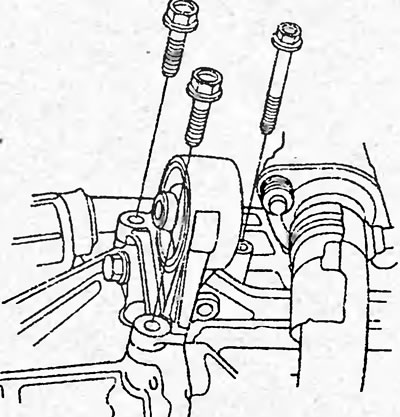
16. Jack up the car and place it on stands.
17. Drain the oil from the gearbox (see chapter "Maintenance and general check and adjustment procedures").
18. Remove the dirt protection.
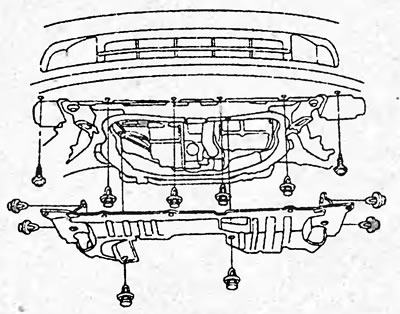
19. Remove the pipe "A" of the exhaust system (see chapter "Air intake and exhaust system").
20. Remove the drive shafts (see chapter "Drive shafts").
21. Remove the three bolts of the rear gearbox support.
Tightening torque - 59 Nm
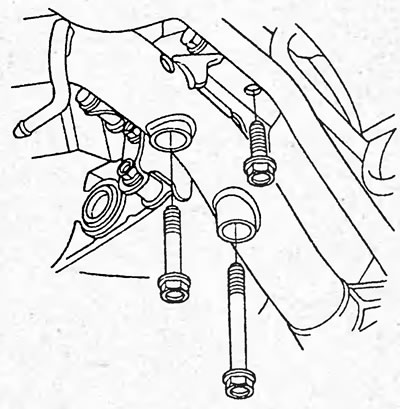
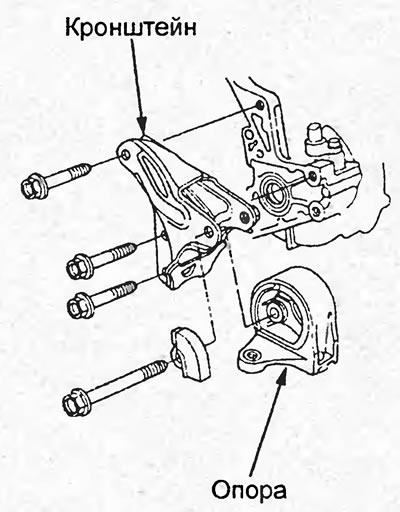
22. Loosen the bolts and remove the rear support and the rear support bracket of the gearbox.
Tightening torque - 64 Nm
23. Mark the bolts and subframe as shown in the figure and remove the subframe.
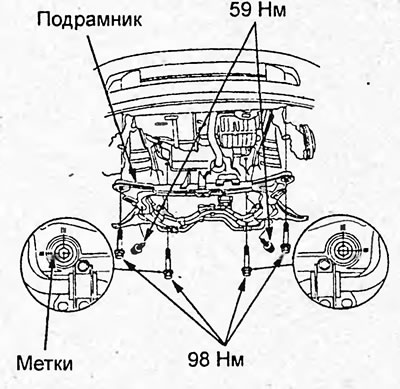
24. Loosen the bolts and remove the stiffener and lower casing.
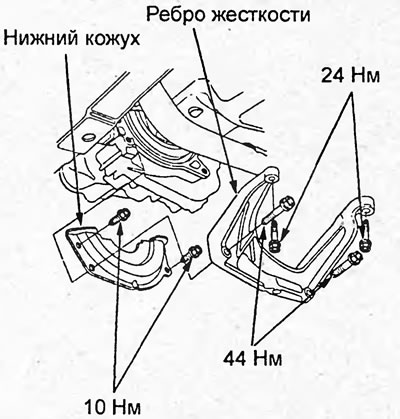
Models with D15B engine.
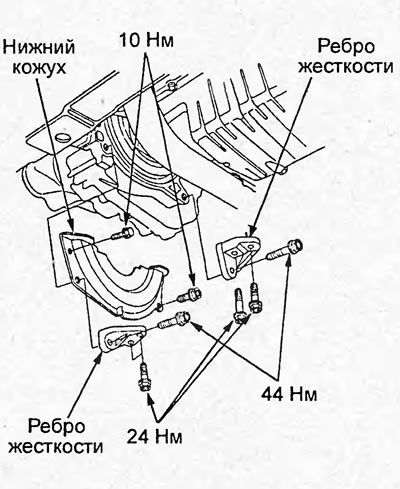
Models with D17A engine.
25. Place a jack under the gearbox and remove the three bolts.
Tightening torque - 64 Nm
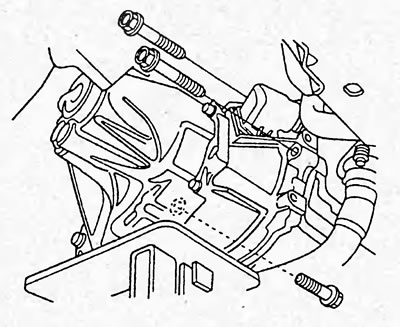
26. Move the gearbox away from the engine until the gearbox input shaft is completely clear of the clutch housing. Then lower the gearbox.
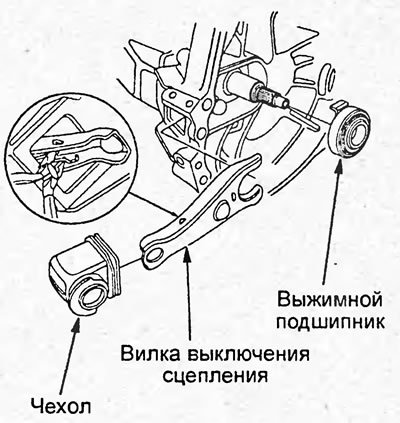
27. Remove the boot, clutch release fork and release bearing from the gearbox.
Note:
- Installation is carried out in the reverse order of removal.
- After installation:
- check that the clutch is working properly.
- check the correct operation of the gearbox, make sure that gear shifting is smooth and that there is no extraneous noise.
- check and, if necessary, adjust the front wheel alignment angles (see chapter "Suspension").