
2. Raise and securely support the vehicle with stands.
3. Disconnect the air intake hose and remove the battery tray.
4. Disconnect the starter wiring and remove it.
5. Disconnect the transmission ground cable and the reverse light switch wiring.
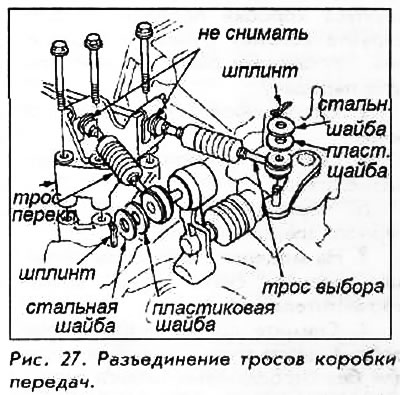
6. Remove the cable stand and disconnect the cables from the top of the transmission case. Remove the cables and stand together. Do not remove the clamps that attach the cables to the stand.
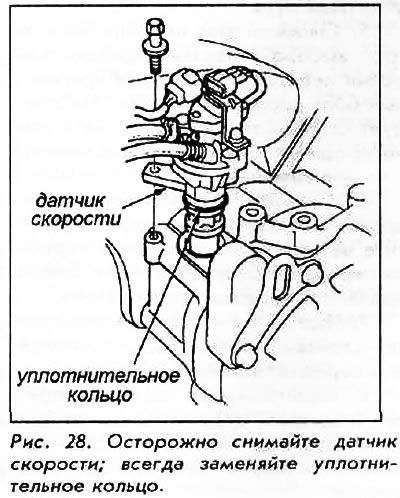
7. Disconnect the speed sensor connector and remove the sensor. The sensor hoses should remain connected.
8. Remove the front wheels.
9. Remove the engine splash shield and drain the gearbox oil.
10. Remove the mounting bolts and the clutch slave cylinder together with the pipe and push rod.
11. Remove the clutch hose retaining bolt and connector along with the line and hose.
Do not press the clutch pedal after removing the slave cylinder. Handle the pipe carefully so as not to bend it.
12. Remove the center beam and the receiving pipe.
13. Remove the lower control arm ball joint studs and nuts. Separate the ball joints from the lower control arms using only the appropriate tool.
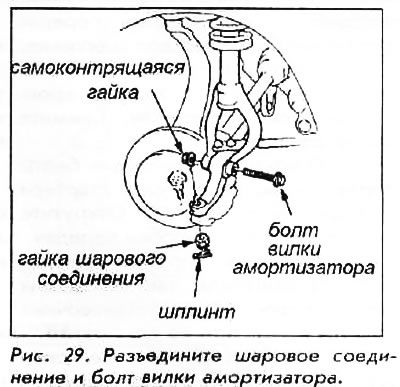
14. Unscrew the shock absorber fork bolt.
15. Pull the right and left half shafts out of the differential and intermediate shaft. Pull the inner joint and remove the right and left half shafts.
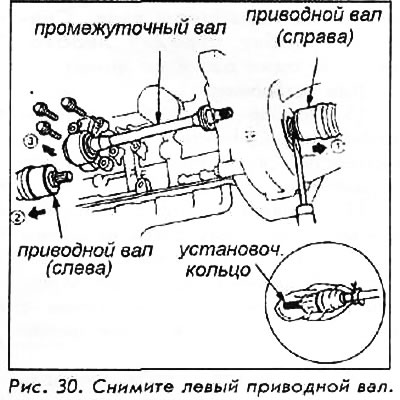
16. After unscrewing the three mounting bolts, lower the bearing support.
17. Remove the intermediate shaft from the differential.
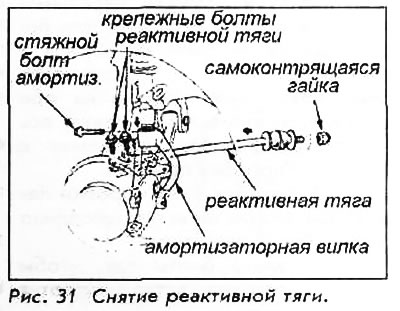
18. Unscrew the right shock absorber tension bolt and then remove the shock absorber fork and the shock absorber itself. After unscrewing the bolts and nuts, remove the right reaction rod.
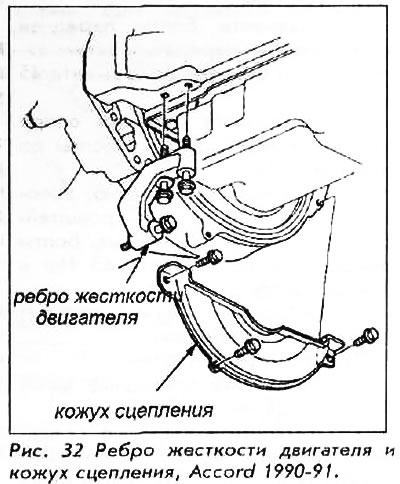
19. Remove the engine stiffener and clutch housing.
20. Remove the intake manifold bracket.
21. Remove the rear engine support bracket strut and remove the three mounting bolts from the bracket.
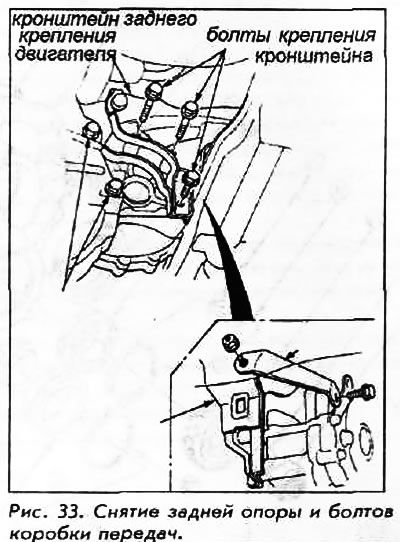
22. Unscrew the gearbox housing mounting bolt from the engine side. Swing the right half shaft toward the inner wing.
23. Place a suitable jack under the gearbox and lift the gearbox slightly to remove its weight from the supporting supports.
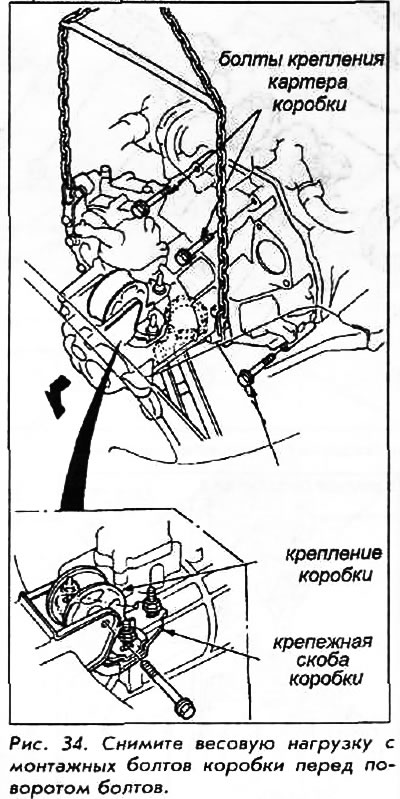
24. Loosen the gearbox mounting bolt and loosen the support bracket nuts.
25. Unscrew the three gearbox housing mounting bolts.
26. Remove the gearbox from the vehicle.
To install:
27. Make sure the 4 locating pins are in place.
28. Raise the gearbox to installation height.
29. Insert the 3 gearbox mounting bolts and tighten them to 65 Nm.
30. Install the strut and transmission support bracket. Insert the through bolt and tighten it. Make sure the engine is level and tighten the 3 nuts on the support bracket to 55 Nm. Then tighten the through bolt to 65 Nm.
31. Install the gearbox housing mounting bolts on the engine side and tighten them to 65 Nm.
32. Install the 3 rear engine bracket bolts and tighten them to 55 Nm.
33. Install the rear engine bracket strut. Tighten the mounting bolt to 39 Nm and then the mounting nut to 21 Nm.
34. Install the intake manifold bracket and tighten the bolts to 22 Nm.
35. Install the clutch cover and tighten the bolts to 12 Nm.
36. Install the engine stiffener rib and tighten the mounting bolts. Tighten the rib mounting bolt to the gearbox housing to 39 Nm and then the 2 rib mounting bolts to the cylinder block to 39 Nm, starting with the bolt closest to the gearbox.
37. Install the reaction rod. Tighten the rod mounting bolts to 105 Nm and the nut to 44 Nm.
38. Install the shock absorber fork. Tighten the shock absorber clamp bolt to 44 Nm.
39. Insert the secondary shaft.
40. Install a NEW locating ring onto the end of each axle shaft. Insert the right and left axle shafts. Rotate the right and left steering knuckles fully outward and insert the axle into the differential until the spring clip snaps into the differential axle gear.
41. Install the shock absorber fork bolt and the ball joint nut into the lower arm. Tighten the fork bolt with the nut to 55 Nm, without allowing the bolt to rotate. Tighten the ball joint nut to 55 Nm. Insert a new cotter pin.
42. Install the exhaust pipe and center beam. Tighten the beam bolts to 39 Nm.
43. Install the clutch hose connector and clutch slave cylinder to the gearbox housing. Tighten the cylinder mounting bolts to 22 Nm.
44. Install the speed sensor and tighten the mounting bolt to 18 Nm.
45. Attach the shift cable and selector cable to the gearshift lever arm and selector lever respectively. Tighten the cable mounting stand bolts to 22 Nm. Insert new cotter pins.
46. Connect the reversing light switch connector.
47. Install the starter. Tighten the 10x1.25 mm bolt to 45 Nm and the 12x1.25 mm bolt to 75 Nm. Connect the starter wiring.
48. Connect the gearbox ground cable.
49. Install the front wheels.
50. Fill the gearbox with oil of the correct quantity and type.
51. Lower the car.
52. Install the battery and connect the wires to the battery.
53. Check the free travel of the clutch pedal.
54. Start the engine and check how smoothly the gearbox operates.
(The article is based on information from the website: HondaBook.ru)