
Examination
Drive, or V-shaped (as they are sometimes called), belts are located at the front of the power unit and play an important role in the operation of the engine and many other vehicle systems. Belts are subject to wear over time, and therefore, should be regularly inspected in accordance with the vehicle's routine maintenance schedule in order to avoid serious engine failures, the correction of which can be a pretty penny.
Note. The family of V-shaped belts also includes multirib belts.
The number of drive belts used depends on the vehicle equipment. Belts are used to drive auxiliary units such as generator, steering and water pumps, air conditioner compressor, etc. Depending on the pulley layout, more than one unit can be driven by one belt.
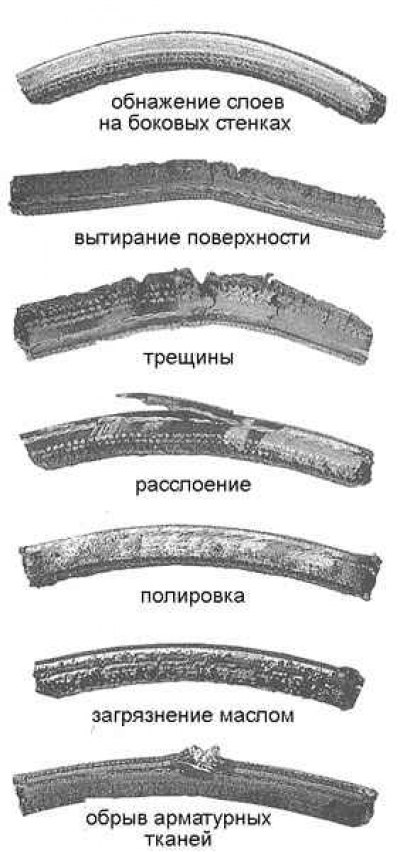
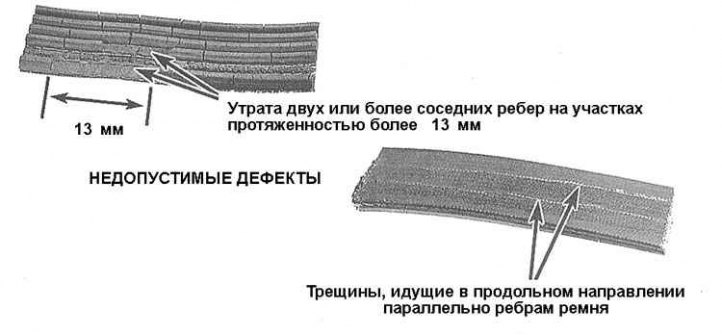
1a. Stop the engine, open the hood and look for the drive belts at the front of the power unit. Lighting yourself with a flashlight, feel the belts along their entire length with your fingers, checking for cracks and delaminations. The presence of scuffs, polished areas and other obvious defects on the belt is also unacceptable (see accompanying illustrations).

1b. Inspect the belts on both sides, for which twist them.
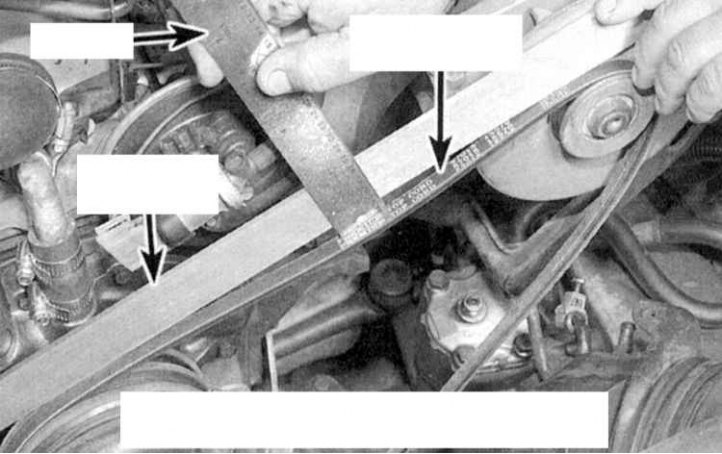
2. Checking the belt tension is done by pressing it with your thumb in the area in the middle between two adjacent pulleys. The pressure must be firm enough. The parameter characterizing the belt tension force is the value of its deflection when pressed (see accompanying illustration). As a rule, if the pulleys are spaced from each other at a distance of 180 to 280 mm, the deflection should be 6.4 mm, with a distance between the pulleys of 305÷405 mm, the deflection of the V-belt should be 12.5 mm, the multi-ribbed belt should be 6.4 mm.
Adjustment
If necessary, the adjustment of the tension force of the drive belt is carried out by shifting the unit driven by it in the appropriate direction.
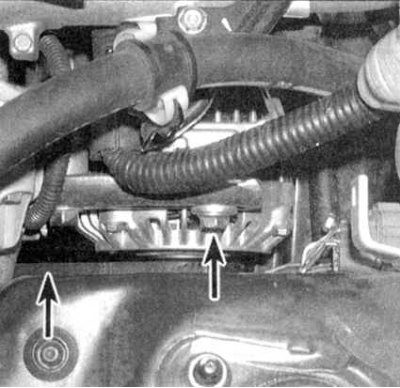
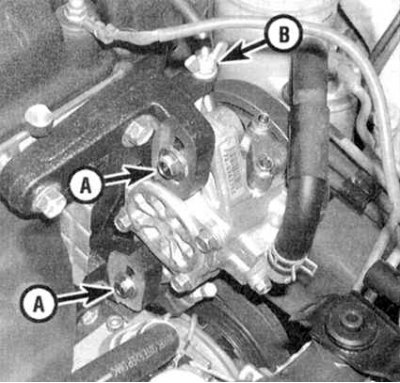
1a. To adjust the tension of the generator drive belt, loosen the axial and adjusting bolts of the latter and move the unit in the appropriate direction (see accompanying illustration).

1b. After completing the adjustment, tighten the bolts. The K / V compressor, on the contrary, is rigidly fixed, however, it is equipped with a tension roller that allows you to adjust the belt tension (see accompanying illustration).
1c. To adjust the tension of the steering pump drive belt, loosen the adjusting bolts, then use the wing nut on some models, or move the pump housing in the appropriate direction on others. 2. After completing the adjustment, make sure the belt tension is correct (see above). Repeat the adjustment procedure if necessary.
Replacement
1. To replace the drive belt, loosen the unit/tensioner mounting bolts as you did when adjusting and slip the belt off the pulleys. It makes sense to replace all drive belts at the same time. Before finally removing the belt from the car, mark the direction of rotation of the belt and the pattern of its laying in the pulley streams.
2. When buying new belts, take the old ones with you as samples - replacement belts must strictly match the old ones in size.
3. After replacement, adjust the tension of the new belts (see above).