
Internal door opening handle
1. Remove the door panel and plastic protection, see Section 12.
2. Loosen the mounting screws, disconnect the latch rod and remove the door handle.
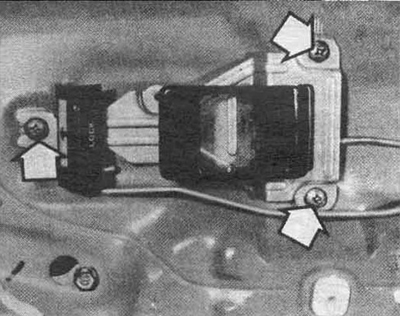
Fig. 13.2a Screws for fastening the internal door handle
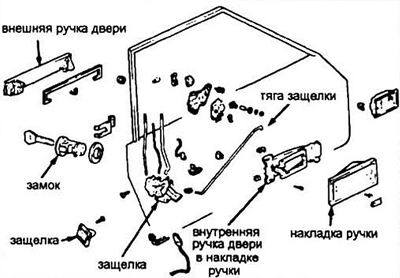
Fig. 13.2b Details of the handle, latch and lock
3. Installation is carried out in the reverse order of removal.
External door handle
4. Remove the door panel and plastic protection (see Section 12).
5. Disconnect the drive rods connected to the outer door handle.
6. Remove the outer handle fasteners and remove the handle.
7. Installation is carried out in reverse order.
Latch
8. Remove the inner door handle, see Section 13.
9. Disconnect the rods.
10. Loosen the screws securing the latch mechanism located at the outer edge of the door.
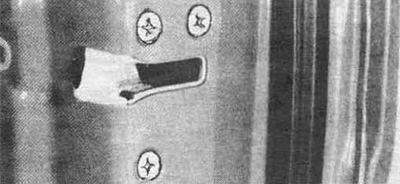
Fig. 13.10 Latch mechanism mounting screws
11. Remove the latch mechanism.
12. Installation is carried out in the reverse order of removal.
Lock
13. Remove the door panel and plastic protection.
14. Remove the outer door handle (see steps 4-7).
15. Remove the control rod and locking ring and take the lock out of the door.
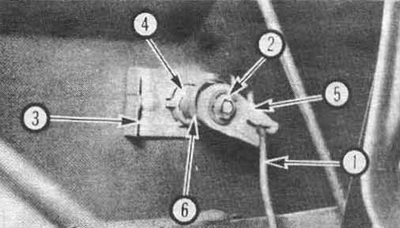
Fig. 13.15 Door lock assembly: 1 - control rod; 2 - locking ring; 3 - locking bracket; 4 - lock; 5 - traction lever.
16. Installation is carried out in the reverse order of removal.