
Withdrawal
1. Remove the door trim panel (see Section 12). Disconnect all wires and push them through the hole so that they do not interfere with dismantling.
2. Open the door and place a jack under it or use the services of an assistant.
3. Outline the positions of the door hinges.
4. Turn off bolts of fastening of a door to a loop and remove a door.
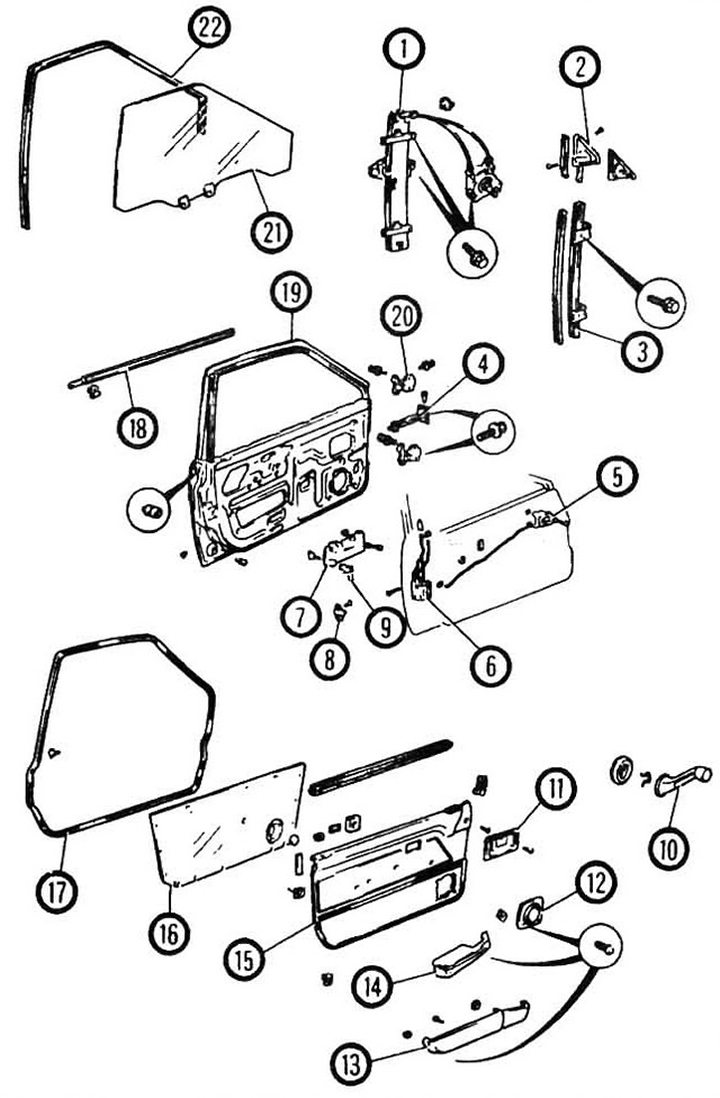
Pic. 11.4a Assembling the front door (Shuttle model): 1 - regulator; 2 - front damper; 3 - front guide; 4 - emphasis; 5 - door handle; 6 - latch; 7 - external handle; 8 - latch; 9 - lock; 10 - regulator handle; 11 - door handle pad; 12 - speaker protection; 13 - pocket; 14 - armrest; 15 - door panel; 16 - plastic protection; 17 - sealant; 18 - external molding; 19 - door; 20 - door hinge; 21 - glass; 22 - guide.
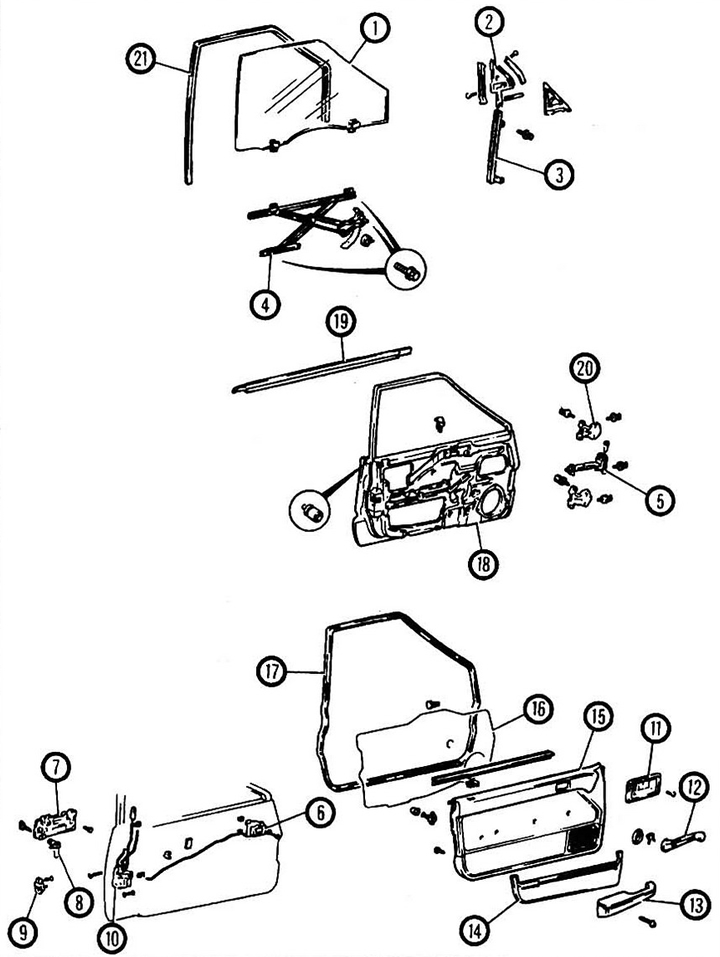
Pic. 11.4b Assembling the front door (other models). 1 - glass; 2 - damper; 3 - guide; 4 - regulator; 5 - emphasis; 6 - interior door handle; 7 - outer door handle; 8 - lock; 9 - latch; 10 - latch; 11 - handle pad; 12 - regulator handle; 13 - armrest; 14 - pocket; 15 - door panel; 16 - plastic protection; 17 - door seal; 18 - external molding, 20 - loop; 21 - guide.
Installation and adjustment
5. Installation is carried out in the reverse order.
6. Checking the correct position of the door and adjusting:
- A) adjustment up and down and back and forth is carried out with loose screws securing the door hinge to the body.
- b) adjustment of the door latch is carried out with the screws securing the latch to the door loosened.