
Removal and installation
1. Remove the door panel and plastic protection, see Section 12.
2. Remove the inner door handle, see Section 13.
3. Lower the glass so that the rear mounting bolt can be unscrewed through the door opening and remove the front bolt.
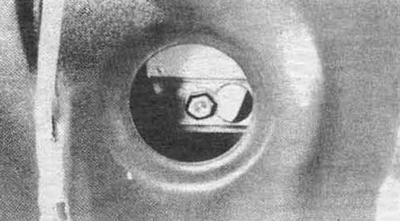
Pic. 14.3a Rear glass guide bolt
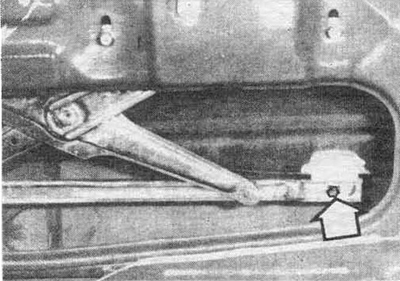
Pic. 14.3b Front glass guide mounting bolt
4. On the rear door, remove the retaining screws, remove the fixed glass and the partition wall.
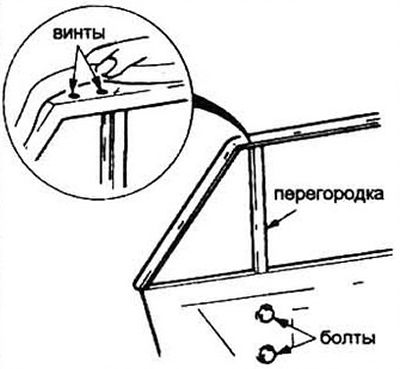
Pic. 14.4 Fixing the fixed glass and rear door partition
5. Raise the glass and remove it from the door slot, tilt it and remove it from the door.
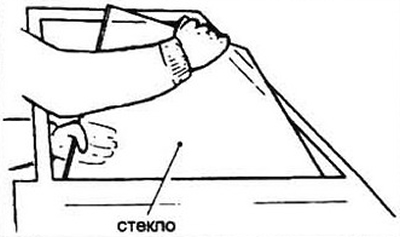
Pic. 14.5 Removing the door window glass
6. Installation is made in the return to removal order.
Adjustment
7. Glass adjustment is done by trial and error with a wrench and a screwdriver. The main methods of regulation:
- A) lining adjustment: change the position of the lift rail so that the glass moves vertically and has the same fit around the perimeter when closed.
- b) back and forth adjustment: move the glass guide until the rear end of the glass in the raised position with the door closed is approximately 10 mm from the door seal holder.
- V) vertical adjustment: change the position of the upper stops.
- G) adjusting the position of the glass relative to the seal: change the position of the glass guides. Make reference marks while adjusting.
- d) flapper tilt assembly adjustment: loosen the flapper nut and adjust its position. Tighten the nut.
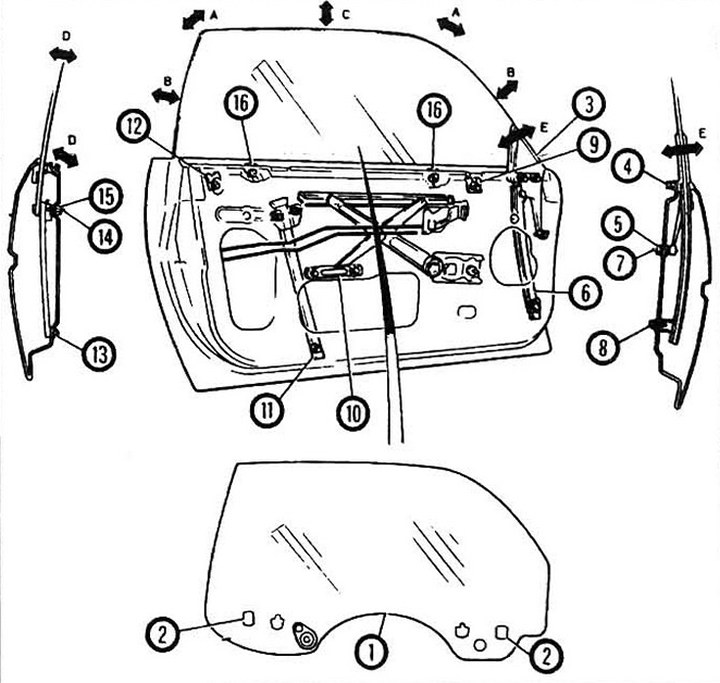
Pic. 14.7 Window adjuster parts 1 - glass; 2 - stopper; 3 - shutters; 4 - bolt; 5 - nut; 6 - front guide; 7 - regulator; 8 - bolt; 9 - upper stopper; 10 - lift guide; 11 - rear guide; 12 - upper stop; 13 - nut; 14 - regulator; 15 - locknut; 16 - stabilizer; A - angular adjustment; 8 - forward-back adjustment; C - vertical adjustment; D - adjustment of the relative position of the glass and seal; E - damper tilt adjustment.