
2. Remove the steering wheel, see chapter 10.
3. Remove the mounting screws under the steering column.
4. Remove the glove box and tray (if installed).

Pic. 18.4a Instrument panel - hatchback and sedan 1 - headlight brush switch; 2 - ventilation grille; 3 - hours; 4 - latch; 5 - compartment for gloves; 6 - latch; 7 - ashtray; 8 - nut; 9 - cigarette lighter; 10 - ashtray holder; 11 - lower panel of the instrument panel; 12 - box for coins; 13 - radio panel; 14 - ventilation grille; 15 - front stove control board; 16 - rear window heater switch; 17 - air damper control button; 18 - rear fog lamp switch; 19 - side panel lighting instrument panel; 20 - button; 21 - washer; 22 - nut; 23 - instrument panel illumination regulator; 24 - side panel.

Pic. 18.4b Instrument panel - CRX 1 - radio; 2 - central office; 3 - hours; 4 - latch; 5 - compartment for gloves; 6 - latch; 7 - bottom panel; 8 - cigarette lighter; 9 - nut.
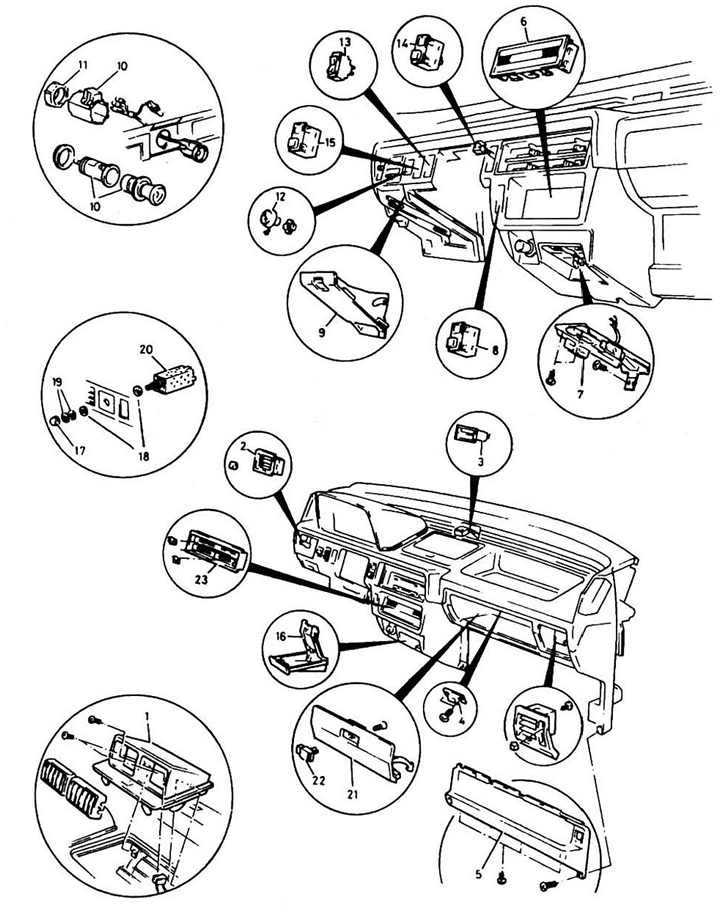
Pic. 18.4v Instrument panel - Shuttle 1 - ventilation; 2 - ventilation; 3 - hours; 4 - latch; 5 - pallet; 6 - radio panel; 7 - ashtray holder; 8 - headlight brush switch; 9 - compartment for coins; 10 - cigarette lighter; 11 - nut; 12 - air damper control button; 13 - sun visor switch; 14 - rear window heating switch; 15 - rear fog lamp switch; 16 - ashtray; 17 - button; 18 - nut; 19 - washer; 20 - dashboard light control; 21 - compartment cover for gloves; 22 - latch; 23 - the front control panel of the stove.
5. Remove the ashtray.
6. Remove the radio, see chapter 12.
7. Remove the front panel of the instrument panel.
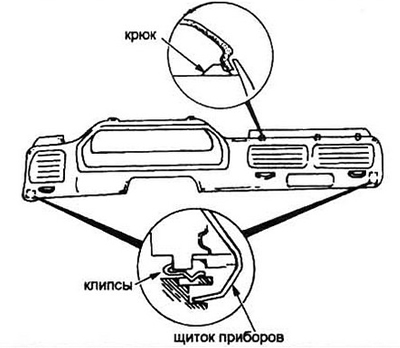
Pic. 18.7 Fastening the front panel of the instrument panel
Note: The front panel is attached to the instrument panel with screws, latches or clips. Don't break the plastic latches.
8. Installation is made in the return to removal order.