
Note: Use an upholstery tool kit or similar when removing components.
Avoid scratching the body. Wear gloves to protect your hands.
1. Loosen screws A and clamp B securing the rear wheel arch protector C.
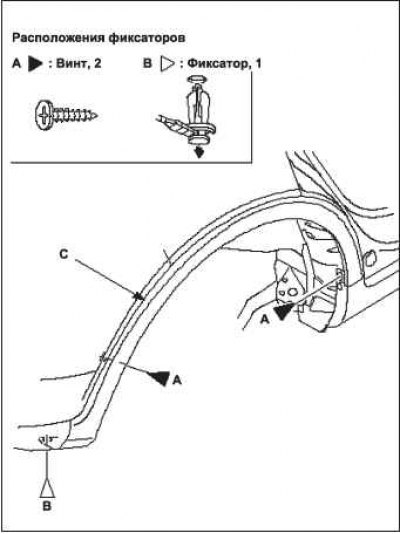
2. Carefully pull out the rear edge of the rear wheel arch A to release the hooks B.
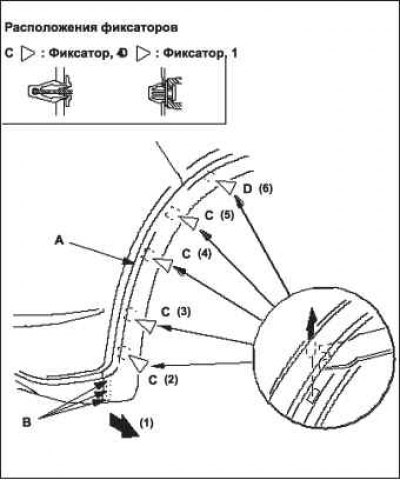
3. Working from the bottom to the middle of the wheel arch, lift the wheel arch protector clamp part with a special tool to release the clips (C, D).
Note: Do not damage the painted part around the clip hole on the rear outer panel when removing the clip. If you damage the painted part, repair it with touch-up paint to protect it from corrosion.
4. Working from the bottom to the middle of the wheel arch, lift the wheel arch protector clamp part A with a special tool to release the clamps.
Note: Do not damage the painted area around the clip holes on the rear outer panel when removing the clips. If you damage the painted area, repair it with touch-up paint to protect it from corrosion.
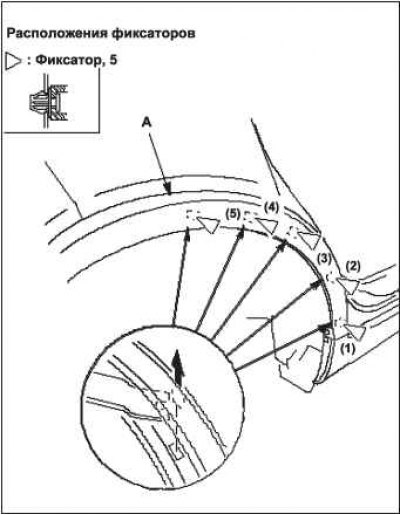
5. Perform the wheel arch protector installation operations in the reverse order of removal, observing the following: check the clamps for damage or whitening from the load and, if necessary, replace them with new ones.
Press firmly on the fasteners and fasteners to ensure a secure connection.