
Note. The image shows the type of car with a left-hand drive column (LRC), right-hand steering column (PKK) is symmetrical.
When removing components, use an upholstery tool kit or similar.
1. Fully lower the door glass.
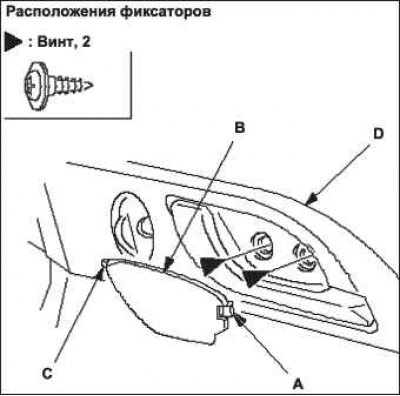
2. Remove a casing of fastening of a mirror.
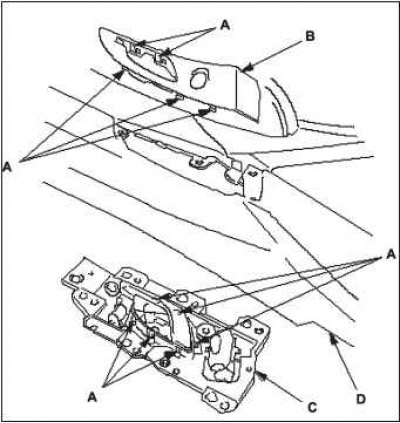
3. Using a handy tool, press the rear hook A and lower the inner handle cap B down onto the front hook C, then remove the cap and remove the screws securing the inner handle D.
4. Remove the screw from under the take-up compartment cover A.

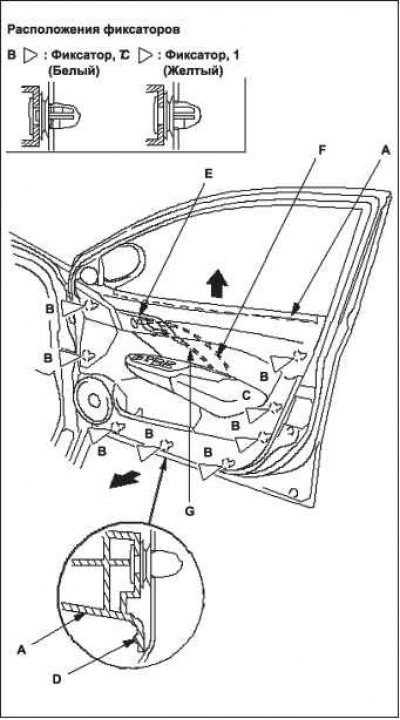
5. Remove door panel A by bending it as little as possible to avoid dents and damage.
Start at the bottom edge of the door panel, release the latches (B, C), located just above the D marks on the edge of the panel with a commercially available trim removal tool.
Disconnect the top clips.
Starting from the back, pull the door panel up.
Note. To prevent damage to the connection of the inside handle E, lock cable F and inside handle cable G), do not forcefully pull the panel up.
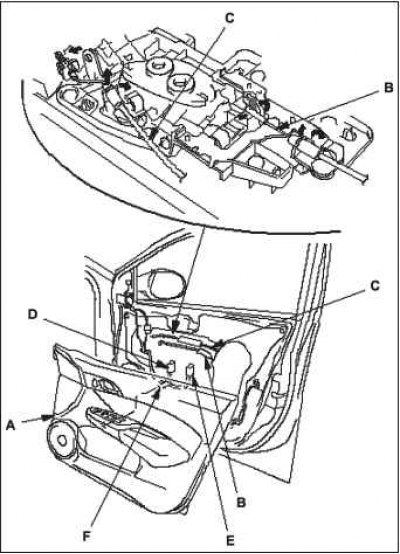
6. While holding door panel A, disconnect inner handle cable B, lock cable C, and electric mirror switch connector D (from the driver's side), power window switch connector E, then unhook the door harness clip F and remove the door panel. Be careful not to bend the cables.
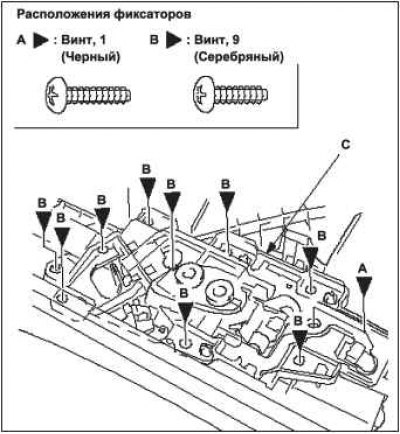
7. Remove the screws (A, B), fastening the inner handle C.
8. Unhook hooks A if necessary, then remove interior handle trim panel B and handle C itself from door panel D.
9. Perform panel installation operations in the reverse order of removal observing the following:
Check for damage or stress whitening on cable clips and retainers and replace with new ones if required.
During replacement, it is necessary to secure the cable of the lock A with the clamp B, setting the lock to the unlocked position, as shown in the figure.
Make sure that the connector block is properly connected and that the cables are securely attached.
Make sure the window and electric door lock are working properly.