
Note. Wear protective gloves.
1. Remove the following parts:
- door panel;
- panel bracket.
2. Remove plastic cover A.
Remove plug caps B.
Disconnect the power window harness connector C, the power door lock actuator connector D, and remove the clips E.
Remove the aluminum tape F, then the tweeter harness G from the clamp H.
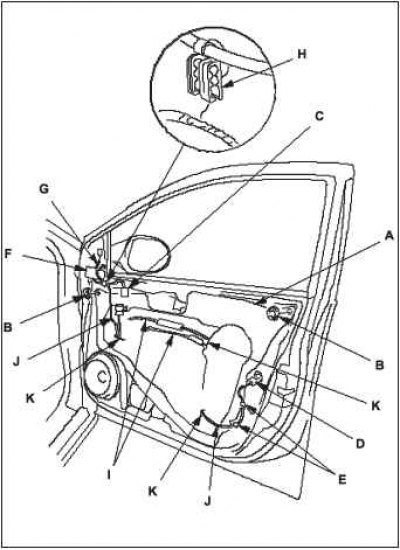
3. Pass the cable I and wire harnesses J through the holes K in the plastic cover, then remove them.
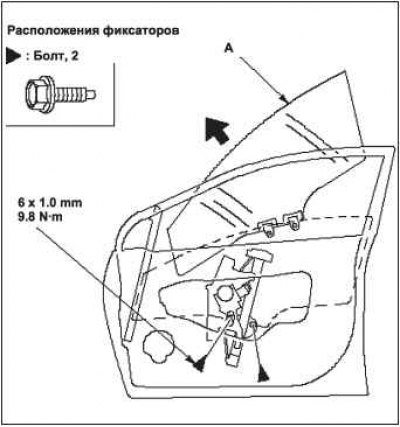
4. Gently lift glass A until you see the bolts, then remove them. Carefully remove the glass from the frame. Be careful not to drop the glass inside the door.
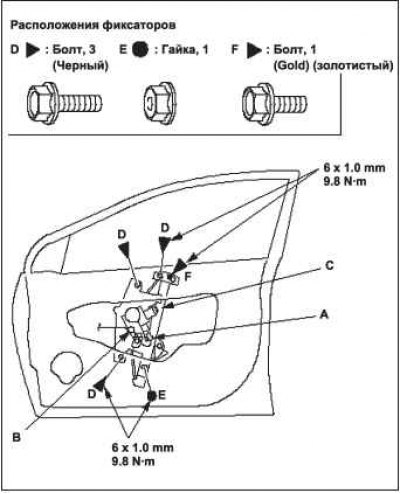
5. Disconnect connector A and harness clamp B from regulator C.
6. Unscrew bolts D, nuts E and loosen bolt F, then remove the regulator through the hole in the door.
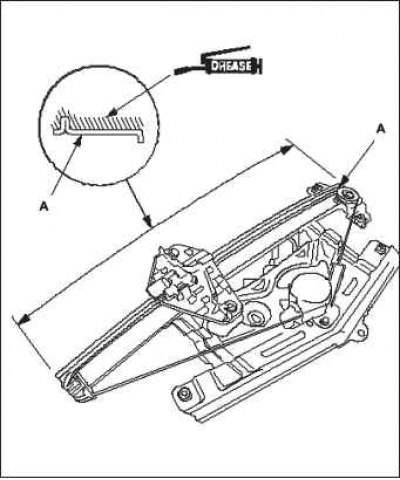
7. Apply multipurpose grease to all sliding surfaces of gearbox A shown in the figure.
8. Carry out the installation operations of the unit in the reverse order of removal, observing the following:
Move the glass down, then up to check that it moves freely without binding.
Make sure there is no gap between the glass and the glass chute when the window is closed.
Adjust the position of the glass if necessary.
Check for water leaks.
Take a test drive and pay attention to wind noise and vibration.
When reinstalling the door panel, make sure the plastic cover is installed correctly and secured around the outer perimeter to keep water out.
 |  |
Make sure the door drive closes and the power windows and mirrors work properly.