
Removal and installation
Front seat belts
Warning: If the front seat belts are not handled correctly, the seat belt pretensioner may accidentally activate and injure you (see chapter "Operating manual").
Caution: Do not disassemble the seat belt pretensioner.
1. Turn the ignition key to the "LOCK" position.
2. Disconnect the cable from the negative battery terminal and wait at least 1 minute.
3. Move the front seats as far forward as possible.
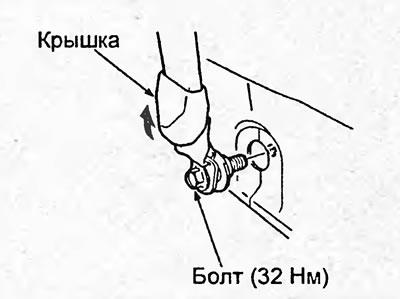
4. Lift up the front seat lower seat belt anchor bolt cover as shown in the illustration and remove the bolt.
Tightening torque - 32 Nm
5. Remove the lower center pillar trim (see section "Interior trim").
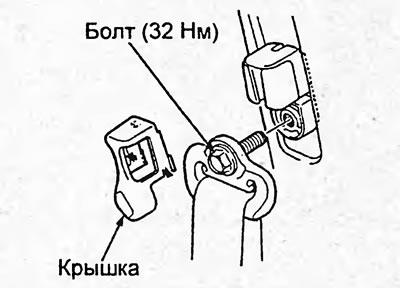
6. Remove the front seat belt upper anchor bolt cover as shown in the figure and loosen the bolt.
Tightening torque - 32 Nm
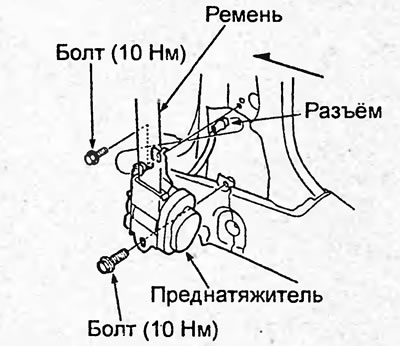
7. Disconnect the connector. Loosen the seat belt pretensioner mounting bolts, and then remove the seat belt and pretensioner.
8. Remove the upper center pillar trim (see section "Interior trim").
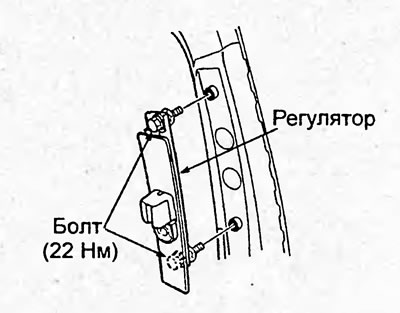
9. Remove the front seat belt anchor point height adjuster.
10. Installation is carried out in the reverse order of removal.
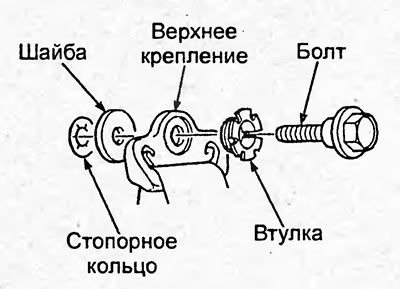
Upper seat belt anchorage.
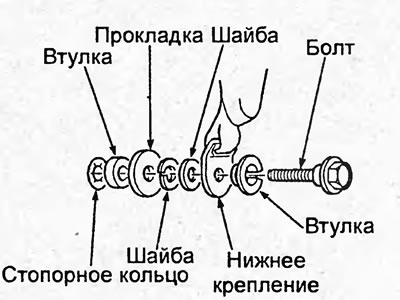
Lower seat belt anchorage.
11. After installation, turn the ignition key to the "ON" position and check that the air bag/seat belt pretensioner (SRS) indicator comes on and goes out after 6 seconds. If the indicator does not go out, the system is faulty.
Front seat belt buckles
1. (Some models) Before carrying out any work, make sure that you know the access code for the radio. After disconnecting the battery terminal, the radio is blocked and can only be unlocked by entering the code.
2. Disconnect the cable from the negative battery terminal and wait at least 3 minutes.
3. Remove the front seat (see section "Seats").
4. Remove the seat side trim.
5. Disconnect the clamps.
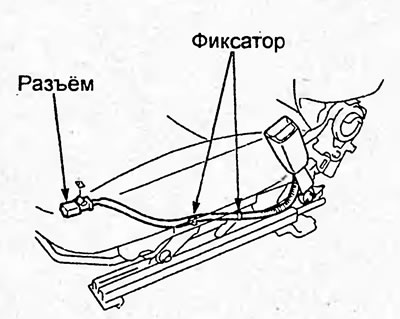
Type 1.
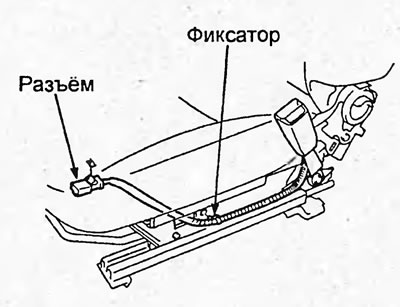
Type 2.
6. (Type 1) Raise the pillow as high as possible.
7. Loosen the bolt and remove the seat belt buckle.
Tightening torque - 32 Nm
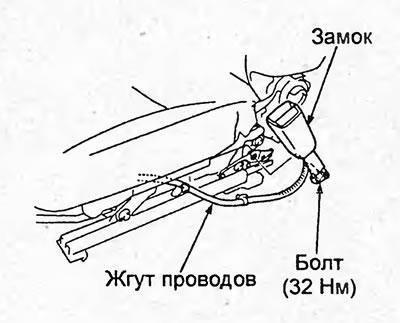
8. Pull the wire through the hole.
9. Installation is carried out in the reverse order of removal.
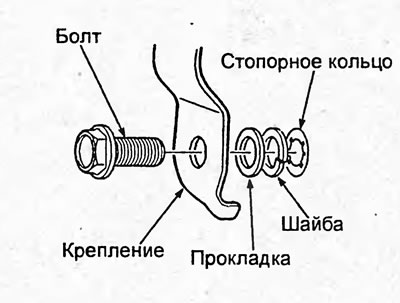
Fastening the seat belt buckle.
Rear seat belts
Caution: Do not disassemble the seat belt pretensioner.
1. Remove the rear seat cushion (see section "Seats").
2. Loosen the bolt and remove the lower seat belt mount.
Tightening torque - 32 Nm
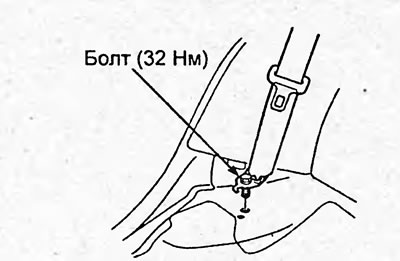
Sedan.
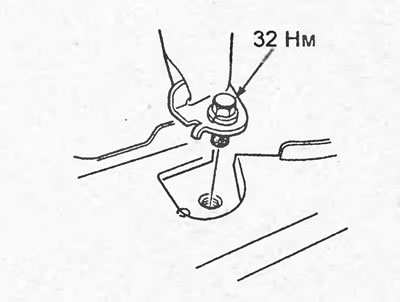
Hatchback.
3. Remove the rear shelf (see section "Interior trim").
4. Loosen the screw and bolt, then remove the seat belt and pretensioner.
Tightening torque - 32 Nm
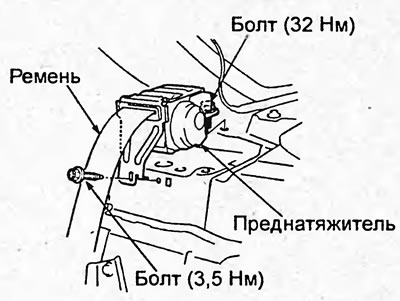
Sedan.
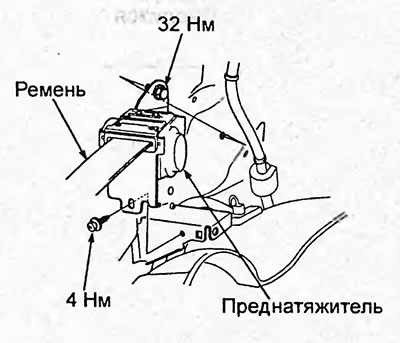
Hatchback.
5. Installation is carried out in the reverse order of removal.
Center seat belt and rear seat belt buckles
1. Remove the rear seat cushion (see section "Seats").
2. Loosen the bolts and remove the seat belt buckles.
Tightening torque - 32 Nm
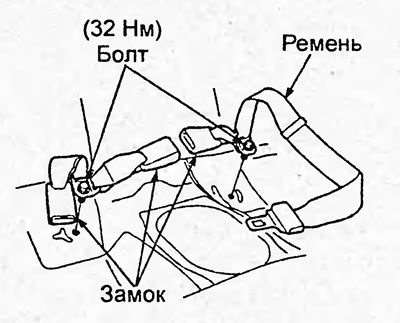
Sedan.
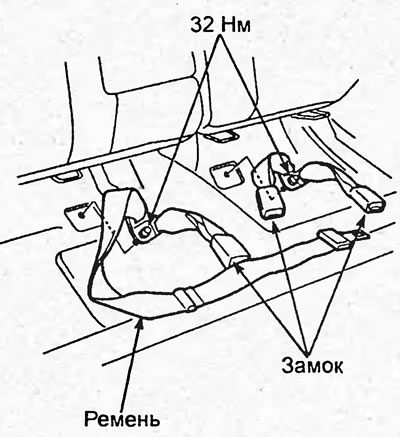
Hatchback.
3. Installation is carried out in the reverse order of removal.
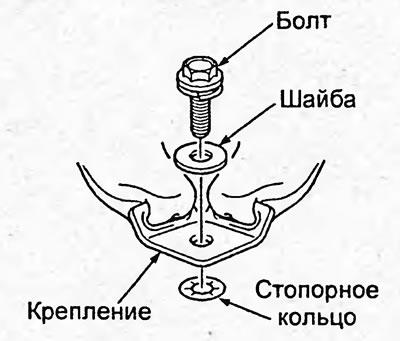
Fastening the seat belt buckle.
Checking the seat belt
1. Make sure the seat belt is installed correctly.
2. Check the seat belt for damage and deformation of metal parts. If there is damage, the belt must be replaced.
3. Make sure the seat belt can be pulled out freely.
4. Make sure that the pretensioner locks the seat belt when the belt is quickly tightened.
5. Remove the seat belt pretensioner.
6. Make sure that the seat belt can be pulled out at a retractor angle of 15° or less, and that the belt cannot be pulled out at an angle of 40° or more.
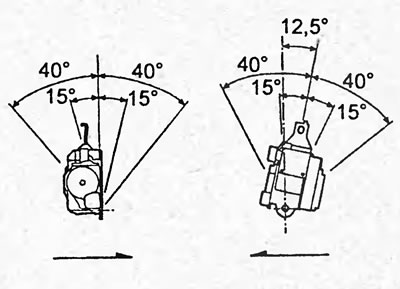
Front seats.
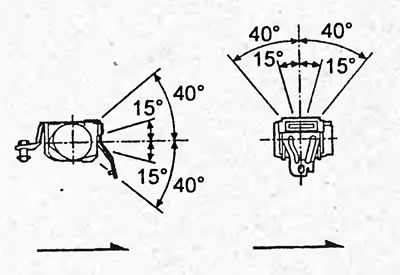
Back seat (side seat belts).
(Full version on the source website: Hondabook.ru)