
Removal and installation
Note: When removing the roof trim, refer to the assembly drawing "Roof Trim".
1. Remove the front pillar trim (see section "Interior trim").
2. Remove the upper center pillar trim (see section "Interior trim").
3. Remove the interior rearview mirror.
4. (Models with hatch) Remove the interior/local lighting bulb.
5. (Models without sunroof) Remove the local lighting lamp.
6. Remove the interior light bulb.
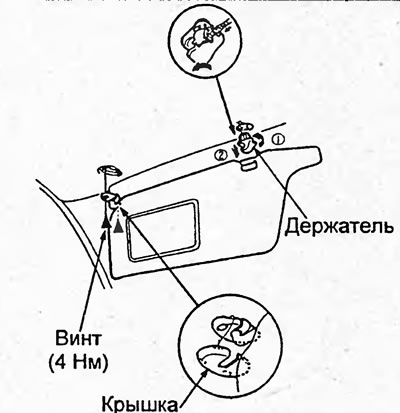
7. Remove the covers, unscrew the screws, and then remove the sun visors and holders.
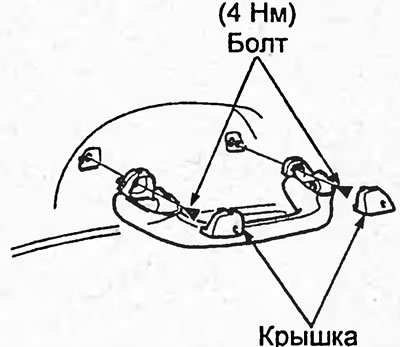
8. Lower the auxiliary handle and remove the covers. Loosen the screws, then remove the auxiliary handle.
9. Remove the roof trim.
a) (Models with hatch) Remove the plug.
b) (Sedan) Remove the rear pillar upper trim (see section "Interior trim").
c) Remove the front and rear side door seals.
g) (Models with hatch) Disconnect the clips and pins and fold back the front edge of the roof trim.
d) Disconnect the clips from the body, then disconnect the clips and remove the roof trim.
e) (Sedan, models without sunroof) Remove the tape and disconnect the wiring harness from the roof.
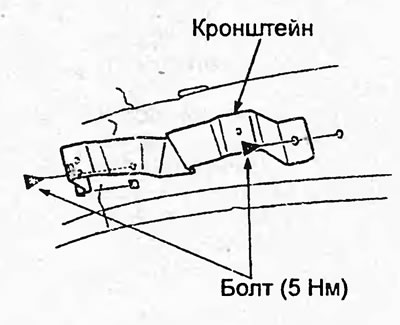
10. If necessary, unscrew the bolts and remove the auxiliary handle mounting bracket.
Tightening torque - 5 Nm
11. Installation is carried out in the reverse order of removal.
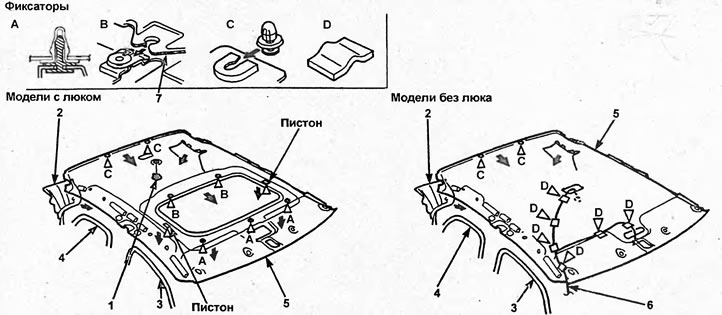
Roof trim (sedan). 1 - plug, 2 - upper trim of the rear pillar, 3 - front door seal, 4 - rear side door seal, 5 - roof trim, 6 - wiring harness, 7 - sunroof subframe.
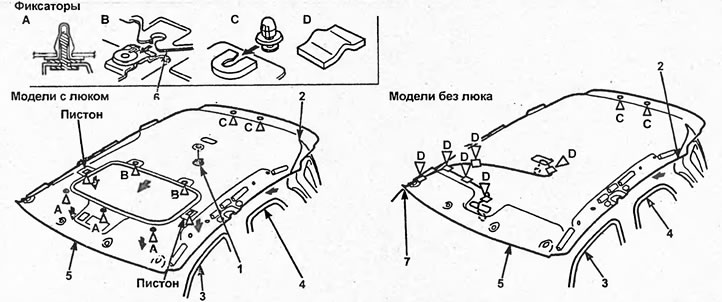
Roof trim (hatchback). 1 - plug, 2 - upper trim of the rear pillar, 3 - front door seal, 4 - rear side door seal, 5 - roof trim, 6 - sunroof subframe, 7 - wiring harness.