
Contents: Removal ⇊ Installation ⇊
Removal
Note: When removing the rear door glass, refer to the assembly drawing "Rear Door Glass".
1. Remove the rear door interior trim (see section "Interior trim").
2. Remove the spoiler.
3. Remove the additional brake light bulb (see chapter "Body electrical equipment").
4. Remove the rear door window wiper electric drive (see chapter "Body electrical equipment").
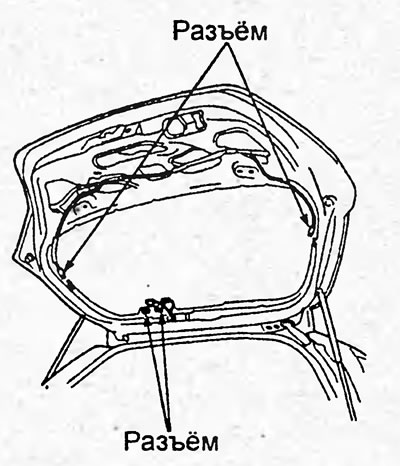
5. Disconnect the rear door glass heating and antenna connectors.
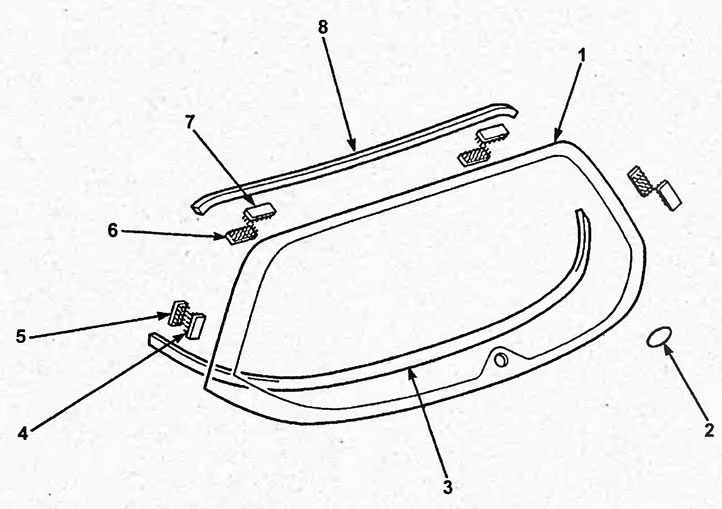
Rear door glass. 1 - rear door glass, 2 - "LEV" sticker, 3 - lower seal, 4, 5, 6, 7 - retainer, 8 - upper seal.
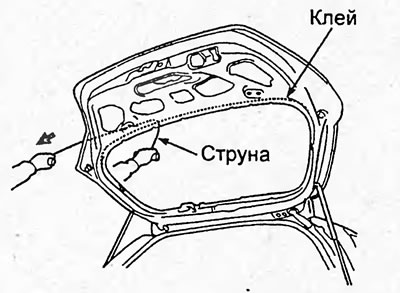
6. From the inside of the body, using an awl, make holes in the glue layer. Pull the string through the hole from the interior.
Note: To avoid damaging painted surfaces, apply masking tape to them.
Caution: To avoid damaging your hands on sharp edges, wear gloves.
7. Secure the ends of the string to the wooden blocks.
Note: To avoid breaking the string, use its entire length while working.
8. Cut off the layer of glue around the entire perimeter of the glass.
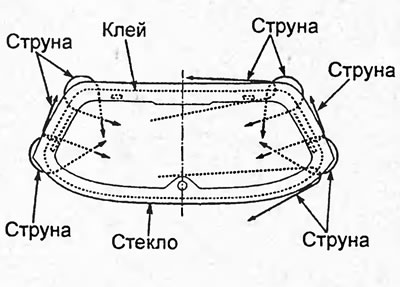
9. Carefully remove the rear door glass.
Installation
Caution: To avoid damaging your hands on sharp edges, wear gloves.
1. Clean the contact surface of the body from glue, leaving 1-2 mm of glue on the surface.
Note: If all the glue was removed during cutting, clean the body surface with a piece of cloth soaked in solvent and wait 30 minutes. Then cover the body surface with a new layer of glue 2 mm thick.
2. Clean and degrease the glass surface approximately 50 mm wide from the edge and the surface where the glass meets the body.
3. Stick the side upper and lower clips on the glass. Then stick the upper and lower seal on the glass according to the marks as shown in the figure. Before installing the upper and lower seal, apply primer to the inner contact surface of the glass and wait until the primer dries.
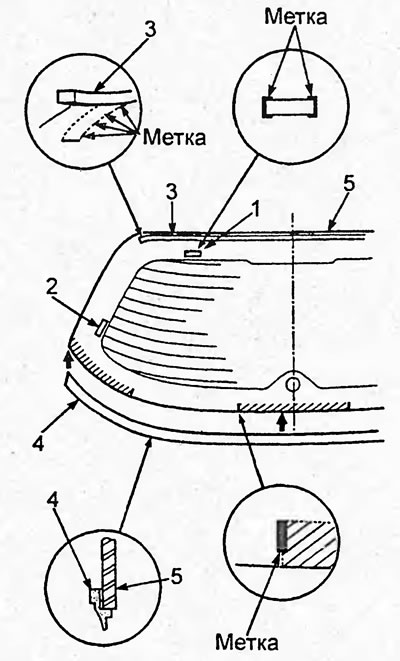
1 - upper retainer, 2 - side retainer, 3 - upper seal, 4 - lower seal, 5 - rear door glass.
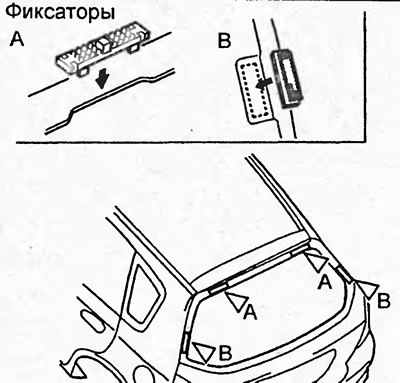
4. Stick the clips to the rear door as shown in the picture.
5. Install the glass on the rear door, apply alignment marks on the glass and door as shown in the figure.
Note: Do not damage glass or painted surfaces of the car body.
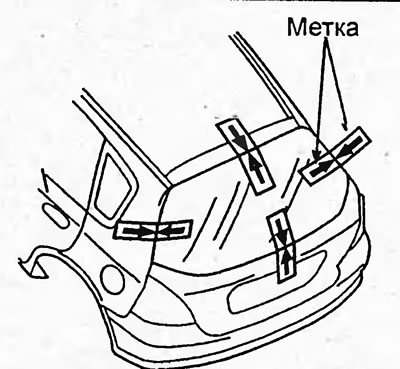
6. Remove the glass.
7. Using a brush, apply primer to the glass and seals as shown in the picture.
Caution: Clean the surface from dirt and grease, do not touch the surface after applying the primer, otherwise the connection will not be airtight.
Note: Use a primer designed for glass installation. The drying time of the primer is specified in the instructions for use.
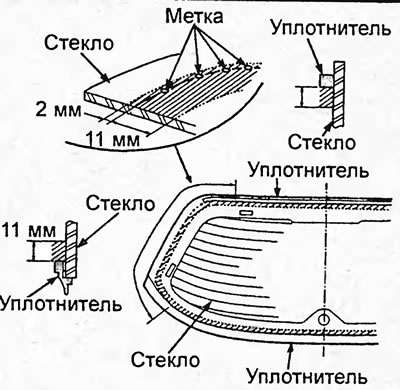
8. Using a brush, apply the primer to the body as shown in the picture. Wait 10 minutes.
Caution: Clean the surface from dirt and grease, do not touch the surface after applying the primer, otherwise the connection will not be airtight.
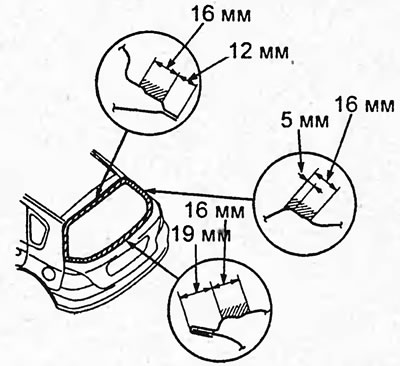
9. Apply glue to the contact surface of the glass and seals as shown in the figure. Wait 30 minutes.
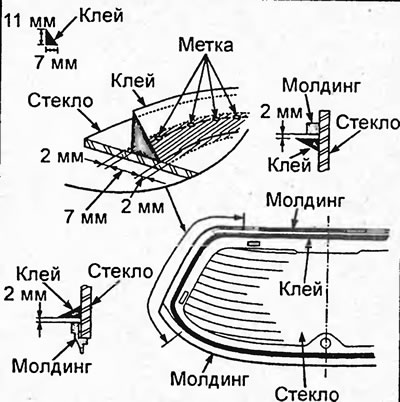
10. Install the glass on the rear door according to the marks. Press lightly on the glass first at the corners, then on the entire contact surface. Do not open or close the car doors until the adhesive has dried.
11. Remove excess adhesive from the glass and painted surfaces of the rear door.
12. Wait 1 hour. Check and eliminate leaks in the connection.
a) After the curing time has elapsed, check the connection for leaks.
b) Seal any leaks with automotive glass sealant.
13. Install the rear door glass wiper electric drive (see chapter "Body electrical equipment").
14. Install the additional brake light bulb (see chapter "Body electrical equipment").
15. Install the spoiler.
16. Install the rear door interior trim (see section "Interior trim").
[Publication reprinted from the website «HONDABOOK»]