
Contents: Adjustment ⇊ Disassembly and assembly ⇊
Adjustment
1. Close the hatch completely.
2. Measure the gap between the hatch panel and the seal and compare the obtained values with those given below.
Gap "a" - 1.0 -2.5 mm
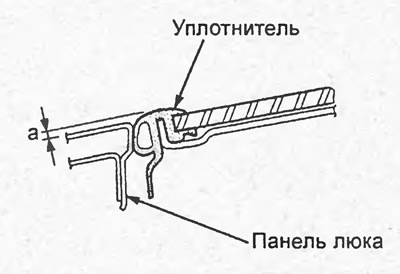
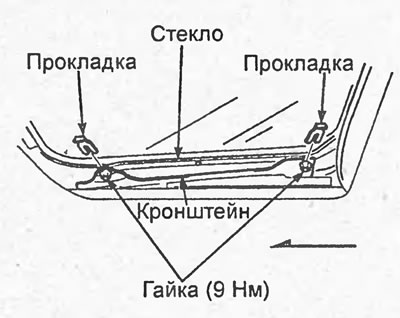
3. Adjust the position of the hatch if necessary.
a) Remove the decorative covers.
b) Loosen the nuts and adjust the gaps between the glass base and the glass brackets using shims as shown in the figure.
Tightening torque - 9 Nm
c) Tighten the nuts after adjustment.
Disassembly and assembly
1. When disassembling the hatch, follow the assembly drawing "Disassembling and assembling the hatch". Disassemble in the sequence shown in the drawing.
2. Assembly is carried out in the reverse order of disassembly.
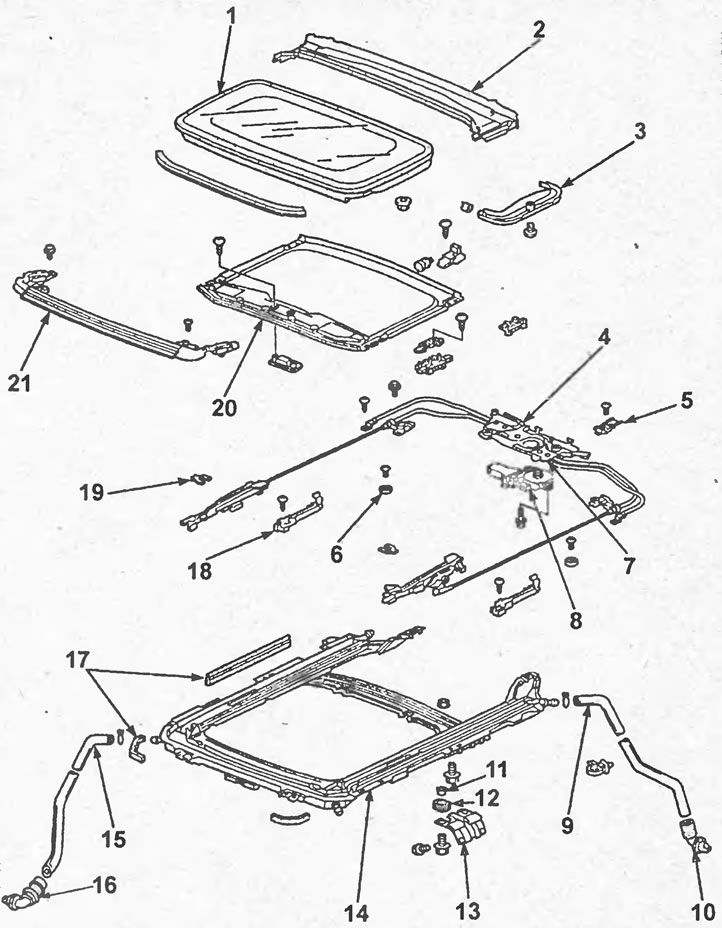
Disassembly and assembly of the hatch (sedan). 1 - glass, 2 - drain gutter, 3 - bracket cover, 4 - sunroof drive and limit switches, 5 - bracket, 6 - stopper, 7 - sunroof drive cable, 8 - sunroof drive electric motor, 9 - rear drain hose, 10 - rear drain hose flap, 11 - bushing, 12 - cushion, 13 - corner holder, 14 - sunroof subframe, 15 - front drain hose, 16 - front drain hose flap, 17 - seal, 18 - guide, 19 - gasket, 20 - sunroof curtain, 21 - sunroof deflector.
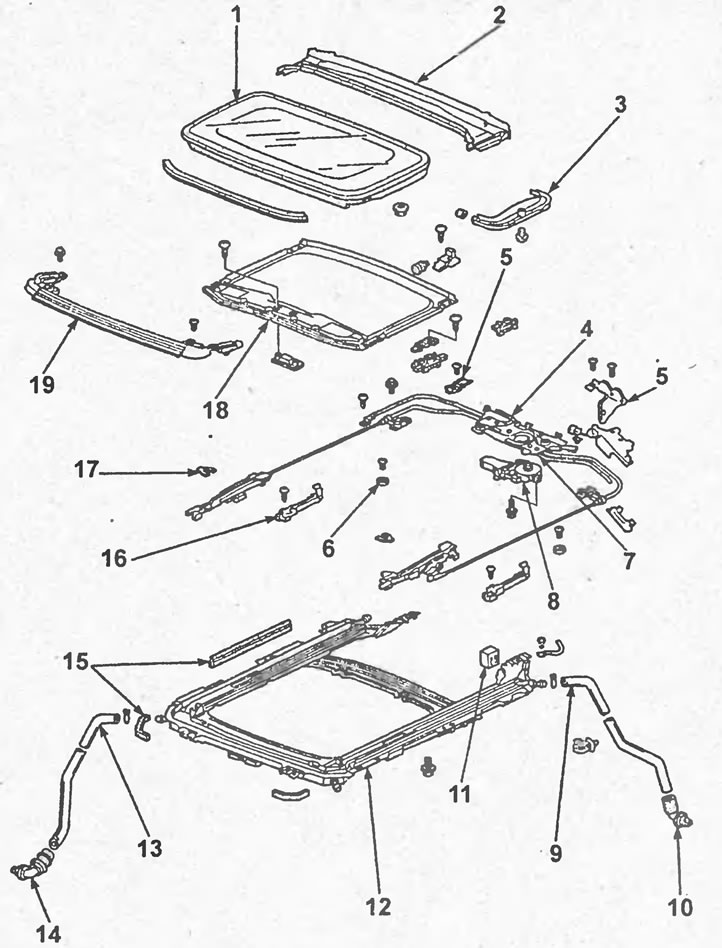
Disassembly and assembly of the hatch (hatchback). 1 - glass, 2 - drain gutter, 3 - bracket cover, 4 - sunroof drive and limit switches, 5 - bracket, 6 - stopper, 7 - sunroof drive cable, 8 - sunroof drive electric motor, 9 - rear drain hose, 10 - rear drain hose flap, 11 - sunroof control unit, 12 - sunroof subframe, 13 - front drain hose, 14 - front drain hose flap, 15 - seal, 16 - guide, 17 - gasket, 18 - sunroof curtain, 19 - sunroof deflector.
Original material on the website: HondaBook.ru