
Replacement
Caution: Do not smoke while working on the fuel system. Keep open flames away from the work area.
1. Relieve fuel pressure.
2. Remove the seat cushion.
3. Remove the access hatch on the floor.
4. Disconnect the 2K and 3K connectors.
5. Disconnect the hoses and quick-release couplings.
6. Raise the vehicle and support it with supports.
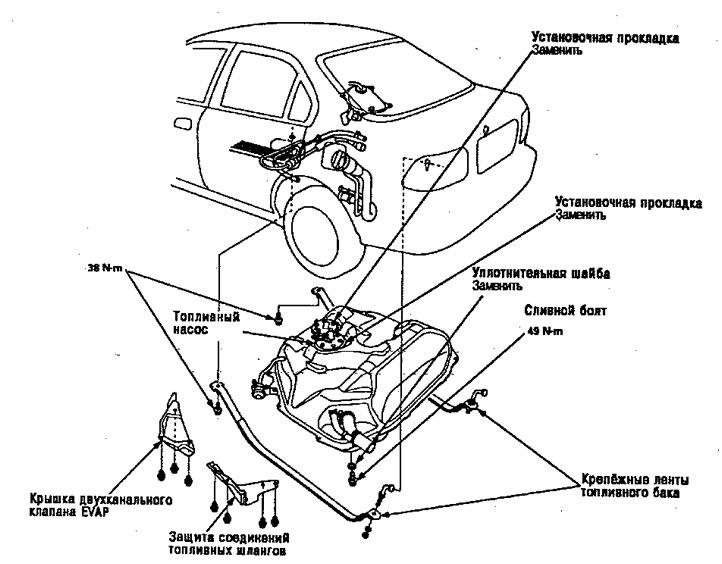
7. Unscrew the drain bolt and drain the fuel into a suitable container.
8. Remove the fuel vapor removal system dual-way valve cover and fuel hose connection protection.
9. Disconnect the hoses.
Attention.
- After disconnecting the hoses, move the clamps back into place and roll up the disconnected hoses to prevent damage.
- Thoroughly clean the high pressure connection nipples before assembling them.
10. Remove the jack or other supports from under the fuel tank.
11. Unscrew the nuts of the fastening straps and leave the straps hanging freely.
12. Remove the fuel tank.
Note: The fuel tank may be stuck to the interior lining where it is installed. To remove, gently pry the tank away from the base.
13. Install the new washer on the drain bolt, then the remaining parts in reverse order.
(The article is based on information from the website: HondaBook.ru)