
Attention: To avoid accidents, do not operate the motor with a damaged fan. Do not attempt to repair the blades - replace the fan.
Control
1. Disconnect the plug from the fan motor. Connect the engine directly to the battery with wires of sufficient length. If the fan does not rotate, replace its motor.
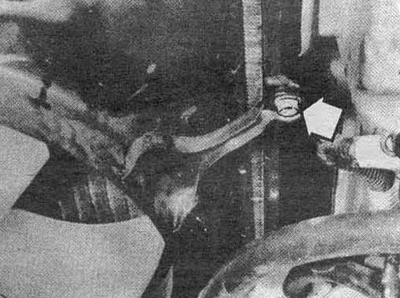
2. With a positive result of the previous test, there are probably defects in the thermal switch for turning on the fan or wire breaks. To check the integrity of the wiring, disconnect the plug from the thermal relay located at the bottom of the radiator (see fig. 4.2a).
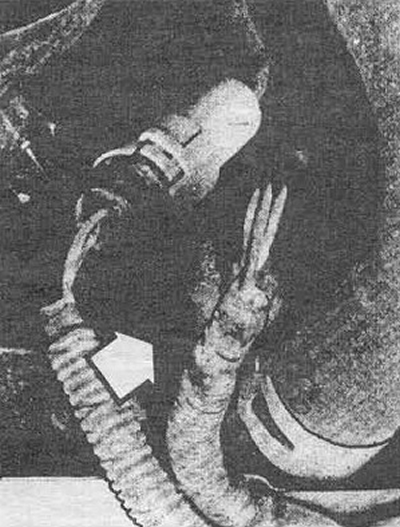
Pic. 4.2a Remove the protective cap from the thermostat contacts
Connect the connector pins with a piece of wire. Turn the ignition key to position "start". If the fan is running, the thermostat is defective.
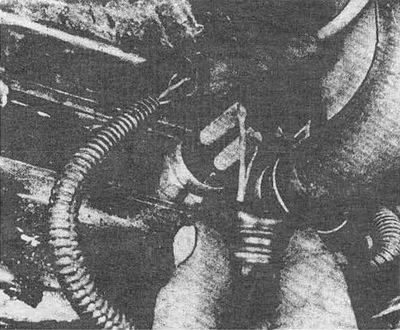
Pic. 4.2b To check the integrity of the electric circuit of the fan motor, remove the wires from the thermal relay and short the circuit with a wire. To replace the thermostat, drain the coolant. Install new relay with sealant
3. If the fan still does not work, carefully check all wiring.
Removal and installation
4. Disconnect the negative cable from the battery.
5. Release the fan wires from the mounting clips.
6. Release the latch on the fan plug and disconnect the wires.
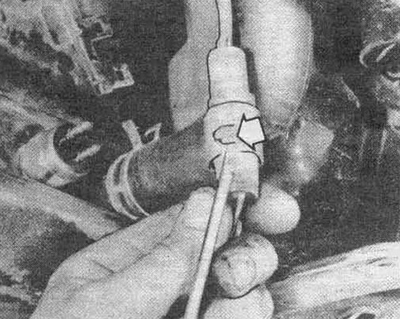
Pic. 4.6 The fan motor plug is located in close proximity to the motor. Pry up the latch (arrow) and disconnect the wires
7. Remove expansion tank (see Section 6).
8. Drain coolant (see chapter 1) and remove the upper and lower radiator shrouds.
9. For easier access to the fan diffuser, remove (if installed) shutter housing. Loosen the screws on the diffuser brackets (see fig. 4.9a, b). Carefully remove the diffuser from the engine compartment. Do not damage the radiator fins.
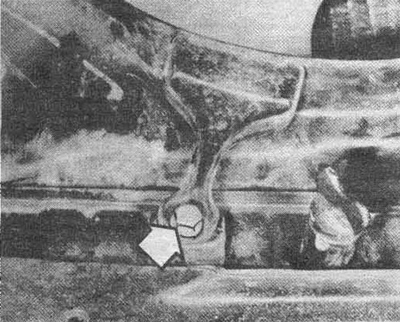
Pic. 4.9a Bolts for fastening the diffuser from the bottom of the radiator
Pic. 4.9b Diffuser mounting bolt on the side of the radiator
10. Disconnect the fan from the electric motor.
11. Turn away nuts of fastening of the engine from an arm.
12. Assemble the assembly in reverse order.