
Contents: Child Safety Equipment (for European…⇊ Lower child restraint anchorages ⇊ Securing a child seat using a…⇊
Child Safety Equipment (for European countries)
There are many systems and means of ensuring child safety in the car on the market, but not all of them are suitable for the car. When choosing a child seat or cradle, be guided by the data in the table, which indicates the possibility of installing child seats on a particular car seat.
Check the size class that may be indicated by the manufacturer for some child seats in the instructions, on the packaging or on labels.
The branded child seats listed in the table are genuine Honda products.
Warning! Using a child restraint system that is not suitable for your vehicle will not provide adequate protection for your child in a traffic accident and could result in death or serious injury to your child.
The vehicle may be equipped with lower anchorages for installing child seats on the side rear seats. These anchorages are permitted to be used only with child seats specifically designed for this type of attachment.
Lower child restraint anchorages
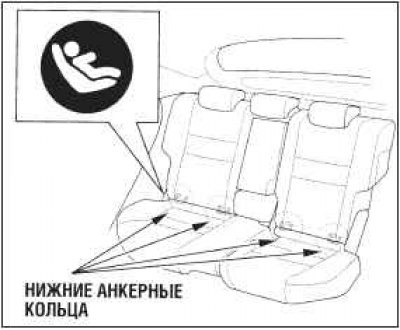
The vehicle is equipped with lower anchorages for child seats. The anchor rings of the lower anchorages are located on the seat fold, between the backrest and the cushion. Anchorages of this type can only be used for child seats that are specially designed for installation using lower anchor rings.
The location of the anchor rings is shown on small buttons located above the rings.
To install a child restraint system using the lower anchors:
- Move the seat belt buckle (or the belt itself) so that it does not interfere with the fastening of the child seat.
- Make sure there are no foreign objects in the child seat attachment area that could get caught in the connection between the seat locking bracket and the anchor ring.
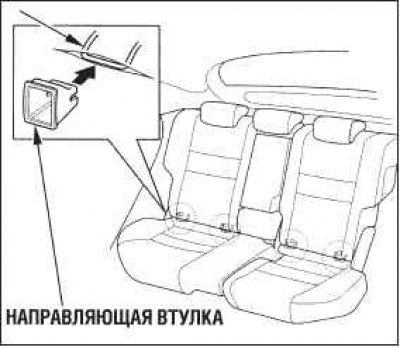
For some safety devices: Together with the child seat you may receive guide bushings that protect the seat upholstery from damage during installation of the seat.
 |
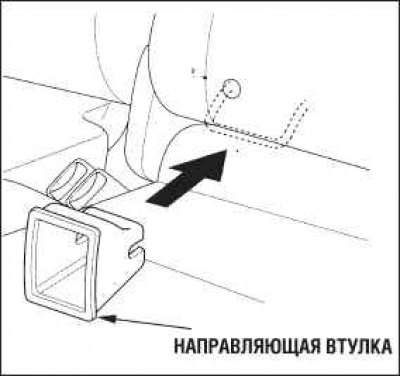 |
Attach the guide bushings to the anchor brackets as shown in the figure.
When installing the guide bushings, follow the child seat manufacturer's instructions.
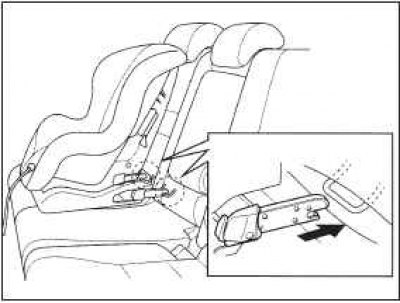
Place the child restraint system on the vehicle seat. Follow the restraint system manufacturer's instructions to attach it to the lower anchor rings.
Some child seats are equipped with rigid locking brackets to secure to the lower anchor rings.
Other child seats are equipped with soft locking brackets (see picture).
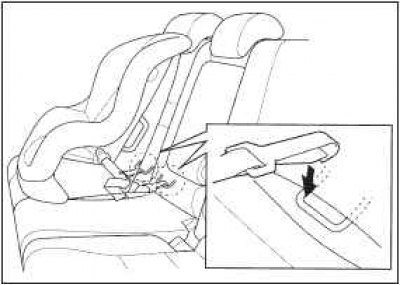
Regardless of the design of the child restraint system, follow all the recommendations of the child restraint system manufacturer regarding adjustment and tightening of fasteners.
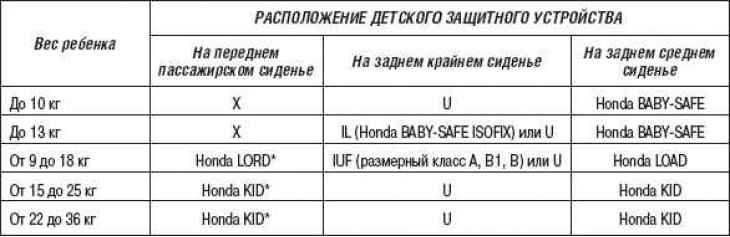
IL: Installation of branded child restraint systems of the ISOFIX standard, as specified in the table, is permitted.
IUF: Universal ISOFIX standard child restraint systems approved for the specified age group are permitted to be installed in the forward-facing position.
U: Installation of universal child restraint systems approved for the specified age group is permitted. X: Installation of child restraint systems for children of this weight group is not permitted.
Child seats equipped with non-rigid locking brackets are not supplied to European countries.
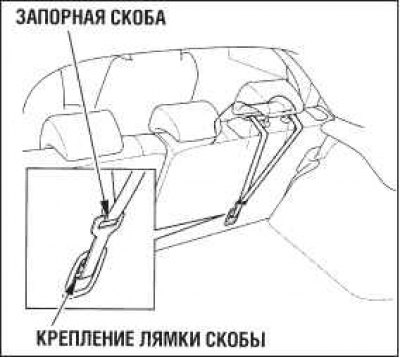
Attach the locking clip to the harness attachment as shown in the picture. Make sure that the harness is not twisted. Then tighten the harness according to the child seat manufacturer's instructions.
The illustration shows the fastening of the locking bracket as applied to vehicles for European countries.
Raise the headrest and route the child seat strap along the back of the seat between the legs of the headrest. Make sure that the strap is not twisted.
Secure the harness locking clip to the attachment point, then tighten the harness according to the safety device manufacturer's recommendations.
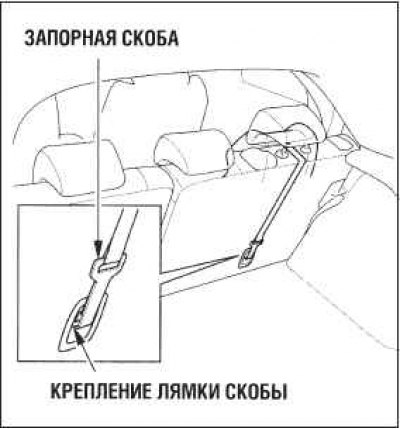
Check that the child seat is securely fastened in place by trying to move it in different directions and make sure that it remains stationary while the vehicle is moving.
The design of a child restraint system and its suitability for use in a particular vehicle must be certified by the manufacturer and checked by the seller of the restraint system. If you are not absolutely sure that the restraint system is suitable for your vehicle, consult your Honda dealer before purchasing it.
Securing a child seat using a diagonal lap belt
In the absence of lower anchor rings, child seats of any type are secured using the shoulder branch of the diagonal-lap seat belt.
The diagonal lap belt installed on the rear seat is equipped with an inertia reel that must be activated during the installation of the child car seat.
To install your child seat correctly, follow the manufacturer's instructions.
The following recommendations for installing child car restraints apply to child seats intended for use in Europe and installed in the forward-facing position.
Install the child seat in the selected rear seat location. Move the child seat as far back as possible, toward the back of the seat.
For vehicles with tether anchorages for installing a child seat in the center rear seat: If you are installing a child seat in the center rear seat and will be securing it with the top tether straps for added safety, lower the head restraint to the lowest position and secure the tether straps before securing the seat with the seat belt.
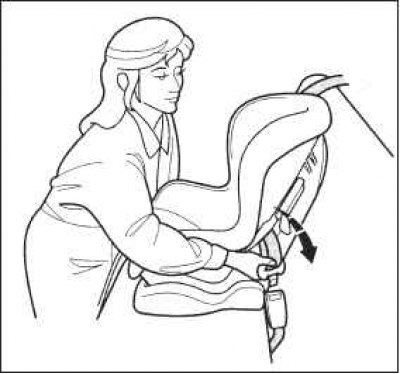
According to the manufacturer's instructions, thread the lap belt strap through the child restraint system's designated anchor points and then insert the belt clip into the buckle.
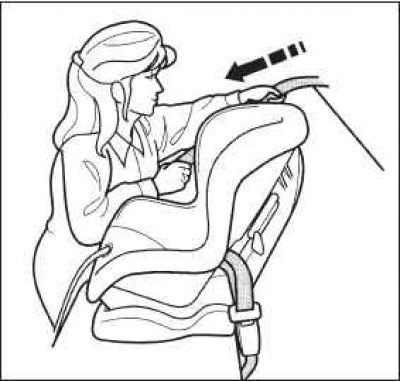
To securely fasten the child safety device, first slowly pull the shoulder section of the belt out of the inertia reel to its full length.
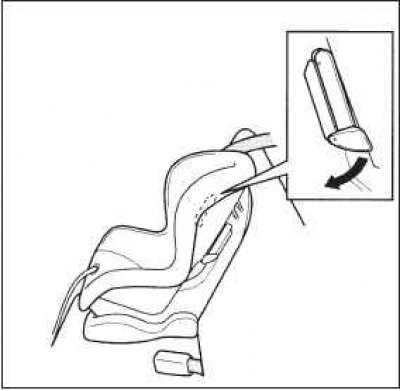
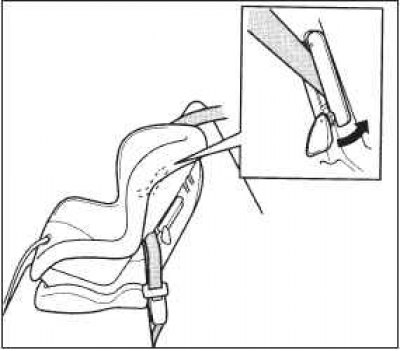
Press the tongue. Pass the shoulder section of the seat belt through the side slot of the safety device, then release the belt and let it retract automatically onto the reel.
After the belt is reeled in, pull it. If the belt is fixed, you will not be able to pull it out. If you manage to pull the belt out, it means that the belt was not securely fixed. In this case, you need to repeat all the previous operations sequentially and achieve a secure fixation of the belt.
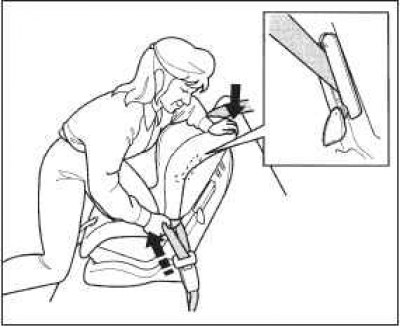
Once you have made sure that the belt is securely fastened with the reel, grab the shoulder section of the belt closest to the buckle and pull it to completely remove the slack in the shoulder section. Remember that if the shoulder section of the diagonal lap belt is too loose, the child safety device will not be securely fastened.
In order to completely take up the slack in the shoulder branch, it is useful to apply your own weight to the child safety device or press hard on its back when tightening the belt.
Press the tab to secure the belt in the slot. Make sure the belt is not twisted and is threaded correctly through the slot.
 |
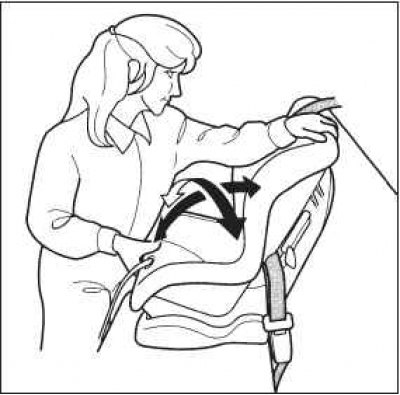 |
Check that the child seat is securely in place by trying to move it in different directions and make sure that it remains stationary while the vehicle is moving. If the child seat moves, remove the belt, reel it in, and then repeat the above installation steps again.
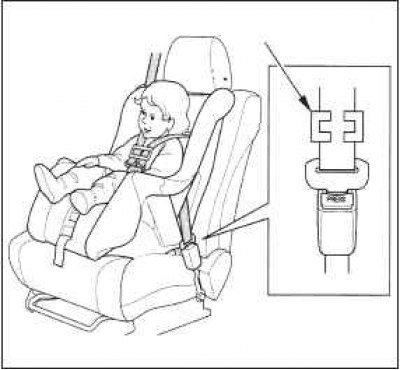
To remove the child restraint system, unbuckle the seat belt, remove it from the child restraint system slots and allow it to rewind completely onto the reel.