
When removing components, use an upholstery tool kit or similar.
When installing/removing the front bumper, be careful not to scratch the front bumper itself and the car body. Wear protective gloves.
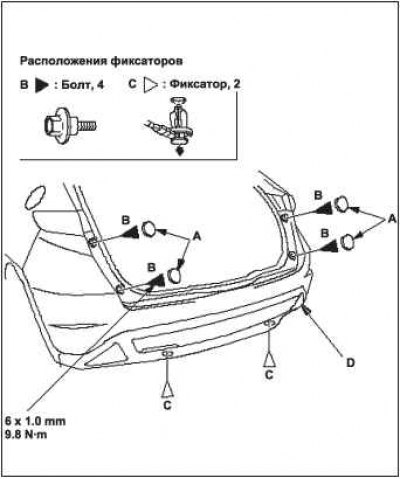
1. Remove the caps A. Unscrew the bolts B and fasteners C holding the rear bumper D.
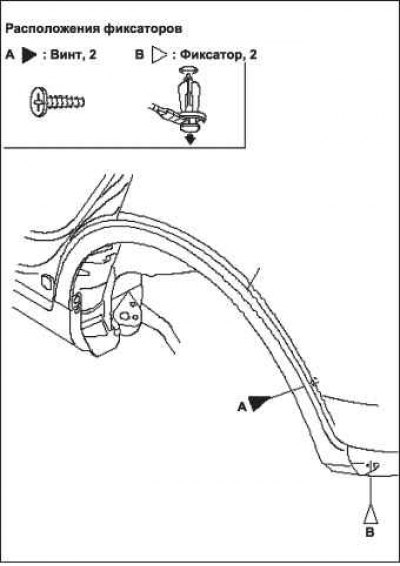
2. Unscrew screws A and detach clamps B on both sides.
3. Carefully pull out the rear edge of the rear wheel arch A to release the hooks B.
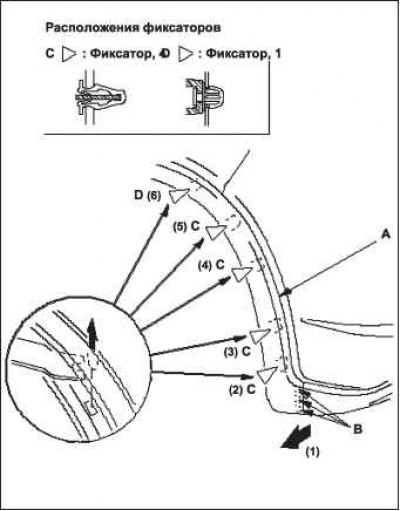
4. Working from the bottom to the middle of the wheel arch, lift the wheel arch protector clamp part with a special tool to release the clips (C, D).
Note: Do not damage the painted part around the clip hole on the rear outer panel when removing the clip. If you damage the painted part, repair it with touch-up paint to protect it from corrosion.
5. Repeat steps 3 through 4 on the other side of the rear bumper to release the rear wheel arch protector from the rear bumper.
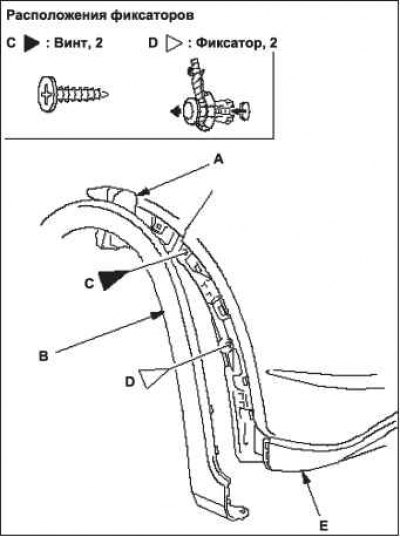
6. Insert a technical napkin A between the wheel arch protectors B and the body on both sides. Unscrew the screws C and remove the fasteners D of the front bumper E on both sides.
7. Pull the rear bumper A near the wheel arches to remove it from the hooks B and side retainers C.
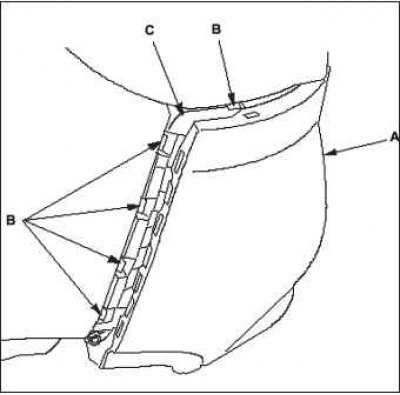
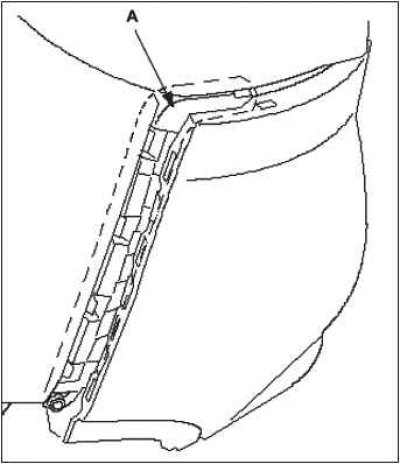
8. With the help of an assistant, remove the wheel arch section from the side retainer A.
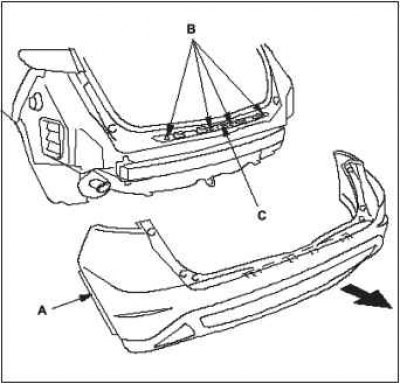
9. With the help of an assistant, pull the rear bumper A to remove it from the hooks B located on the side bracket C.
10. Install the rear bumper in the reverse order of removal. Please note the following:
Make sure the rear bumper is fully engaged with the hooks (located on the side beams and clamps) on both sides of the car.
 |
 |
Check the clamps for damage or whitening from stress and replace them with new ones if necessary.
Press firmly on the fasteners and fasteners to ensure a secure connection.
(Full version on the source website HONDABOOK)