
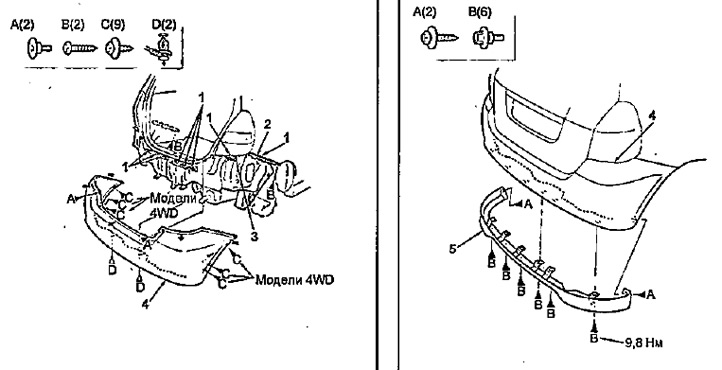
Rear bumper.
1 - clamp,
2 - side bushing,
3 - side bracket,
4 - rear bumper,
5 - lower bumper trim.
1. Disconnect the cable from the negative terminal of the battery.
2. When removing the rear bumper and the lower bumper trim, refer to the assembly drawing "Rear bumper".
Warning: Do not remove the bumper alone, it may fall and injure you.
Note: When removing and installing, be careful not to damage the body or bumper.
3. Remove the bumper in the following sequence:
a) Remove the bolts (A), screws (B), screws (C) (right-hand drive and 4WD models) and detach the clips (D) from the bumper (see assembly drawing).
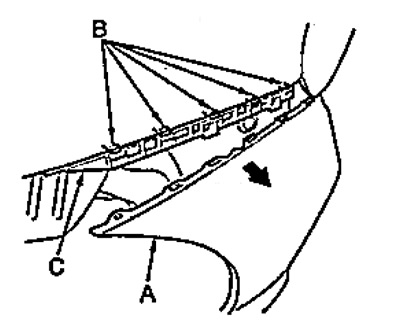
b) Disconnect the clamps (B) of the side bushing (C) from the bumper holes (A).
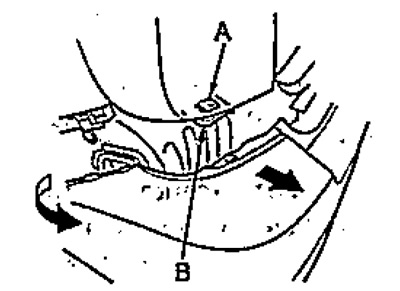
c) Disconnect the clips (A) of the side bracket (B) from the bumper holes.
d) Disconnect the clamps (B) of the upper brackets (C) from the bumper holes (A) and remove the bumper.
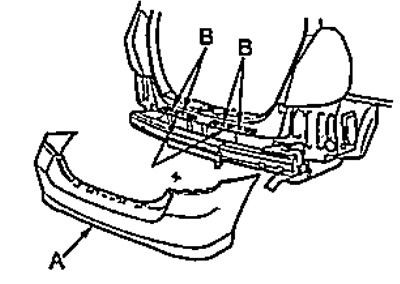
4. Installation is carried out in the reverse order of removal.
The original can be found on the resource: www.HondaBook.ru