
Checking the clutch fluid level
The procedures for checking the working fluid level are described in the chapter "Maintenance and general check and adjustment procedures".
Bleeding the clutch release hydraulic drive
Caution: Do not allow the working fluid to come into contact with painted surfaces. If the working fluid comes into contact with a painted surface, wash it off immediately.
Note:
- Do not mix different types of working fluid.
- Do not reuse drained fluid.
1. Make sure the clutch fluid level is correct.
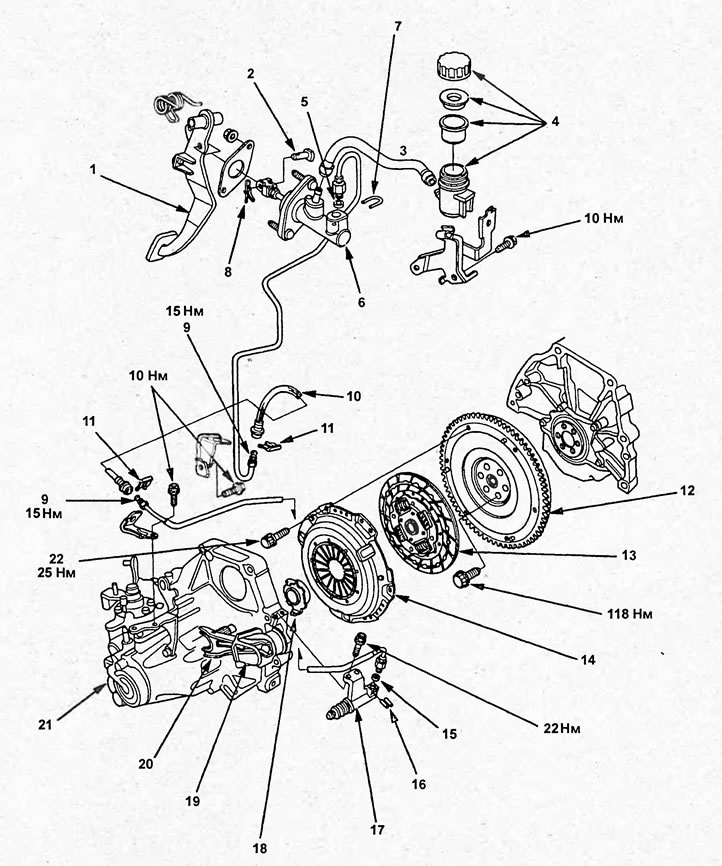
Clutch components. 1 - clutch pedal, 2 - fork axle, 3 - hose, 4 - working fluid reservoir assembly, 5 - O-ring, 6 - clutch master cylinder, 7 - retainer, 8 - cotter pin, 9 - clutch hydraulic tube, 10 - hose, 11 - retainer, 12 - flywheel, 13 - clutch driven disc, 14 - clutch housing, 15 - O-ring, 16 - pin, 17 - clutch slave cylinder, 18 - release bearing, 19 - boot, 20 - clutch release fork, 21 - gearbox assembly, 22 - bolt.
2. Remove the cap from the bleed nipple (A) of the clutch slave cylinder and connect one end of the vinyl tube.
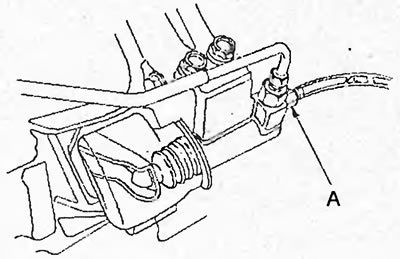
3. Place the other end of the tube in a transparent container.
4. Slowly press the clutch pedal several times.
5. With the clutch pedal depressed, loosen the bleed screw and allow the working fluid to drain.
6. Using the special tool, tighten the bleed screw.
7. Repeat the operations described in points 4-6 until air bubbles no longer appear in the outgoing working fluid.
8. Tighten the bleed screw.
Tightening torque - 8 Nm
9. Bring the working fluid level up to the "MAX" mark.
10. Make sure the clutch is working properly.