
Brake system of the car Honda CR-V 2
.


Checking the operation and leaks in the brake system
Check the following components: Component Procedure Brake booster (A) Check the operation of the brakes by pressing the brake pedal during a test drive. If the brakes do not work as they should, check the brake booster....
Check the following components: Component Procedure Brake booster (A) Check the operation of the brakes by pressing the brake pedal during a test drive. If the brakes do not work as they should, check the brake booster....
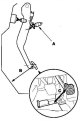
Adjusting the brake pedal and brake pedal position switch
Pedal height 1. Turn the brake pedal position switch (A) counterclockwise and unscrew it so that it no longer contacts the brake pedal. 2. Turn back the mat and measure the height of the pedal (B) from the center of the...
Pedal height 1. Turn the brake pedal position switch (A) counterclockwise and unscrew it so that it no longer contacts the brake pedal. 2. Turn back the mat and measure the height of the pedal (B) from the center of the...
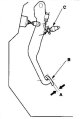
Free travel of the brake pedal
1. Stop the engine and check the free play of the brake pedal (A) on the pedal block (B) by pressing the pedal with your hand. Free play: 1-5 mm 2. If the pedal free play is abnormal, adjust the brake pedal position...
1. Stop the engine and check the free play of the brake pedal (A) on the pedal block (B) by pressing the pedal with your hand. Free play: 1-5 mm 2. If the pedal free play is abnormal, adjust the brake pedal position...

Checking the parking brake
1. Tighten the parking brake lever (A) to 196 N (20 kgf) and fully apply the parking brake. The parking brake lever travel should be the specified number of clicks (B). Number of clicks before parking brake engages: 5-9...
1. Tighten the parking brake lever (A) to 196 N (20 kgf) and fully apply the parking brake. The parking brake lever travel should be the specified number of clicks (B). Number of clicks before parking brake engages: 5-9...

Fine adjustment of the parking brake
1. Raise the rear of the vehicle and support it securely. 2. Release the parking brake lever completely. Move the driver's seat (on right-hand drive vehicles: passenger seat) forward. 3. Roll the mat under the seat....
1. Raise the rear of the vehicle and support it securely. 2. Release the parking brake lever completely. Move the driver's seat (on right-hand drive vehicles: passenger seat) forward. 3. Roll the mat under the seat....

Large adjustment of the parking brake
(performed when replacing brake pads and after running-in of friction linings) 1. Raise the rear of the vehicle and support it securely. 2. Release the parking brake lever completely. Move the driver's seat (on...
(performed when replacing brake pads and after running-in of friction linings) 1. Raise the rear of the vehicle and support it securely. 2. Release the parking brake lever completely. Move the driver's seat (on...

Bleeding the brake system
Note: Do not spill brake fluid on your car as it may damage the paintwork; if liquid does spill, wash it off immediately with water. At the beginning of the bleeding procedure, the fluid level in the reservoir on the...
Note: Do not spill brake fluid on your car as it may damage the paintwork; if liquid does spill, wash it off immediately with water. At the beginning of the bleeding procedure, the fluid level in the reservoir on the...


Testing the Parking Brake Switch
1. Remove the lower panel from the driver's side. 2. Disconnect the connector from the parking brake switch (A). 3. Check if there is continuity between the switch contact (B) and ground: When the lever (top) (C) is...
1. Remove the lower panel from the driver's side. 2. Disconnect the connector from the parking brake switch (A). 3. Check if there is continuity between the switch contact (B) and ground: When the lever (top) (C) is...

Testing the Brake Fluid Level Switch
Check if there is conductivity between contacts (A) in the lower and upper positions of the float: Remove all brake fluid from the reservoir. Float at the bottom: there should be conductivity. Fill the reservoir with...
Check if there is conductivity between contacts (A) in the lower and upper positions of the float: Remove all brake fluid from the reservoir. Float at the bottom: there should be conductivity. Fill the reservoir with...

Checking the front brake pads
Warning: Frequent inhalation of dust from brake pad surfaces, regardless of the material composition, can pose a health hazard. Do not inhale dust. Do not clean brake surfaces with compressed air or a brush. Use a...
Warning: Frequent inhalation of dust from brake pad surfaces, regardless of the material composition, can pose a health hazard. Do not inhale dust. Do not clean brake surfaces with compressed air or a brush. Use a...

Checking and replacing the front brake pads — on a 15-inch brake disc
1. Loosen the flange bolt (A). Note: To prevent the brakes from seizing, springs are placed on the brake pads. Be careful when you swing the caliper all the way up, as the spring may fly out. 2. Slightly tilt the...
1. Loosen the flange bolt (A). Note: To prevent the brakes from seizing, springs are placed on the brake pads. Be careful when you swing the caliper all the way up, as the spring may fly out. 2. Slightly tilt the...

Replacing the front brake pads — on a 14-inch brake disc
1. Unscrew the guide pin (A). Note: To prevent the brakes from seizing, springs are placed on the brake pads. Be careful when you swing the caliper all the way up, as the spring may fly out. 2. Slightly tilt the caliper...
1. Unscrew the guide pin (A). Note: To prevent the brakes from seizing, springs are placed on the brake pads. Be careful when you swing the caliper all the way up, as the spring may fly out. 2. Slightly tilt the caliper...

Checking the runout of the front brake disc
1. Raise the front of the vehicle and support it securely. Remove the front wheels. 2. Remove the brake pads. 3. Check the disc surface for damage or cracks. Clean the disc thoroughly and remove all rust. 4. Securely...
1. Raise the front of the vehicle and support it securely. Remove the front wheels. 2. Remove the brake pads. 3. Check the disc surface for damage or cracks. Clean the disc thoroughly and remove all rust. 4. Securely...

Checking the thickness and parallelism of the front brake disc
1. Raise the front of the vehicle and support it securely. Remove the front wheels. 2. Remove the brake pads. 3. Using a micrometer, measure the thickness of the disc at eight points, spaced approximately 45° apart and...
1. Raise the front of the vehicle and support it securely. Remove the front wheels. 2. Remove the brake pads. 3. Using a micrometer, measure the thickness of the disc at eight points, spaced approximately 45° apart and...

Front Wheel Brake Caliper Repair
Warning! Frequent inhalation of dust from brake pad surfaces, regardless of the material composition, can pose a health hazard. Do not inhale dust. Do not clean brake surfaces with compressed air or a brush. Use a...
Warning! Frequent inhalation of dust from brake pad surfaces, regardless of the material composition, can pose a health hazard. Do not inhale dust. Do not clean brake surfaces with compressed air or a brush. Use a...

Replacing the master cylinder
Note: Do not spill brake fluid on your vehicle as it may damage the paintwork; if liquid does spill, wash it off immediately with water. 1. Loosen the engine wiring harness clamps on the tensioner (A) and remove the...
Note: Do not spill brake fluid on your vehicle as it may damage the paintwork; if liquid does spill, wash it off immediately with water. 1. Loosen the engine wiring harness clamps on the tensioner (A) and remove the...

Disassembling the master cylinder
1. Remove the piston rod seal from the master cylinder. 2. Remove the ring clamp (A) by pressing down the secondary piston (B). 3. Remove the tank (A). 4. On vehicles with ABS, remove the locking pin (B) by pressing...
1. Remove the piston rod seal from the master cylinder. 2. Remove the ring clamp (A) by pressing down the secondary piston (B). 3. Remove the tank (A). 4. On vehicles with ABS, remove the locking pin (B) by pressing...

Assembling the master cylinder
Note: When replacing the primary, secondary piston or master cylinder body, check and adjust the push rod clearance before installing the master cylinder. Clean all components in brake fluid and dry in open air; blow...
Note: When replacing the primary, secondary piston or master cylinder body, check and adjust the push rod clearance before installing the master cylinder. Clean all components in brake fluid and dry in open air; blow...

Adjusting the clearance of the brake booster push rod
Note: If necessary, the clearance between the push rod and the master cylinder piston should be checked and adjusted before installing the master cylinder. 1. Attach the special tool (A) to the master cylinder body (B);...
Note: If necessary, the clearance between the push rod and the master cylinder piston should be checked and adjusted before installing the master cylinder. 1. Attach the special tool (A) to the master cylinder body (B);...

Brake Booster — Check for Leaks
1. Connect a vacuum gauge (A) between the brake booster and the check valve. 2. Start the engine, adjust the engine speed with the accelerator pedal so that the vacuum gauge readings are equal to 40.0-66.7 kPa (300-500...
1. Connect a vacuum gauge (A) between the brake booster and the check valve. 2. Start the engine, adjust the engine speed with the accelerator pedal so that the vacuum gauge readings are equal to 40.0-66.7 kPa (300-500...
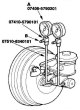
Brake booster — checking functionality
1. Connect the vacuum gauge in the same way as when checking for leaks. 2. Using adapters (special tool) connect the oil pressure gauges (A) to the master cylinder as shown in the figure. 3. Release air through the...
1. Connect the vacuum gauge in the same way as when checking for leaks. 2. Using adapters (special tool) connect the oil pressure gauges (A) to the master cylinder as shown in the figure. 3. Release air through the...

Brake Booster — Checking the Check Valve
1. Disconnect the brake booster vacuum hose (check valve built in) (A) from the amplifier side. 2. Start the engine and let it run at idle speed. There should be a vacuum. If there is no vacuum, the shut-off valve is...
1. Disconnect the brake booster vacuum hose (check valve built in) (A) from the amplifier side. 2. Start the engine and let it run at idle speed. There should be a vacuum. If there is no vacuum, the shut-off valve is...

Replacing the brake booster
1. Remove the master cylinder. 2. Remove the air cleaner assembly (A). 3. Release the master cylinder brake pipes (A) from the clamps. 4. Disconnect the vacuum hose (B) from the brake booster. 5. Remove the cotter pin...
1. Remove the master cylinder. 2. Remove the air cleaner assembly (A). 3. Release the master cylinder brake pipes (A) from the clamps. 4. Disconnect the vacuum hose (B) from the brake booster. 5. Remove the cotter pin...

Checking the rear brake pads
Warning! Frequent inhalation of dust from brake pad surfaces, regardless of the material composition, may pose a health hazard. Do not inhale dust. Do not clean brake surfaces with compressed air or a brush. Use a...
Warning! Frequent inhalation of dust from brake pad surfaces, regardless of the material composition, may pose a health hazard. Do not inhale dust. Do not clean brake surfaces with compressed air or a brush. Use a...

Replacing rear brake pads
1. Secure the pins (A) with a wrench, being careful not to damage the pin dust boots. Remove the bolts (B) from the caliper and remove the caliper (C) from the bracket. 2. Remove the pads (A) and shoes (B). 3. Remove...
1. Secure the pins (A) with a wrench, being careful not to damage the pin dust boots. Remove the bolts (B) from the caliper and remove the caliper (C) from the bracket. 2. Remove the pads (A) and shoes (B). 3. Remove...

Checking the runout of the rear brake disc
1. Raise the rear of the vehicle and support it securely. Remove the rear wheels. 2. Remove the brake pads. 3. Check the disc surface for damage or cracks. Clean the disc thoroughly and remove all rust. 4. Securely fix...
1. Raise the rear of the vehicle and support it securely. Remove the rear wheels. 2. Remove the brake pads. 3. Check the disc surface for damage or cracks. Clean the disc thoroughly and remove all rust. 4. Securely fix...

Checking the thickness and parallelism of the rear wheel brake disc
1. Loosen the rear wheel nuts slightly, then raise the rear of the vehicle and support it securely. Remove the rear wheels. 2. Remove the brake pads. 3. Using a micrometer (A), measure the disc thickness at eight points...
1. Loosen the rear wheel nuts slightly, then raise the rear of the vehicle and support it securely. Remove the rear wheels. 2. Remove the brake pads. 3. Using a micrometer (A), measure the disc thickness at eight points...

Repair of the rear wheel brake caliper
Warning! Frequent inhalation of dust from brake pad surfaces, regardless of the material composition, can pose a health hazard. Do not inhale dust. Do not clean brake surfaces with compressed air or a brush. Use a...
Warning! Frequent inhalation of dust from brake pad surfaces, regardless of the material composition, can pose a health hazard. Do not inhale dust. Do not clean brake surfaces with compressed air or a brush. Use a...


Checking the parking brake drum and shoes
Warning! Frequent inhalation of dust from brake pad surfaces, regardless of the material composition, can pose a health hazard. Do not inhale dust. Do not clean brake surfaces with compressed air or a brush. Use a...
Warning! Frequent inhalation of dust from brake pad surfaces, regardless of the material composition, can pose a health hazard. Do not inhale dust. Do not clean brake surfaces with compressed air or a brush. Use a...

Replacing the parking brake pads — disassembly
Warning! Frequent inhalation of dust from brake pad surfaces, regardless of the material composition, can pose a health hazard. Do not inhale dust. Do not clean brake surfaces with compressed air or a brush. Use a...
Warning! Frequent inhalation of dust from brake pad surfaces, regardless of the material composition, can pose a health hazard. Do not inhale dust. Do not clean brake surfaces with compressed air or a brush. Use a...
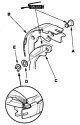
Replacing the parking brake pads — assembly
1. Apply Molykote 44 MA grease to the sliding surface of the axle (A) and insert the axle into the driven brake shoe (B). 2. Install the parking brake lever (C) and wave washer (D) onto the axle and secure with a...
1. Apply Molykote 44 MA grease to the sliding surface of the axle (A) and insert the axle into the driven brake shoe (B). 2. Install the parking brake lever (C) and wave washer (D) onto the axle and secure with a...

Running-in of friction lining surfaces
Note: Perform brake lining break-in when replacing brake pads and/or rear brake disc/drum. Warning. Carry out the burn-in in a safe place. 1. Park your vehicle on a firm, level surface. 2. Make major adjustments to the...
Note: Perform brake lining break-in when replacing brake pads and/or rear brake disc/drum. Warning. Carry out the burn-in in a safe place. 1. Park your vehicle on a firm, level surface. 2. Make major adjustments to the...

Checking brake hoses and pipes
1. Check the brake hoses for damage, wear, leakage, interference or kinking. 2. Check the brake pipes for damage, rust or leakage. Also check if the tubes are bent. 3. Check for leaks at the joints of hoses and tubes or...
1. Check the brake hoses for damage, wear, leakage, interference or kinking. 2. Check the brake pipes for damage, rust or leakage. Also check if the tubes are bent. 3. Check for leaks at the joints of hoses and tubes or...

Replacing brake hoses
Note: Do not spill brake fluid on your car as it may damage the paintwork; if liquid does spill, wash it off immediately with water. To prevent liquid from spilling, cover the hose joints with rags or napkins. Before...
Note: Do not spill brake fluid on your car as it may damage the paintwork; if liquid does spill, wash it off immediately with water. To prevent liquid from spilling, cover the hose joints with rags or napkins. Before...

Replacing the parking brake cable
Note: The parking brake cables must not be bent or deformed. Otherwise, this will lead to harsh operation and premature failure of the cable. When replacing, refer to the exploded view image. 1. Raise the rear of the...
Note: The parking brake cables must not be bent or deformed. Otherwise, this will lead to harsh operation and premature failure of the cable. When replacing, refer to the exploded view image. 1. Raise the rear of the...


General ABS Troubleshooting Information
ABS indicator If the system is normal, the ABS indicator goes out 2 seconds after the ignition key is turned to the ON (II) position without starting the engine, then comes on again and goes out 2 seconds after the...
ABS indicator If the system is normal, the ABS indicator goes out 2 seconds after the ignition key is turned to the ON (II) position without starting the engine, then comes on again and goes out 2 seconds after the...

ABS control unit
Main Directorate The ABS control unit determines the wheel speed based on the signals received from the wheel sensors, then calculates the vehicle speed based on the wheel speed. The control unit determines the vehicle...
Main Directorate The ABS control unit determines the wheel speed based on the signals received from the wheel sensors, then calculates the vehicle speed based on the wheel speed. The control unit determines the vehicle...
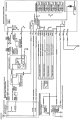

Removal and installation the ABS modulator-control unit
Note: Do not spill brake fluid on your car as it may damage the paintwork; if liquid does spill, wash it off immediately with water. When removing and installing, do not damage or deform the brake pipes. To prevent...
Note: Do not spill brake fluid on your car as it may damage the paintwork; if liquid does spill, wash it off immediately with water. When removing and installing, do not damage or deform the brake pipes. To prevent...

Checking and replacing ABS wheel sensors
Checking wheel sensors 1. Remove the steering knuckles. 2. Clean and check the magnetic sensor. Replace the magnetic sensor if necessary. 3. Measure the air gap between the wheel sensor and the magnetic sensor around...
Checking wheel sensors 1. Remove the steering knuckles. 2. Clean and check the magnetic sensor. Replace the magnetic sensor if necessary. 3. Measure the air gap between the wheel sensor and the magnetic sensor around...
This section is available on: russian, bulgarian, belarusian, ukrainian, serbian, croatian, romanian, polish, slovak, hungarian
Link in different formats to this section
TEXTHTMLBB Code
- General information
- User manual
- Technical data
- Maintenance
- Power unit
- Engine repair
- Lubrication system
- Cooling system
- Exhaust system
- Fuel system
- Engine management
- Engine electrical equipment
- Transmission
- Clutch
- Manual gearbox
- Automatic gearbox
- Rear differential
- Drive shafts
- Chassis and running gear
- Steering
- Front suspension
- Rear suspension
- Brake system
- Body and interior
- Exterior (external elements)
- Interior (internal elements)
- Doors, locks and windows
- General information
- Maintenance
- Tips for car owner
- Power unit
- Engine repair
- Engine overhaul
- Cooling and lubrication system
- Engine electrical equipment
- Control system
- Fuel system
- Transmission
- Clutch and drive shafts
- Car gearbox
- Chassis and running gear
- Front suspension
- Rear suspension
- Steering
- Brake system
- Body and interior
- Body service
- Exterior (external elements)
- Interior (internal elements)
- Electrical equipment
- Equipment and devices
- Electrical circuits