
Interior (internal body elements) of the car Honda CR-V 1

Dashboard and fasteners
Dashboard and fasteners (CR-V): 1, 6. Protective tape; 2, 5. Guide pins.; 3. Dashboard.; 4. Passenger side airbag connector; 7, 9. Connectors; 8.10. Bracket for fastening wires; 11. Relay and fuse box under the...
Dashboard and fasteners (CR-V): 1, 6. Protective tape; 2, 5. Guide pins.; 3. Dashboard.; 4. Passenger side airbag connector; 7, 9. Connectors; 8.10. Bracket for fastening wires; 11. Relay and fuse box under the...

Instrument panel (CR-V models) — removal and installation
1. Disconnect the battery from the ground. 2. Disable the SRS air safety system ( see Chap. 6 ). 3. Remove the following parts and panels: glove box, the lower section of the instrument panel on the driver's side,...
1. Disconnect the battery from the ground. 2. Disable the SRS air safety system ( see Chap. 6 ). 3. Remove the following parts and panels: glove box, the lower section of the instrument panel on the driver's side,...
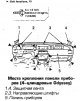
Instrument panel (4-cylinder Odyssey) — removal and installation
1. Disconnect the battery from the ground. 2. Disable the SRS air safety system ( see Chap. 6 ). 3. Remove the following parts and panels: glove box, driver's side knee brace central floor section -. beverage holder in...
1. Disconnect the battery from the ground. 2. Disable the SRS air safety system ( see Chap. 6 ). 3. Remove the following parts and panels: glove box, driver's side knee brace central floor section -. beverage holder in...
Instrument panel (Odyssey V6) — removal and installation
1. Disconnect the battery from the ground. 2. Disable the SRS air safety system ( see Chap. 6 ). 3. Remove the following parts and panels: instrument panel lower cover steering column cover, lower container in the...
1. Disconnect the battery from the ground. 2. Disable the SRS air safety system ( see Chap. 6 ). 3. Remove the following parts and panels: instrument panel lower cover steering column cover, lower container in the...

Dashboard sections, covers and vents (CR-V)
Below is the procedure for removing individual parts of the instrument panel, the need for which arises in connection with the repair (or dismantling) components and assemblies located in the front of the cabin. When...
Below is the procedure for removing individual parts of the instrument panel, the need for which arises in connection with the repair (or dismantling) components and assemblies located in the front of the cabin. When...
Dashboard sections, covers and vents (4-cylinder Odyssey)
Glove box 1. Unscrew the 2 side screws securing the limiters from the inside of the drawer. 2. Loosen the bolts of the drawer curtains and remove the drawer. 3. Remove the drawer bracket and buffer. 4. Installation is...
Glove box 1. Unscrew the 2 side screws securing the limiters from the inside of the drawer. 2. Loosen the bolts of the drawer curtains and remove the drawer. 3. Remove the drawer bracket and buffer. 4. Installation is...
Dashboard sections, covers and vents (6-cylinder Odyssey)
Central container 1. Remove the lower latch pins of the center section trims and remove the trims. 2. Unscrew the 6 screws securing the container, feed the container by the upper part, removing it from the latches. 3....
Central container 1. Remove the lower latch pins of the center section trims and remove the trims. 2. Unscrew the 6 screws securing the container, feed the container by the upper part, removing it from the latches. 3....

Inner door panel — removal and installation
CR-V 1. Turn away the screw of fastening of an overlay of a door handle and remove an overlay. Remove the lock rod mounting bracket, disconnect the lock drive connector and remove the handle (photo). 2. Remove the...
CR-V 1. Turn away the screw of fastening of an overlay of a door handle and remove an overlay. Remove the lock rod mounting bracket, disconnect the lock drive connector and remove the handle (photo). 2. Remove the...
Door locks — removal and installation
CR-V and 4-cylinder Odyssey 1. Remove the inner door panel. 2. Remove the plastic shield. 3. Remove the lock drum switch and the outer handle. 4. Turn away a bolt in a back directing glass. 5. Disconnect the connectors,...
CR-V and 4-cylinder Odyssey 1. Remove the inner door panel. 2. Remove the plastic shield. 3. Remove the lock drum switch and the outer handle. 4. Turn away a bolt in a back directing glass. 5. Disconnect the connectors,...
Drum switch of the lock — removal and installation
CR-V and 4-cylinder Odyssey 1. Remove the inner door panel and plastic screen. 2. Remove the lock switch rod bracket and disconnect the rod. 3. Remove the U-bracket and remove the lock drum switch. 4. On 4-cylinder...
CR-V and 4-cylinder Odyssey 1. Remove the inner door panel and plastic screen. 2. Remove the lock switch rod bracket and disconnect the rod. 3. Remove the U-bracket and remove the lock drum switch. 4. On 4-cylinder...
Rear window / rear cover lock — removal and installation
CR-V 1. Remove the inner panel of the back cover. 2. Disconnect the connector. 3. Mark position of the lock on a cover, turn away bolts and remove the lock. 4. Installation is carried out in the reverse order....
CR-V 1. Remove the inner panel of the back cover. 2. Disconnect the connector. 3. Mark position of the lock on a cover, turn away bolts and remove the lock. 4. Installation is carried out in the reverse order....
Rear door lock — removal and installation
The rear door lock works in conjunction with a latch release that only unlocks the door when the rear window is lowered. Turning the key in the lock unlocks the glass. With the glass up, the door can be opened with a...
The rear door lock works in conjunction with a latch release that only unlocks the door when the rear window is lowered. Turning the key in the lock unlocks the glass. With the glass up, the door can be opened with a...

Glass and window regulator — removal and installation
CR-V and 4-cylinder Odyssey 1. Remove the inner door panel and plastic screen. 2. On the rear door of the 4-cylinder Odyssey, unscrew the bolt and remove the rear glass guide. 3. Raise the glass so that the bolts are...
CR-V and 4-cylinder Odyssey 1. Remove the inner door panel and plastic screen. 2. On the rear door of the 4-cylinder Odyssey, unscrew the bolt and remove the rear glass guide. 3. Raise the glass so that the bolts are...

Power window motor — removal and installation
1. Remove the inner door panel and plastic screen 2. Remove glass of a door. 3. Remove the power window regulator. 4. On CR-V and 4-cylinder Odysseys, before removing the drive, mark the position of the drive gear...
1. Remove the inner door panel and plastic screen 2. Remove glass of a door. 3. Remove the power window regulator. 4. On CR-V and 4-cylinder Odysseys, before removing the drive, mark the position of the drive gear...

Rear-view mirror in the cabin — removal and installation
CR-V 1. Pry up and remove the mirror cover. 2. Remove the rubber buffer from the mirror leg. 3. Turn away screws and remove a mirror. 4. Installation is carried out in the reverse order. 4-cylinder Odyssey 1. On a...
CR-V 1. Pry up and remove the mirror cover. 2. Remove the rubber buffer from the mirror leg. 3. Turn away screws and remove a mirror. 4. Installation is carried out in the reverse order. 4-cylinder Odyssey 1. On a...
Seats — removal and installation
The seat is removed and installed by two people. Front seat 1. On CR-V and 4-cylinder Odysseys, move the seat forward, remove the side covers and bolt caps, remove the bolts. 2. On 6-cylinder Odysseys, remove the seat...
The seat is removed and installed by two people. Front seat 1. On CR-V and 4-cylinder Odysseys, move the seat forward, remove the side covers and bolt caps, remove the bolts. 2. On 6-cylinder Odysseys, remove the seat...
Seat drive motor — removal and installation
1. Disconnect the battery from the ground. 2. Remove the seat. 3. Disconnect from the electric motor a socket, turn away bolts of fastening and remove the electric motor. 4. Installation is carried out in the reverse...
1. Disconnect the battery from the ground. 2. Remove the seat. 3. Disconnect from the electric motor a socket, turn away bolts of fastening and remove the electric motor. 4. Installation is carried out in the reverse...
Tightening torques for threaded connections
Tightening torques for threaded connections (Nm) Antenna nut 4-5 Bolts of fastening of a clamp of a door (tailgate or tailgate) 18 Door hinge bolts 29 Latch mounting bolts 6 Limiter lever mounting bolts 10 Bolt of...
Tightening torques for threaded connections (Nm) Antenna nut 4-5 Bolts of fastening of a clamp of a door (tailgate or tailgate) 18 Door hinge bolts 29 Latch mounting bolts 6 Limiter lever mounting bolts 10 Bolt of...
This section is available on: russian, bulgarian, belarusian, ukrainian, serbian, croatian, romanian, polish, slovak, hungarian
Link in different formats to this section
TEXTHTMLBB Code
- General information
- Maintenance
- Tips for car owner
- Power unit
- Engine repair
- Engine overhaul
- Cooling and lubrication system
- Engine electrical equipment
- Control system
- Fuel system
- Transmission
- Clutch and drive shafts
- Car gearbox
- Chassis and running gear
- Front suspension
- Rear suspension
- Steering
- Brake system
- Body and interior
- Body service
- Exterior (external elements)
- Interior (internal elements)
- Electrical equipment
- Equipment and devices
- Electrical circuits
HondaBook.ru © 2018–2024 • Mobile version • Sitemap: EN BG BY UA RS HR RO PL SK HU • Feedback • Driver Information • Search system • Bookmark
Accord 3 (1985-1989) • Accord 6 (1997-2002) • Civic 3 and 4 (1983-1991) • Civic 5 and 6 (1991-2000) • Civic 6 (1995-2000) • Civic 8 (2005-2011) • Fit 1 (2001-2008) • CR-V 1 (1995-2001) • HR-V 1 (1998-2006) • Avancier 1 (1999-2003) •
Accord 3 (1985-1989) • Accord 6 (1997-2002) • Civic 3 and 4 (1983-1991) • Civic 5 and 6 (1991-2000) • Civic 6 (1995-2000) • Civic 8 (2005-2011) • Fit 1 (2001-2008) • CR-V 1 (1995-2001) • HR-V 1 (1998-2006) • Avancier 1 (1999-2003) •