
Note:
- When replacing the primary, secondary piston or master cylinder body, check and adjust the push rod clearance before installing the master cylinder.
- Clean all components in brake fluid and dry in open air; blow out all channels with compressed air.
- Before assembly, make sure that the components are free of dust and other foreign particles.
- Replace parts with new ones when instructed to do so.
- Use only Genuine Honda brake fluid DOT3. Use of other fluids may cause corrosion and reduce the life of the brake system.
- Do not mix brake fluid of different brands, as they may be incompatible.
- Replace the master cylinder if its walls are damaged or worn. Do not attempt to hone or regrind the cylinder walls.
- Apply clean brake fluid to the piston seals, grease nipple and master cylinder walls.
- Use the recommended grades of lubricants included with the master cylinder seal kit.
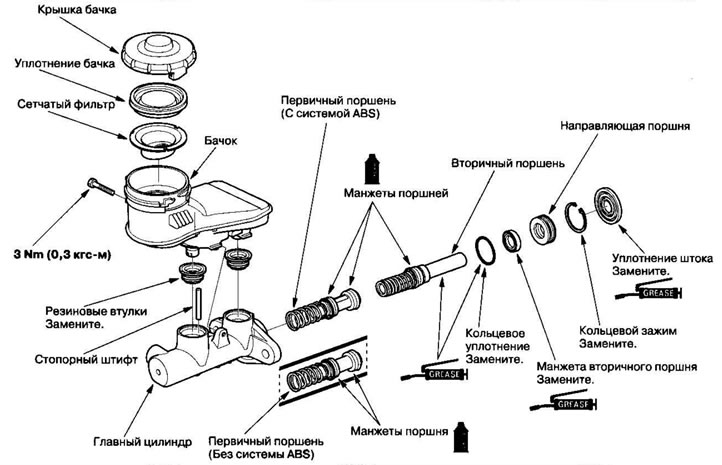
1. Install the reservoir seal into the groove in the reservoir lid.
2. Install the mesh filter, assembled tank lid and new rubber grommets onto the tank.
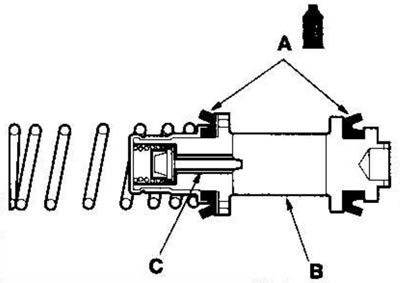
3. Apply clean brake fluid to the seals (A) of the new primary piston (B), then insert the primary piston into the master cylinder.
Note: On vehicles with ABS, ensure that the valve stem (C) moves smoothly by pressing it slightly into the groove on the valve. Install the valve so that the groove on the valve aligns with the hole for the locking pin in the master cylinder.
With ABS system
Without ABS system
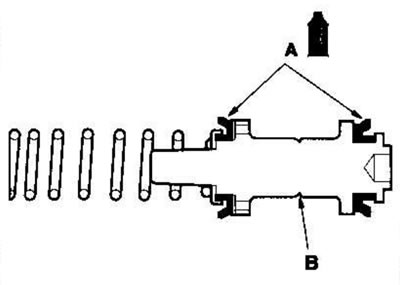
4. Apply clean brake fluid to the seal (A) of the new secondary piston (B).
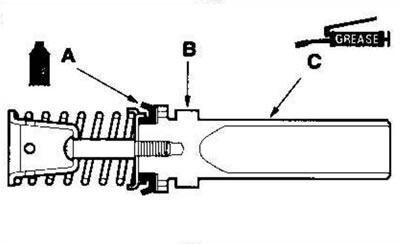
5. Apply the recommended rubber lubricant supplied with the master cylinder seal kit to the piston surface (C), then insert the secondary piston into the master cylinder.
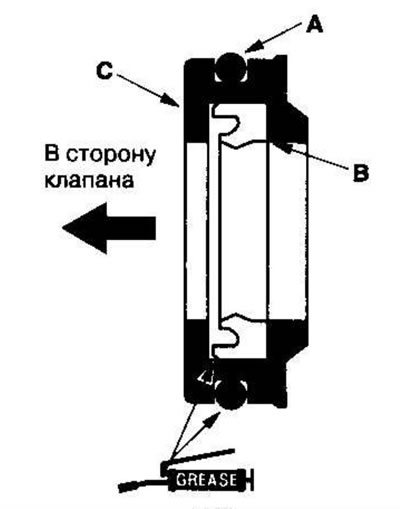
6. Apply the recommended seal lubricant supplied with the master cylinder seal kit to the new O-ring (A) and secondary piston boot (B) in the new piston guide (C), then install the piston guide into the master cylinder. Observe the installation direction.
7. On vehicles with ABS, align the groove on the primary valve with the hole for the locking pin (A), recess the secondary valve (B) and insert the locking pin (C).
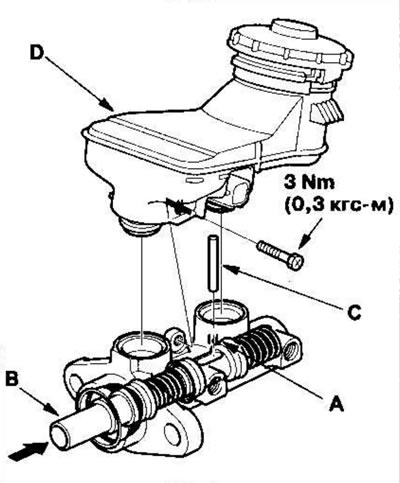
8. Install the reservoir (D) onto the master cylinder.
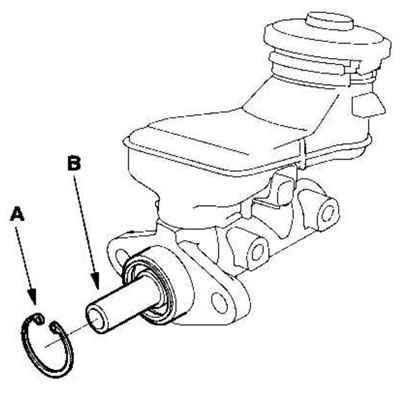
9. Install the new ring clamp (A) by pressing the secondary piston (B), being careful not to scratch or damage the piston surface with the edges of the ring clamp.
10. Adjust the clearance of the push rod.
11. Apply the recommended seal lubricant supplied in the master cylinder seal kit to the new rod seal and install the seal into the master cylinder.